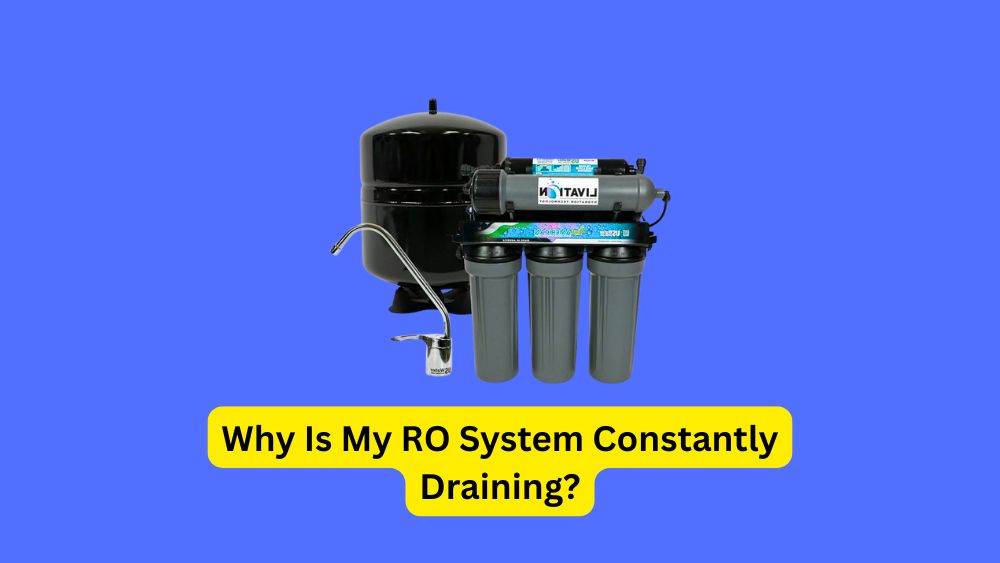
Have you noticed your RO system draining water nonstop and wondered why? While it’s normal for some water to be flushed away during filtration, constant draining means something isn’t right.
If your system keeps wasting water, it could lead to higher bills and less clean water for your home. Understanding why your RO system keeps draining can save you time, money, and frustration. Let’s dive into the common reasons behind this issue and how you can fix it.
Understanding Normal RO System Drainage
Grasping how a reverse osmosis (RO) system manages water flow is essential to identifying whether it is operating correctly. These systems are designed to purify drinking water by separating contaminants, but they naturally produce some wastewater during this process. The drain line serves as the pathway for this rejected water, carrying away the impurities removed from the feed water. Continuous drainage beyond the expected amount often points to a malfunction within the system.
The Purpose Of The Drain Line
The drain line plays a crucial role in the overall function of your reverse osmosis system. It serves as the pathway for disposing of the water that contains impurities and contaminants filtered out during the purification process. Without this outlet, the system wouldn’t be able to flush away unwanted substances, ultimately compromising its performance. Continuous draining, however, indicates that there might be an issue within the unit that requires attention.
Typical Drainage Cycles During And After Use
Understanding the standard operation of drainage in an RO system is essential for identifying any irregularities. During normal use, the system allows water to flow out intermittently as part of the purification cycle, stopping once the storage tank has reached its capacity. This cycling ensures a proper ratio between purified water and the wastewater generated. Continuous drainage, on the other hand, indicates the system might be caught in an endless draining phase.
Common Reasons For Continuous RO System Drainage
Several typical issues can lead to an RO system running nonstop and draining water excessively. Understanding these frequent causes can help pinpoint the problem and restore your system’s normal operation.
Faulty Drain Saddle Valve
The drain saddle valve plays a vital role in linking your reverse osmosis system to the household drain, ensuring proper disposal of wastewater. When this valve malfunctions, it may remain open, allowing water to flow endlessly into the drain line. Despite its small size, this component is essential for stopping unwanted water drainage and restoring your system’s normal operation.
Defective Check Valve
The check valve plays a crucial role in your RO system by ensuring water moves in only one direction—away from the membrane and into the storage tank. When this valve malfunctions, it allows water to flow backward, leading to continuous drainage and constant water flow noises. A damaged or worn-out check valve is often the main reason behind persistent draining problems in reverse osmosis units.
Malfunctioning Auto Shut-off Valve (ASO Valve)
The Auto Shut-Off (ASO) valve plays a crucial role in managing the water flow within your reverse osmosis system. Its primary function is to halt water movement once the storage tank reaches capacity. When this valve malfunctions, water continues to drain endlessly, regardless of how full the tank is. Persistent sounds of water running, even after the tank should be filled, often point to a faulty ASO valve as the root cause.
Issues With The Faucet Or Air Gap
Problems related to the faucet or air gap often contribute to persistent draining in RO systems. The air gap acts as a safeguard, preventing contaminated water from flowing backward into the purification unit. Should this component become obstructed or sustain damage, it may result in the system continuously discharging water. Inspecting the faucet and air gap for debris, cracks, or malfunctions is essential to resolve ongoing drainage issues.
Blockages Or Restrictions In The Drain Line
Drain line blockages or narrowings often cause persistent drainage problems in RO systems. Obstructions can prevent water from moving freely, resulting in continuous draining or improper functioning of the system. Careful examination of the drain tubing can often pinpoint the problem and lead to a straightforward fix.
Diagnosing The Cause Of Constant Drainage
Understanding why your RO system is continuously draining requires a systematic approach. Pinpointing the root issue involves careful examination and testing to identify any irregularities affecting its performance.
Start by inspecting all connections and fittings for leaks or loose components that could cause excessive water flow. Next, evaluate the flow restrictor and check if it’s clogged or damaged, as this can disrupt the balance of water pressure within the system. Examine the membrane for signs of wear or fouling, which might lead to constant drainage due to reduced filtering efficiency. Also, verify the functioning of the automatic shut-off valve; if it fails to close properly, water will continue to drain unnecessarily. Step-by-step troubleshooting like this helps isolate the problem, enabling you to address the specific cause and restore your RO system’s normal operation.
Visually Inspecting The Drain Line And Connections
Examining the drain line and its fittings is a crucial step in pinpointing the cause of continuous water discharge from your RO system. Careful observation can reveal subtle issues that might disrupt proper drainage.
Begin by closely inspecting the drain tubing for any signs of damage or wear. Check each connection point to confirm they are securely fastened and free from leaks. Even minor bends or obstructions within the line can impede water flow and lead to persistent draining problems.
Listening For Continuous Water Flow
Detecting the constant sound of water running inside your reverse osmosis system can serve as an early warning sign of underlying issues. This persistent noise often points to problems with components such as the automatic shut-off (ASO) valve, check valve, or other critical parts that may not be functioning correctly.
Checking The Aso Valve Functionality
Ensuring the Automatic Shut-Off (ASO) valve is operating correctly is vital for the efficient functioning of your reverse osmosis system. This valve is designed to halt the water supply once the storage tank reaches capacity, preventing continuous drainage and water wastage.
To verify the ASO valve’s performance, first power down the RO system. Observe whether the water flow ceases when the tank is full. A malfunctioning valve will allow water to keep flowing, causing constant drainage and an audible running sound. Inspecting this component can help identify if it needs cleaning, adjustment, or replacement to restore proper system operation.
Examining The Faucet And Air Gap (if Applicable)
Assessing the condition of the faucet and any connected air gap is a vital step in diagnosing drainage issues with your RO system. These components play a crucial role in maintaining proper water flow and preventing backflow, so ensuring they function correctly can help resolve persistent draining problems.
Inspect the faucet and air gap assembly for blockages or physical wear that might hinder their operation. Debris accumulation or cracks can disrupt the system’s balance, causing continuous water discharge. Performing a thorough cleaning or replacing faulty parts often restores normal performance and stops unwanted draining.
Troubleshooting And Fixing The Drainage Issue
Addressing persistent drainage problems in your RO system requires a clear plan of action. Understanding the root cause is just the beginning; resolving it involves a series of targeted steps that restore your system’s efficiency. Let’s explore a straightforward approach to diagnosing and correcting the drainage issue effectively.
How To Check And Replace The Drain Saddle Valve
Inspecting and replacing the drain saddle valve is an essential step in resolving issues with your RO system’s constant drainage. Ensuring this component is properly installed and operational can prevent unnecessary water waste and maintain system efficiency.
Begin by examining the drain saddle valve to confirm it is firmly clamped onto the drain pipe and shows no signs of wear or leaks. Should the valve appear cracked, loose, or fail to regulate water flow correctly, a replacement is necessary. Shut off the water supply before loosening the existing valve. Carefully remove the old valve and position a new drain saddle valve onto the pipe, tightening it securely to avoid leaks. This simple maintenance task often restores proper function and stops continuous draining.
Testing And Replacing The Check Valve
Ensuring the check valve functions properly is essential to stop your RO system from continuously draining. This component prevents water from flowing backward, which can lead to unnecessary waste and system inefficiency. Testing the valve’s performance helps identify if it’s the root cause of the problem.
To evaluate the check valve, observe whether water is returning into the system instead of moving forward. Presence of reverse flow indicates the valve is compromised. In such cases, removing the faulty valve and installing a new one is necessary to restore proper operation and avoid ongoing water loss.
How To Troubleshoot And Replace The Aso Valve
Identifying issues with the Automatic Shut-Off (ASO) valve is a key step in resolving persistent water drainage problems in your reverse osmosis system. Understanding how to test and replace this component can restore your system’s efficiency and prevent unnecessary water waste.
Start by observing whether the ASO valve halts water flow once the storage tank reaches full capacity. A malfunctioning valve may allow continuous water flow, leading to constant draining. To address this, gently remove the valve and inspect it for any debris or buildup that might be obstructing its operation. Cleaning the valve thoroughly can sometimes restore its function. If cleaning doesn’t help, swapping out the faulty valve with a new one is a straightforward fix that often brings the system back to proper working order.
Clearing Blockages In The Drain Line
Blockages within the drain line often lead to persistent draining problems in RO systems. To tackle this, detach the drain line and inspect it thoroughly for any clogs or bends that might be restricting water flow. Remove any accumulated particles or buildup to ensure the pathway is completely clear. This straightforward maintenance step can effectively bring your RO system back to proper operation.
Addressing Faucet And Air Gap Problems
Faucet and air gap issues are common causes of continuous water drainage in reverse osmosis systems. Ensuring these components are free from blockages is essential for proper operation. Routine maintenance can prevent such problems from escalating.
Begin by thoroughly cleaning the faucet and air gap to eliminate any debris or buildup that might be obstructing water flow. Persistent drainage problems may indicate that the faucet or air gap parts have worn out and require full replacement. Restoring these elements to good working condition should halt the nonstop draining and improve system performance.
When To Call A Professional For Ro System Repair
Recognizing the right moment to seek professional assistance can save both time and prevent further damage to your reverse osmosis system. Certain signs indicate that expert help is necessary to properly diagnose and resolve persistent issues.
When troubleshooting efforts fail to resolve the draining problem or the issue reoccurs frequently, it’s a clear indication that specialized skills are required. Complex repairs or internal component faults often demand the knowledge and tools that only a trained technician can provide, ensuring your RO system returns to optimal function without unnecessary guesswork.
If You’re Uncomfortable With Diy Repairs
Feeling unsure about tackling repairs on your reverse osmosis system is completely normal. Handling complex components without the right expertise can sometimes lead to bigger issues. In such cases, seeking expert assistance ensures your system stays in top shape without unnecessary risks.
Attempting to fix your RO system without sufficient knowledge might result in unintended damage. It’s wise to reach out to a certified technician who can accurately diagnose and resolve the problem. Professional help not only safeguards your equipment but also saves time and stress, especially when the issue involves intricate parts or precise adjustments.
If The Issue Persists After Troubleshooting
When basic fixes fail to resolve the constant draining of your RO system, it often signals a deeper problem that requires expert intervention. Complex issues may not be easily identifiable without specialized equipment and experience.
At this stage, consulting a qualified technician is the best course of action. Professionals possess the diagnostic tools and technical skills necessary to pinpoint the root cause and implement a lasting solution, ensuring your RO system operates efficiently once again.
Conclusion: Resolving Continuous Ro System Drainage
Dealing with an RO system that won’t stop draining can be a hassle, but identifying the root cause often leads to a straightforward fix. Whether it involves swapping out a malfunctioning valve or unclogging the drain tubing, regular upkeep is key to keeping your reverse osmosis system operating efficiently. By applying these troubleshooting tips, you can minimize water waste and continue enjoying clean, purified water with ease.
Frequently Asked Questions
Why Does My Ro System Drain Continuously?
Continuous draining often indicates a faulty check valve or a clogged drain line. These issues cause water to flow out without stopping, wasting water and reducing efficiency.
How To Stop My Ro System From Constant Draining?
Inspect the check valve and drain line for blockages or damage. Replace faulty parts promptly to restore normal operation and prevent water waste.
Can Low Water Pressure Cause Ro System Drainage?
Yes, low water pressure can trigger constant draining as the system struggles to maintain pressure. Ensure your water supply meets the system’s pressure requirements.
Does A Full Storage Tank Affect Ro Draining?
A full or leaking storage tank can cause the system to drain continuously. Check for leaks and ensure the tank is correctly pressurized.
Conclusion
A draining RO system can waste water and increase bills. Check the valve and filter for blockages or damage. A worn-out membrane may also cause constant draining. Regular maintenance helps keep the system working well. Small fixes can stop water waste quickly.
Don’t ignore strange noises or leaks. Act early to avoid bigger problems later. Clean parts and replace old components as needed. Your RO system should save water, not drain it. Keep it healthy for clean, fresh water every day.

Hasan Al Sarker is a Reverse Osmosis Specialist. He has worked for many years to ensure safe drinking water for all. His research paper has been published in several journals, including Issue, Medium, and Slideshare. He is recognized as a water doctor among specialists though he did not attend medical college.
Besides working as a researcher of reverse osmosis technology, he is also very fancy with the kitchen and cooking. His guides are reading thousands of people every day. As a head of content, he is responsible for all the published articles at RO System Reviews.