Are you ready to enjoy fresh, clean water right from your tap? Installing a Zero Water filter is easier than you might think, and it can make a big difference in your daily hydration.
Whether you want to improve the taste of your water or reduce harmful contaminants, this guide will walk you through every step. By the end, you’ll have your Zero Water filter set up quickly and correctly—so you can start drinking better water immediately.
Let’s dive in and get your filter ready!
Choosing The Right Zero Water Filter
Choosing the right Zero Water filter is important for clean and fresh water. This guide helps you pick the best model for your needs. Knowing the options and what to consider makes the choice simple and smart.
Different Models Available
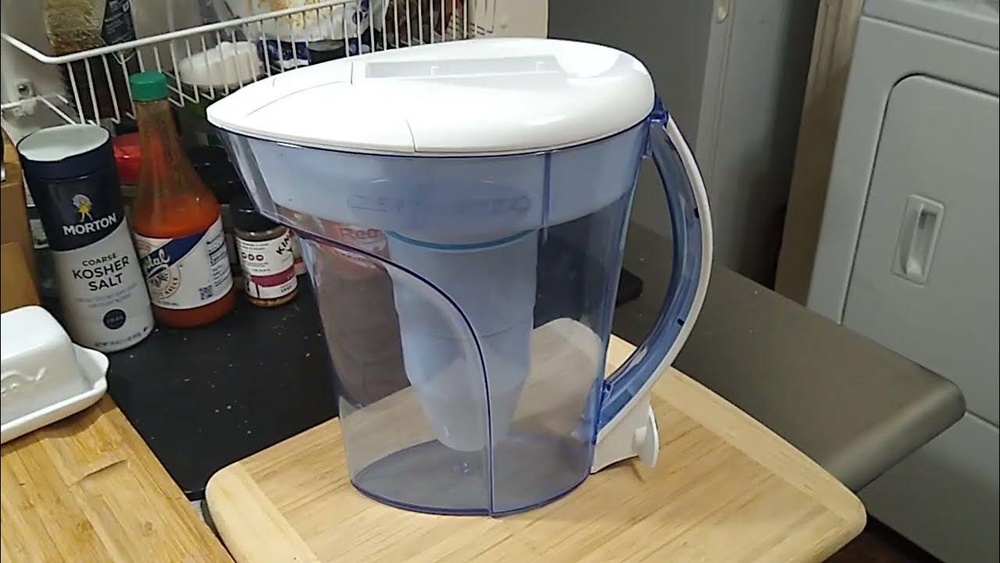
Zero Water offers several filter models. Each fits different water needs and container sizes. Some filters work for pitchers, others for dispensers or bottles. Pitcher filters are good for small families. Dispenser filters suit larger households or offices. Bottle filters are best for on-the-go use. Each model removes 99.6% of dissolved solids for pure water.
Factors To Consider Before Purchase
Think about water usage before buying a filter. How much water do you drink daily? Consider the filter’s capacity and lifespan. Check how often you must replace the filter. Replacement frequency affects cost and convenience. Also, consider the water source. Some filters work better with hard or soft water. Size and design matter too. Choose a model that fits your kitchen space. Easy-to-use filters save time and effort.

Preparing For Installation
Preparing for the installation of your Zero Water Filter is the first step to ensure clean drinking water. Proper preparation saves time and avoids mistakes during the setup. It helps the filter work better and last longer.
Gathering Necessary Tools
Start by collecting all tools needed for installation. Most Zero Water Filters require no special tools. Usually, you only need a clean cloth and access to running water. Check the filter package for any extra items. Having everything ready prevents interruptions.
Cleaning The Filter Components
Clean all parts before assembling the filter. Rinse the filter pitcher and lid with warm water. Avoid using soap or detergents on the filter itself. Wipe the outside surfaces with a damp cloth. Clean parts reduce the risk of contamination and improve water taste.
Step-by-step Installation Guide
Installing a Zero Water filter is simple. Follow these steps for a smooth setup. This guide helps ensure clean water quickly.
Removing The Old Filter
First, remove the pitcher lid. Then, take out the old filter from the reservoir. Dispose of the old filter properly. Rinse the reservoir with clean water to clear any residue.
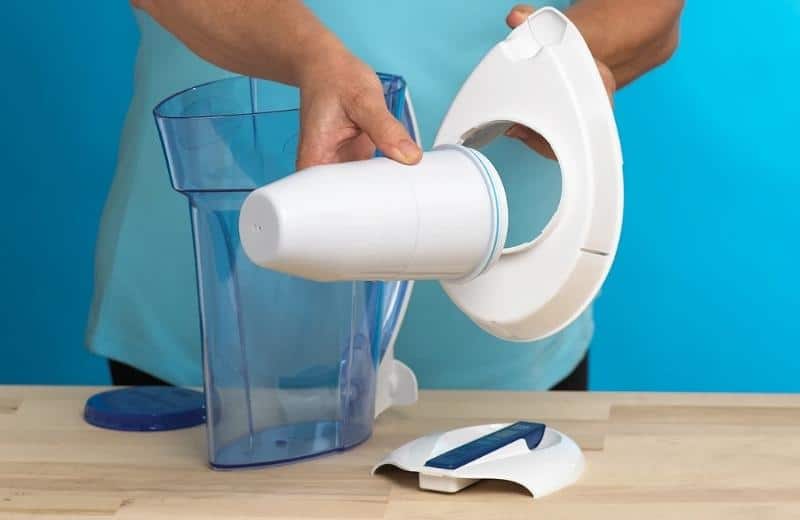
Installing The New Zero Water Filter
Take the new filter out of its packaging. Soak it in cold water for 10 to 15 minutes. This step helps activate the filter. Insert the wet filter into the reservoir. Push it down gently but firmly until it fits snugly.
Securing And Testing The Installation
Place the reservoir back into the pitcher. Put the lid on securely. Pour cold tap water slowly into the reservoir. Wait as the water filters through. Check for any leaks or loose parts. The water should taste fresh and clean.
Maintaining Your Zero Water Filter
Maintaining your Zero Water Filter is key for clean, fresh water. Proper care helps the filter work well and last longer. Simple steps keep your water tasting great and safe to drink.
Regular maintenance saves money and avoids problems. Follow these easy tips to keep your Zero Water Filter in top shape.
Cleaning Tips
Clean the pitcher and reservoir every week. Use warm, soapy water for best results. Avoid harsh chemicals that can damage the filter.
Rinse all parts well to remove soap. Dry with a clean cloth before reassembling. This prevents mold and keeps water fresh.
Wipe the lid and spout daily. This stops dirt and germs from building up. Clean hands help too.
Filter Replacement Schedule
Replace the filter after it reaches its limit. Usually, this is about 40 gallons or two months. The TDS meter on the lid shows when to change it.
Do not wait too long to replace the filter. Old filters lose their ability to remove contaminants. This affects water quality and taste.
Keep extra filters on hand for quick replacement. Changing filters on time ensures safe, clean water every day.
Troubleshooting Common Issues
Troubleshooting common issues with your Zero Water Filter helps keep it working well. Some problems are easy to fix. This guide covers the most frequent issues. It helps you enjoy clean water without stress.
Low Water Flow
Low water flow is a common complaint. It can happen if the filter clogs. Check the filter for dirt or debris. Rinse the filter under cold water to clear it.
Make sure the filter is installed correctly. A loose fit can reduce flow. Tighten the filter by turning it clockwise until snug. Avoid over-tightening to prevent damage.
Water pressure in your home also affects flow. Low pressure means slower water through the filter. Try using the filter in another faucet to test pressure.
Filter Life Indicator Problems
The filter life indicator may not work right sometimes. It might show the wrong status or not change at all. This can happen if the indicator is dirty. Wipe it gently with a soft cloth.
Reset the indicator by following the product instructions. Usually, pressing a button or twisting the indicator helps. If it still does not work, the sensor may be faulty.
Using tap water instead of filtered water near the sensor can confuse it. Keep the area clean and dry. Contact customer support if problems continue.
Frequently Asked Questions
How Do I Start Installing A Zero Water Filter?
Begin by rinsing the filter with cold water. Then, assemble the filter components. Place the filter into the pitcher and fill it with tap water.
How Often Should I Replace The Zero Water Filter?
Replace the filter every 2 to 3 months. Change it sooner if the water tastes off or flow slows down.
Can I Use Zero Water Filter With Any Pitcher?
No, Zero Water Filters are designed specifically for Zero Water pitchers. Using other pitchers may cause leaks or poor filtration.
How To Test If My Zero Water Filter Works?
Use the TDS meter included with your pitcher. Test water before and after filtering. Lower TDS indicates effective filtration.
Conclusion
Installing a Zero Water filter is simple and quick. Follow each step carefully for best results. Clean water means better health and taste at home. Change the filter regularly to keep water pure. Enjoy fresh, clear water every day without hassle.
This guide helps you get started easily. Now, you can trust your water quality. Stay hydrated with confidence and ease.

Hasan Al Sarker is a Reverse Osmosis Specialist. He has worked for many years to ensure safe drinking water for all. His research paper has been published in several journals, including Issue, Medium, and Slideshare. He is recognized as a water doctor among specialists though he did not attend medical college.
Besides working as a researcher of reverse osmosis technology, he is also very fancy with the kitchen and cooking. His guides are reading thousands of people every day. As a head of content, he is responsible for all the published articles at RO System Reviews.