If you love your Keurig coffee, you know that clean, fresh water makes all the difference in every cup. But did you know that changing your Keurig’s water filter regularly can keep your coffee tasting its best and protect your machine?
Don’t worry—it’s easier than you think. In this guide, you’ll learn exactly how to change the water filter quickly and correctly, so your Keurig stays in top shape and your coffee stays delicious. Keep reading to make sure you never miss this simple step that can transform your daily brew.

Keurig Water Filter Basics
Understanding the basics of Keurig water filters helps keep your coffee fresh. These filters reduce chlorine taste and odor in your water. Clean water improves the flavor of every cup. Replacing the filter regularly ensures consistent coffee quality and machine performance.
Keurig water filters fit inside the water reservoir. They trap impurities and sediments. Each filter lasts about two months or 60 tank refills. Changing the filter on time protects your machine from buildup and damage.
Why Change The Filter
Old filters lose their ability to clean water. This leads to bad-tasting coffee. Buildup in the machine can cause clogs or damage. Changing the filter improves water flow and taste. It also extends the life of your Keurig.
Signs You Need A New Filter
Coffee tastes bitter or off. Water takes longer to fill the reservoir. You see sediment or cloudiness in the water. The filter is past two months of use. These signs mean it is time for a new filter.
Filter Types Compatible With Keurig
Keurig uses a specific water filter type. Official Keurig charcoal filters fit most models. Some third-party filters also work well. Check your Keurig model before buying filters. Using the right filter ensures proper fit and function.

Preparing For Filter Replacement
Preparing for a water filter change in your Keurig is simple but important. Taking a few steps before starting makes the process smooth. It helps you avoid mistakes and keeps your machine safe.
Follow these steps to get ready. Each step is easy and clear.
Gathering Necessary Supplies
First, find the new water filter cartridge. You also need clean water to soak the filter. A clean cloth or paper towel will help clean the reservoir. Keep these items close to your Keurig before you start.
Turning Off And Unplugging The Machine
Always turn off your Keurig before changing the filter. Unplug it from the power outlet to avoid accidents. This step keeps you safe and protects the machine from damage.
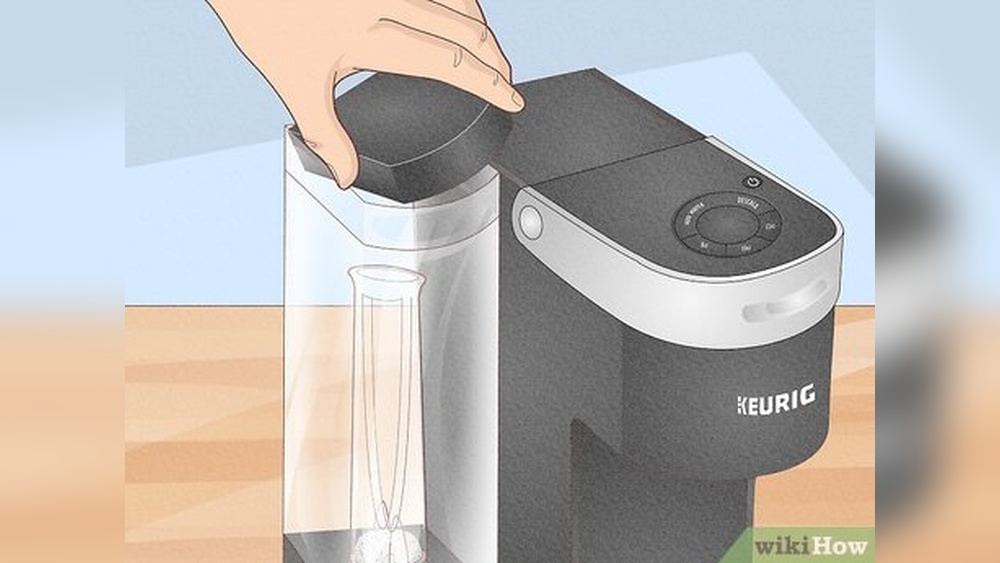
Removing The Water Reservoir
Gently lift the water reservoir from the Keurig base. Pour out any remaining water into the sink. Use a cloth to dry the inside of the reservoir. This makes filter replacement easier and cleaner.
Removing The Old Filter
Removing the old water filter from your Keurig is the first step to keep your coffee fresh. It helps your machine work better and makes your drinks taste clean. Follow these simple steps to take out the used filter safely and prepare for a new one.
Locating The Filter Holder
Open the water reservoir lid on your Keurig. Look inside the reservoir for a small, round holder. This holder keeps the water filter in place. It usually sits at the bottom or along the side of the tank. Spotting it is easy once you know where to look.
Taking Out The Used Filter
Grip the filter holder firmly with your fingers. Pull it straight up and out of the reservoir. The old filter will be inside the holder. Remove the filter from the holder and discard it. Be gentle to avoid spilling any trapped water.
Cleaning The Filter Compartment
Use a clean cloth or sponge to wipe the inside of the holder. Remove any dirt or buildup that might block water flow. Rinse the holder with fresh water to clear any debris. Let it dry before placing the new filter inside.
Installing The New Filter
Installing the new water filter in your Keurig is a simple task. It keeps your coffee tasting fresh and clean. Follow these easy steps to set up the new filter correctly. This ensures your machine works well and lasts longer.
Soaking The New Filter
Start by soaking the new filter in cold water. Let it sit for about 5 minutes. This removes any loose carbon dust. Soaking also helps the filter activate properly. After soaking, gently squeeze the filter to remove air bubbles.
Inserting The Filter Properly
Next, place the filter into the filter holder. Make sure it fits snugly without forcing it. The filter should sit flat and not move around. Proper placement stops water from bypassing the filter. This step is important for clean water flow.
Reattaching The Water Reservoir
Finally, attach the water reservoir back to the machine. Push it firmly until you hear a click. This ensures the reservoir is secure and sealed. Check for any gaps to prevent leaks. Your Keurig is now ready to brew fresh coffee.
Resetting The Filter Indicator
Resetting the filter indicator on your Keurig is important after changing the water filter. This step helps the machine know you installed a new filter. Without resetting, the alert may keep showing. It also ensures the best water quality for every brew.
Resetting the indicator is simple and quick. You do it through the machine settings. This guide will walk you through the process step-by-step.
Accessing The Machine Settings
Start by turning on your Keurig. Make sure it is ready to use. Find the menu button on the control panel. Press it to open the settings menu. Use the arrows or touch screen to navigate. Look for the “Water Filter” or “Filter Settings” option. Select it to continue.
Steps To Reset The Filter Alert
After entering the filter settings, find the reset option. It may say “Reset Filter,” “Replace Filter,” or “Filter Indicator Reset.” Choose this option. Confirm your choice if the machine asks. Wait for the indicator to clear. The filter alert light will turn off. Your Keurig is now ready to track the new filter use.
Maintaining Your Keurig Filter
Maintaining your Keurig filter is important for fresh-tasting coffee. Clean water helps keep your machine in good shape. A well-maintained filter stops dirt and minerals from building up inside. This protects your Keurig and makes every cup better.
Recommended Filter Change Frequency
Change the water filter every two months. This keeps the filter working well. If you use your Keurig a lot, change it more often. A fresh filter removes more impurities. This helps your coffee taste clean and pure.
Tips For Prolonging Filter Life
Rinse the filter under cold water before each use. This clears loose dirt and dust. Store extra filters in a cool, dry place. Avoid touching the filter’s surface with dirty hands. Use filtered or bottled water to reduce buildup. Clean your Keurig regularly to keep the filter safe.
Troubleshooting Filter Issues
Troubleshooting filter issues in your Keurig helps keep your coffee fresh. Problems with the filter can stop your machine from working well. Fixing these issues fast saves time and frustration. This guide covers common filter problems and easy fixes.
Filter Not Fitting Correctly
Check the filter size first. Some filters may be too big or small for your Keurig model. Remove the filter holder and clean it well. Dirt or old filter pieces can block the fit. Press the filter gently into the holder until it clicks. Do not force it in. If it still does not fit, try a new filter made for your model.
Water Flow Problems After Replacement
Slow or no water flow happens after changing the filter sometimes. Air bubbles can block water from flowing freely. Run a few water-only brew cycles without a pod. This clears air and primes the filter. Make sure the filter is wet before installing. Dry filters can slow water flow. Clean the needle and water line if flow stays low.
What To Do If The Filter Alert Doesn’t Reset
The filter alert may stay on after replacement. Press and hold the “30-second reset” button on your Keurig. Hold it until the light turns off. Unplug the machine for a minute and plug it back in. This resets the system. Check your user manual for model-specific reset steps. The alert should turn off after reset.

Frequently Asked Questions
How Often Should I Change Keurig Water Filter?
Change your Keurig water filter every 2 months or after brewing 60 tank refills. This keeps water fresh and prevents clogging.
What Tools Do I Need To Replace Keurig Filter?
You only need a new Keurig water filter and a clean water reservoir. No extra tools are required.
How Do I Remove Old Water Filter From Keurig?
Lift the water reservoir, open the filter holder, and gently pull out the old filter. Dispose of it properly.
Can I Use Any Water Filter In Keurig?
Use only official Keurig water filters or compatible ones designed for your model. Other filters may not fit or work properly.
Conclusion
Changing the water filter in your Keurig keeps coffee tasting fresh. Clean water helps your machine work well longer. The process is simple and quick. Just follow the steps carefully each time. Regular filter changes stop buildup and improve flavor.
Your coffee will taste better every day. Take a few minutes to maintain your Keurig. It makes a big difference in the long run. Enjoy great coffee with clean water, always.

Hasan Al Sarker is a Reverse Osmosis Specialist. He has worked for many years to ensure safe drinking water for all. His research paper has been published in several journals, including Issue, Medium, and Slideshare. He is recognized as a water doctor among specialists though he did not attend medical college.
Besides working as a researcher of reverse osmosis technology, he is also very fancy with the kitchen and cooking. His guides are reading thousands of people every day. As a head of content, he is responsible for all the published articles at RO System Reviews.