Are you sure your whole house water filter is working its best? Knowing how often to change your filter can save you from costly repairs and keep your water clean and safe.
If you don’t replace it at the right time, you could be letting harmful particles slip through or wasting money on a filter that’s still good. You’ll discover the simple signs to watch for, the ideal schedule to follow, and tips to make the process easy.
Keep reading to protect your home and enjoy fresh, pure water every day.
Signs To Replace Your Water Filter
Knowing the signs to replace your whole house water filter helps keep water clean. A filter that is old or clogged stops working well. This can affect your water quality and home appliances. Watch for clear signals to change your filter soon. This keeps water safe and fresh for your family.
Changes In Water Taste And Smell
Water that tastes strange or smells bad can mean the filter is worn out. Filters remove bad tastes and odors from water. When the filter gets old, these problems return. Drinking water may taste metallic, musty, or just off. Notice any new or strong smells in your water.
Reduced Water Pressure
A drop in water pressure signals a clogged filter. As filters trap dirt and particles, they can block water flow. You may feel weaker water from taps and showers. This happens because the filter is full and needs changing. Check pressure regularly to avoid damage to pipes and appliances.
Visible Sediment And Discoloration
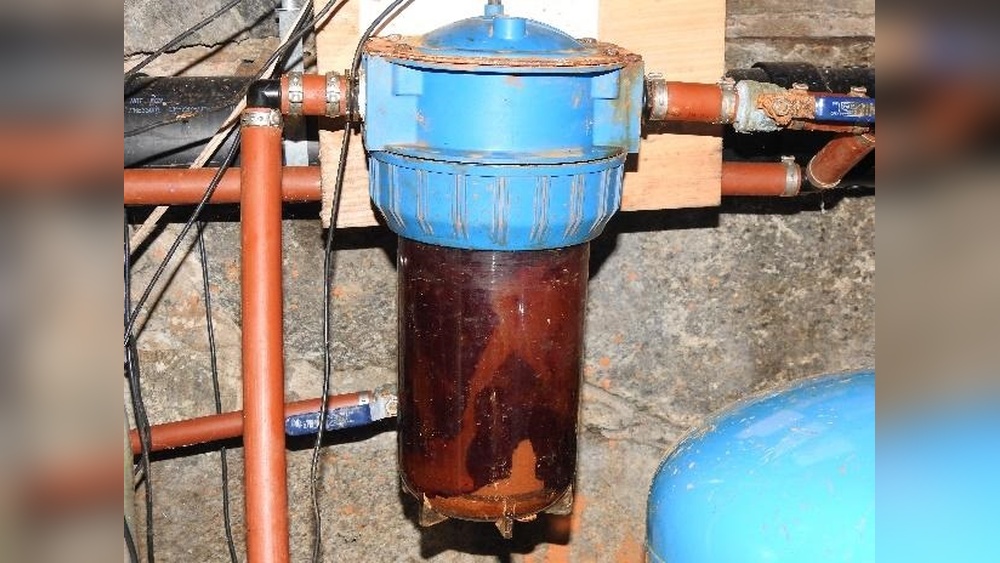
See dirt or discoloration in water? This means the filter is not cleaning well. Sediment or particles in water come from old filters. Water may look cloudy, yellow, or brown. These signs show the filter is failing to stop impurities. Replace your filter to restore clear, clean water.
Factors Affecting Filter Lifespan
The lifespan of a whole house water filter depends on several key factors. These influence how long the filter can clean your water effectively. Understanding these factors helps you know when to change your filter. It also saves money and keeps water quality high.
Water Quality And Contaminants
Water with many impurities wears out filters faster. Dirt, sediment, and chemicals clog the filter quickly. Hard water with minerals can also reduce filter life. Testing your water helps decide filter replacement frequency. Cleaner water means the filter lasts longer.
Household Water Usage
The more water your household uses, the faster the filter fills up. Large families or high water use drains the filter quickly. Small homes with less water use can stretch filter life. Track your water use to estimate filter changes better.
Type Of Water Filter
Different filters have different lifespans. Carbon filters might last 3 to 6 months. Ceramic or reverse osmosis filters often last longer. Some filters handle more water or contaminants than others. Choose a filter that fits your water needs and budget.
Recommended Replacement Intervals
Changing your whole house water filter regularly keeps water clean and safe. Filters catch dirt, chemicals, and bad tastes. Over time, filters get full and stop working well. Following the right replacement schedule helps your system work its best. Different filter types need changing at different times. Below are common filter types and their recommended replacement intervals.
Standard Whole House Filters
Standard filters usually last about 3 to 6 months. This depends on your water quality and use. Check the filter every month. Replace it when water flow drops or water looks cloudy. Changing on time avoids damage to your pipes and appliances.
Carbon Filters
Carbon filters remove chlorine and bad smells. They usually need changing every 6 months. If water tastes or smells strange, change the filter sooner. Carbon filters can clog faster in hard water areas. Keep track of their condition to keep water fresh.
Sediment Filters
Sediment filters catch dirt and sand. They often need changing every 3 months. More often if you have well water or dirty water. A clogged sediment filter reduces water flow. Replace it regularly to protect other filters and your system.
Reverse Osmosis Systems
Reverse osmosis systems use several filters. Sediment and carbon filters usually change every 6 to 12 months. The RO membrane lasts 2 to 3 years. Test your water to know when to change each part. Proper maintenance keeps water pure and safe to drink.
Consequences Of Delayed Filter Changes
Delaying the change of your whole house water filter can lead to several problems. The filter clogs over time, reducing its ability to clean water properly. This affects water quality and can cause bigger issues in your home.
Reduced Filtration Efficiency
A dirty filter cannot remove impurities well. Particles, dirt, and chemicals pass through more easily. Water may look cloudy or taste bad. This means your family is not getting clean water as expected.
Potential Health Risks
Stale water trapped in an old filter can grow bacteria. Drinking or using this water can cause illnesses. People with weak immune systems face higher risks. Clean filters help keep water safe to use.
Damage To Plumbing And Appliances
Clogged filters reduce water flow and increase pressure. Pipes and appliances like water heaters or dishwashers may suffer damage. Repairs can be costly and inconvenient. Regular filter changes protect your home’s plumbing system.
Steps To Change Your Whole House Water Filter
Changing your whole house water filter keeps your water clean and safe. Follow simple steps to replace the filter correctly. Doing it right improves water flow and quality.
Gathering Necessary Tools
Prepare tools before starting. You will need a new filter, a filter wrench, a bucket, and towels. Have gloves ready to keep hands clean. Collecting tools first saves time.
Shutting Off Water Supply
Turn off the main water valve to stop water flow. Open a faucet nearby to release pressure. This step prevents leaks and spills during the change.
Removing And Replacing The Filter
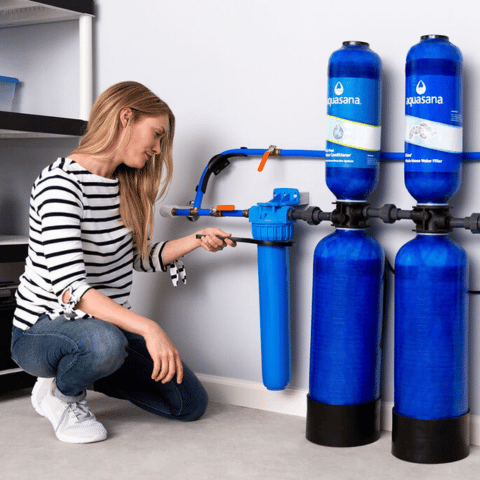
Use the filter wrench to unscrew the filter housing. Remove the old filter carefully to avoid mess. Insert the new filter into the housing. Screw the housing back tightly by hand.
Flushing The System
Turn the water supply back on slowly. Open several faucets to flush air and debris. Let water run for a few minutes. Check for leaks around the filter housing.
Tips To Extend Filter Life
Extending the life of your whole house water filter saves money and keeps water clean longer. Simple steps help your filter work well over time. These tips focus on protecting the filter and keeping it efficient.
Pre-filtration Options
Using a pre-filter helps catch large dirt and particles. This stops the main filter from clogging fast. Sediment filters or mesh screens work well before the main filter. They reduce the load and make the main filter last longer.
Regular Maintenance
Check your filter system often. Clean or replace parts as needed. Follow the manufacturer’s advice for maintenance. A clean filter performs better and lasts longer. Avoid waiting until water flow slows down or tastes change.
Monitoring Water Quality
Keep an eye on your water quality. Test water regularly for clarity and taste. Changes can mean the filter needs attention. Good water quality means your filter is still working well. Monitoring helps you know the right time to change it.
Choosing The Right Replacement Filter
Choosing the right replacement filter is key to keeping your whole house water filter working well. A good filter fits your system and cleans water properly. Picking the wrong filter can reduce water quality and damage your system.
Matching Filter Specifications
Each water filter has specific size and capacity needs. Check the model number on your current filter. Match the micron rating to remove the same particles. Use filters that fit your system’s flow rate. This keeps water clean and the system safe.
Certified Brands And Quality
Choose filters certified by trusted organizations. Certifications like NSF or WQA ensure filter safety and performance. Certified filters remove harmful contaminants as promised. Avoid cheap, uncertified filters that may fail quickly. Quality filters last longer and protect your family’s health.
Cost Vs. Performance
Low-cost filters may save money upfront. But they often need changing more often. High-quality filters cost more but perform better and last longer. Balance your budget with filter lifespan and cleaning power. A good filter saves money over time by working well.
Frequently Asked Questions
How Often Should I Replace My Whole House Water Filter?
Replace your whole house water filter every 3 to 6 months. Usage and water quality affect this timeline. Regular changes maintain water purity and system efficiency.
What Signs Indicate It’s Time To Change The Filter?
Look for reduced water flow, bad taste, or odor. Cloudy water or visible sediment also suggests a filter change. These signs mean the filter is clogged or ineffective.
Can I Change The Whole House Filter Myself?
Yes, you can change the filter yourself with basic tools. Turn off water supply, remove the old filter, and install the new one. Follow manufacturer instructions for best results.
Does Water Quality Affect Filter Replacement Frequency?
Yes, poor water quality shortens filter life. High sediment or contaminants clog filters faster. Test your water regularly and adjust replacement schedules accordingly.
Conclusion
Changing your whole house water filter regularly keeps water clean and safe. Most filters need replacing every 3 to 6 months. Check the filter’s instructions for exact timing. Watch for changes in water taste, smell, or flow. These signs mean it’s time to change the filter.
Clean water protects your family’s health and your home’s pipes. Stay consistent to avoid problems and enjoy fresh water daily. Small effort, big benefits. Keep your filter fresh and your water pure.
Hasan Al Sarker is a Reverse Osmosis Specialist. He has worked for many years to ensure safe drinking water for all. His research paper has been published in several journals, including Issue, Medium, and Slideshare. He is recognized as a water doctor among specialists though he did not attend medical college.
Besides working as a researcher of reverse osmosis technology, he is also very fancy with the kitchen and cooking. His guides are reading thousands of people every day. As a head of content, he is responsible for all the published articles at RO System Reviews.
Is your Maytag refrigerator water not tasting as fresh as it used to? It might be time to replace your water filter.
Changing your water filter regularly keeps your water clean and your fridge running smoothly. But if you’re unsure how to do it, don’t worry—you’re in the right place. This step-by-step guide will show you exactly how to replace your Maytag refrigerator water filter quickly and easily.
By the end, you’ll have fresh, clean water flowing again without any hassle. Let’s get started!
Signs To Replace Filter
Knowing when to replace your Maytag refrigerator water filter is important. A clogged or old filter can affect water quality and appliance performance. Watch for clear signs that the filter needs changing. These signs help keep your water clean and fresh.
Water Taste And Odor
Bad taste or strange smell in your water means the filter is old. The filter stops impurities and chemicals. Over time, it loses this ability. If water tastes bitter or smells odd, replace the filter fast.
Reduced Water Flow
Slow water flow from the dispenser shows a clogged filter. Dirt and particles block the filter’s holes. This lowers water pressure and flow speed. If water drips slowly or stops, it is time to change the filter.
Filter Indicator Light
Many Maytag refrigerators have a filter indicator light. This light turns on when the filter needs replacement. It helps you remember to change the filter on time. Don’t ignore the light; replace the filter promptly for best results.
Tools And Materials Needed
Replacing a Maytag refrigerator water filter is a simple task. Having the right tools and materials makes the job easier and faster. Prepare everything before starting to avoid interruptions.
Most Maytag models require only a few basic items. These tools help you remove the old filter and install the new one safely. Keep them close at hand to work smoothly.
New Maytag Water Filter
Use a genuine Maytag water filter designed for your model. It ensures clean and fresh water. Check the model number on your fridge or filter slot to buy the correct one.
Soft Cloth Or Towel
Keep a soft cloth ready to catch any water drips. It protects your floor and fridge from water damage. Wipe the area around the filter to keep it clean.
Gloves (optional)
Wearing gloves keeps your hands clean and improves grip. It also protects your skin from cold water or dirt. Choose disposable or reusable gloves based on your preference.
Instruction Manual
Have your fridge’s instruction manual nearby. It offers specific steps and tips for your model. Reading it prevents mistakes and helps you understand the process better.
Locate The Water Filter
Finding the water filter in your Maytag refrigerator is the first step to replacing it. Knowing its exact location saves time and effort. Maytag refrigerators usually place the filter in one of two spots. Check these areas carefully before you start the replacement.
Inside The Refrigerator
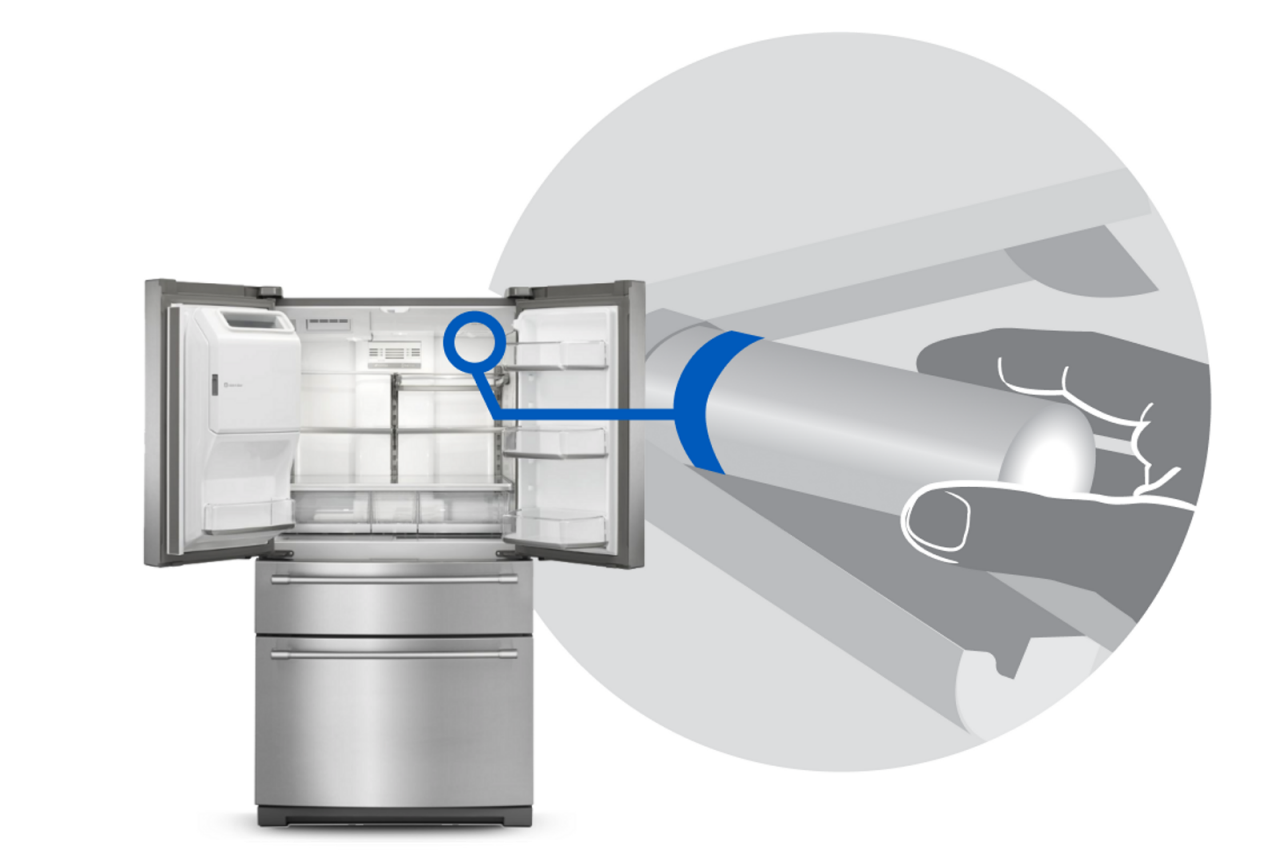
Many Maytag models have the water filter inside the fridge. Look near the top right corner or the upper back wall. The filter often sits in a small, round or rectangular compartment. It might be hidden behind a cover that you can easily pop open. This spot is common in side-by-side and French door refrigerators.
Near The Base Or Grille
Some Maytag refrigerators place the water filter near the bottom. Check the grille at the front base of the fridge. The filter could be behind a panel or a small door. This location is typical in bottom freezer models. You might need to bend down or kneel to see the filter clearly.
Removing The Old Filter
Removing the old filter from your Maytag refrigerator is a simple task. It helps keep your water fresh and clean. Follow these clear steps to do it safely and correctly. This part is important before installing the new filter.
Turn Off Water Supply
Start by turning off the water supply to the fridge. This stops water flow and avoids leaks. Look for the valve behind or under your refrigerator. Turn it clockwise until it stops. Double-check to ensure no water runs.
Release The Filter
Find the water filter inside your fridge. It is usually in the upper right corner or near the bottom grille. Press the release button or twist the filter counterclockwise. Pull the filter straight out gently. Avoid forcing it to prevent damage.
Remove And Dispose
Take the old filter out carefully. Some water may drip, so have a towel ready. Do not reuse the old filter. Throw it away according to local recycling rules. Proper disposal helps protect the environment.
Installing The New Filter
Start by aligning the new filter with the slot inside the fridge. Push it in firmly until it clicks into place. Turn on the water to check for leaks and proper flow.
Unpack And Prepare Filter
Start by removing the new water filter from its packaging. Take off any protective covers or seals. Check the filter for damage. Make sure it matches the old filter in size and shape. This helps ensure proper fit and function.
Insert And Secure Filter
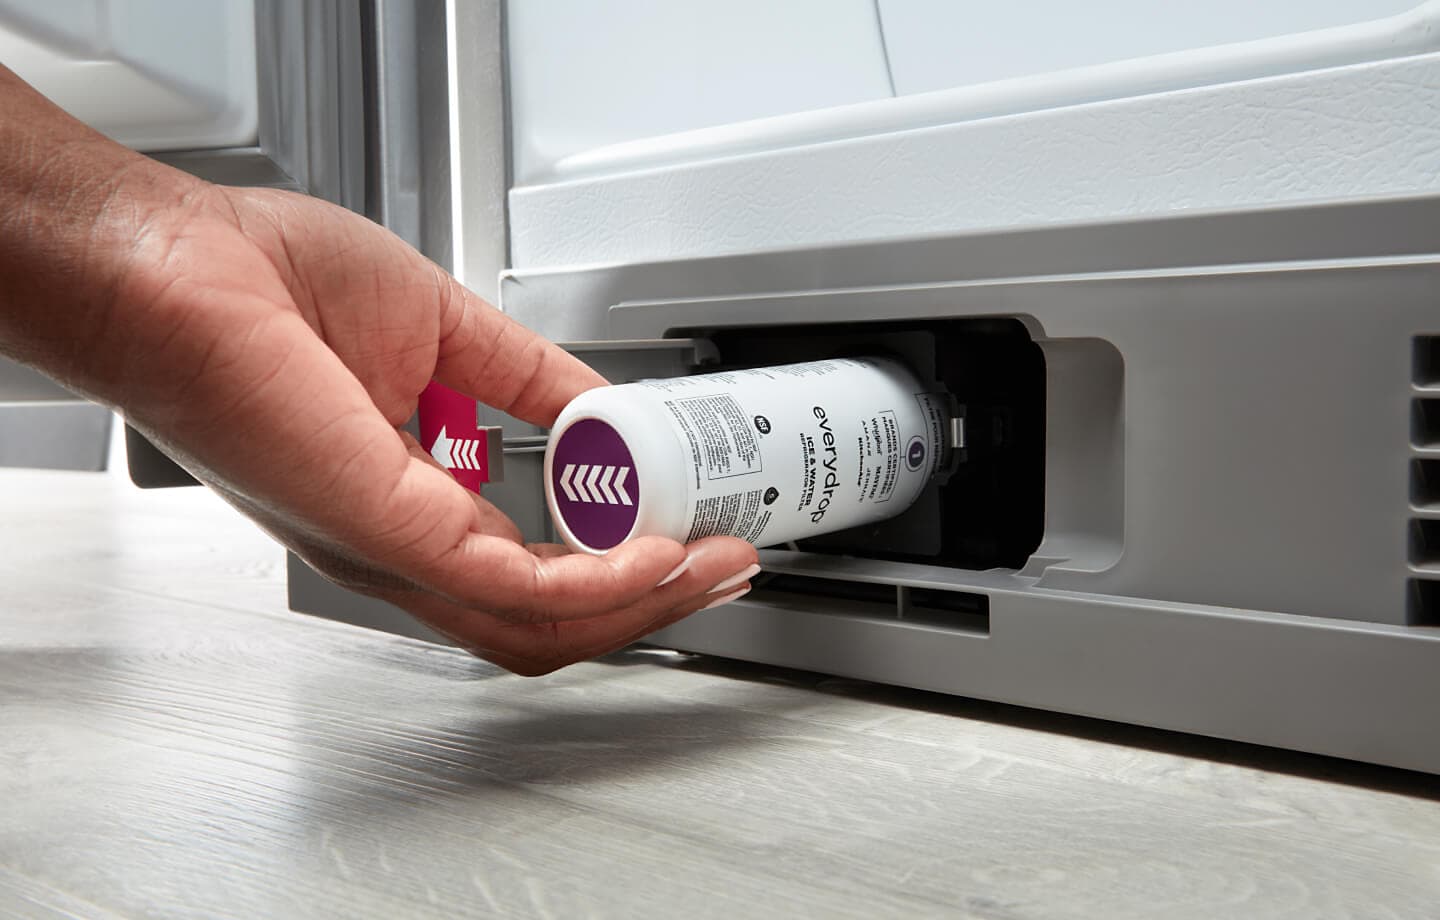
Locate the filter slot inside your Maytag refrigerator. Align the filter with the slot carefully. Push the filter in firmly until it clicks or locks. Turn the filter clockwise if your model requires it. This step secures the filter in place and prevents leaks.
Flush The Filter
Run water through the dispenser for about 3 to 5 minutes. This clears out air and loose carbon particles. Use a container to catch the water. Flushing ensures clean, fresh water and better taste. Your filter is now ready to use.
Resetting The Filter Indicator
After replacing the water filter in your Maytag refrigerator, resetting the filter indicator is important. This step keeps the display accurate. It tells you when the filter needs changing next. Without resetting, the light may stay on, causing confusion. Resetting is quick and simple. It helps maintain clean water and ice.
Using The Control Panel
Locate the control panel on your refrigerator door. Press and hold the “Reset Filter” button. Hold it for about 3 seconds. The indicator light will blink or turn off. This means the reset is successful. Some models show a message like “Filter Reset.” Check your manual if the button name differs. This method is the easiest and fastest way.
Manual Reset Methods
If your model lacks a reset button, try manual methods. Unplug the refrigerator for 5 minutes. Plug it back in to reset the system. Another way is to press and hold the “Ice Type” or “Water” button for 10 seconds. Watch for the indicator light to change. These methods also clear the filter status. They work well for older or simpler models.
Maintenance Tips
Maintaining your Maytag refrigerator water filter is key to clean water and smooth operation. Proper care helps the filter last longer and keeps water tasting fresh. Follow these simple tips to keep your filter in top shape.
Filter Replacement Frequency
Change the water filter every six months. This timing keeps water clean and safe to drink. Check the user manual for your model’s exact recommendation. Some filters have indicator lights to remind you. Don’t wait too long to replace it. Old filters can cause bad taste and reduce water flow.
Cleaning The Filter Housing
Clean the filter housing each time you replace the filter. Wipe it with a soft cloth and mild soap. Avoid harsh chemicals or abrasive tools. Rinse the housing well to remove soap residue. This step prevents dirt and mold build-up. Clean housing ensures the new filter fits properly and works well.
Frequently Asked Questions
How Often Should I Replace My Maytag Water Filter?
Maytag recommends replacing the water filter every six months. This ensures clean, fresh-tasting water and optimal refrigerator performance. Frequent use or poor water quality may require earlier replacement.
How Do I Locate The Maytag Water Filter?
The Maytag water filter is usually inside the refrigerator compartment. Check the upper right corner or bottom grille. Refer to your model’s manual for the exact location.
Can I Use Any Water Filter For Maytag Refrigerators?
No, use only Maytag-approved water filters. Generic filters may not fit properly or filter contaminants effectively. Using the right filter maintains water quality and appliance longevity.
What Steps Are Involved In Replacing The Water Filter?
First, turn off the water supply. Then, twist and remove the old filter. Insert the new filter firmly and turn on the water supply. Finally, flush water for 3-5 minutes to clear air.
Conclusion
Replacing your Maytag refrigerator water filter keeps water fresh and clean. It takes only a few minutes to do. Regular changes help avoid bad taste and odors. You save money by fixing it yourself. Follow the steps carefully for the best results.
Clean water means better drinks and food. Stay on schedule to keep your fridge working well. Simple, quick, and worth the effort. Now, enjoy fresh water anytime you want.
Hasan Al Sarker is a Reverse Osmosis Specialist. He has worked for many years to ensure safe drinking water for all. His research paper has been published in several journals, including Issue, Medium, and Slideshare. He is recognized as a water doctor among specialists though he did not attend medical college.
Besides working as a researcher of reverse osmosis technology, he is also very fancy with the kitchen and cooking. His guides are reading thousands of people every day. As a head of content, he is responsible for all the published articles at RO System Reviews.
Have you ever wondered what’s really in the water coming from your tap? You might think it’s clean, but many tiny impurities can hide in plain sight.
That’s where a charcoal filter steps in. It’s a simple tool that can make a big difference in the quality of your water. But what exactly does a charcoal filter remove from water? Understanding this can help you decide if it’s the right choice for your home and health.
Keep reading to discover how charcoal filters work and why they might be the key to cleaner, safer water for you and your family.
How Charcoal Filters Work
Charcoal filters clean water by removing many impurities. They use a special type of charcoal that traps harmful substances. This process makes water safer and better tasting. Understanding how these filters work helps you choose the right one for your needs.
Activated Charcoal Basics
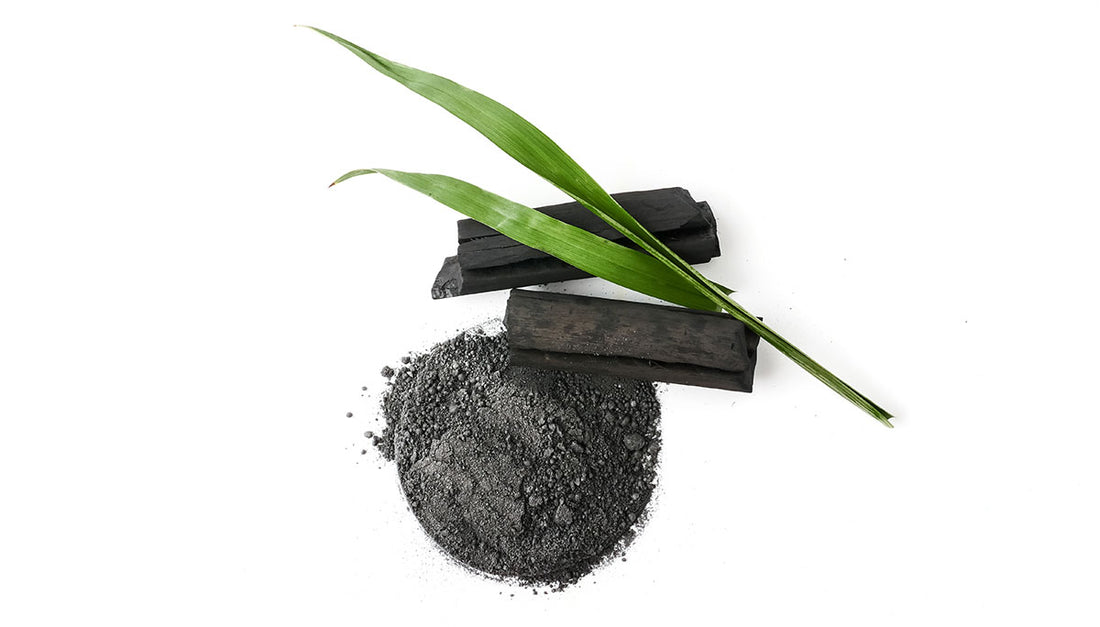
Activated charcoal is carbon treated with oxygen. This treatment creates tiny pores on its surface. These pores increase the charcoal’s surface area greatly. More surface area means more space to trap contaminants. It looks like black powder but works like a sponge.
Adsorption Process
Charcoal removes impurities through adsorption, not absorption. Adsorption means contaminants stick to the charcoal’s surface. Water flows through the charcoal, leaving harmful chemicals behind. It captures chlorine, pesticides, and some heavy metals. This process improves water smell and taste.
Filter Design Variations
Charcoal filters come in different shapes and sizes. Some use loose charcoal granules, others use solid blocks. Block filters have higher density and trap more particles. Some filters combine charcoal with other materials for extra cleaning. Each design targets specific impurities in water.
Common Contaminants Removed
Charcoal filters clean water by trapping many harmful substances. They use activated charcoal, which has tiny pores. These pores catch chemicals and particles, making water safer and better tasting. Below are common contaminants charcoal filters remove from water.
Chlorine And Chloramine
Chlorine is added to water to kill germs. It can leave a bad taste and smell. Charcoal filters absorb chlorine, improving water flavor. They also remove chloramine, a chemical made from chlorine and ammonia. Chloramine is harder to remove, but charcoal helps reduce it.
Volatile Organic Compounds
Volatile organic compounds (VOCs) come from factories and fuel. They can cause health problems if in drinking water. Charcoal filters trap VOCs by sticking to their surface. This stops them from reaching your glass.
Pesticides And Herbicides
Pesticides and herbicides protect crops but can pollute water. These chemicals may harm humans over time. Activated charcoal captures many types of these chemicals. It helps keep water safer for daily use.
Heavy Metals
Heavy metals like lead and mercury can poison water. They enter water through pipes or pollution. Charcoal filters can reduce some heavy metals. This lowers the risk of health issues from drinking water.
Sediments And Particulates
Sediments include dirt, sand, and rust particles. These make water cloudy and unpleasant. Charcoal filters trap these solid particles. This clears the water and protects other filter parts.
Limitations Of Charcoal Filters
Charcoal filters clean water by trapping many harmful substances. They work well for removing chlorine, bad taste, and odors. Still, charcoal filters do not catch everything. Knowing their limits helps choose the right filter for safe water.
Microorganisms And Bacteria
Charcoal filters do not remove bacteria or viruses. These tiny germs can pass through the filter easily. To protect against microbes, use filters with special layers or UV treatment.
Minerals And Salts
Minerals and salts stay in water after charcoal filtering. These include calcium, magnesium, and sodium. Charcoal does not change water hardness or salt content. Reverse osmosis filters work better for this task.
Fluoride And Nitrates
Fluoride and nitrates remain in water after charcoal filtration. They are small and dissolve well in water. Charcoal does not trap these chemicals. Special filters or treatments are needed to reduce fluoride and nitrates.
Benefits Of Using Charcoal Filters
Using charcoal filters for water brings many clear benefits. These filters improve water quality by removing unwanted substances. The result is better tasting, cleaner water that feels safer to drink. Charcoal filters also support health and help protect the environment.
Improved Taste And Odor
Charcoal filters remove chlorine and other chemicals that cause bad taste. They reduce odors that make water unpleasant. This creates fresh, clean-tasting water. Many people find it easier to drink more water with charcoal filtration.
Health Advantages
These filters trap harmful chemicals and impurities. They reduce contaminants like pesticides and heavy metals. This lowers health risks linked to unsafe water. Clean water supports better digestion and overall well-being.
Environmental Impact
Charcoal filters help reduce plastic waste by encouraging tap water use. They avoid the need for bottled water. The filters are often made from natural, renewable materials. This makes them a greener choice for daily water needs.
Choosing The Right Charcoal Filter
Choosing the right charcoal filter is key to clean and safe water. Not all filters work the same. Different filters suit different needs and water types. Understanding the options helps you pick the best one.
Filter Types And Sizes
Charcoal filters come in various forms. Some are block filters, others are granular. Block filters remove more particles but may slow water flow. Granular filters allow faster flow but catch fewer contaminants. Size matters too. Larger filters last longer and handle more water. Smaller filters fit compact systems but need frequent changes.
Filter Lifespan And Maintenance
Filters lose effectiveness over time. Most charcoal filters last between three to six months. Usage and water quality affect lifespan. Change filters regularly to avoid contamination. Cleaning some filters extends their life. Check the manufacturer’s instructions for care tips. Proper maintenance keeps your water pure and safe.
Certification And Standards
Look for certified filters to ensure safety. Certifications from NSF or WQA show filters meet strict standards. These filters remove specific contaminants reliably. Non-certified filters may not remove harmful substances well. Certification gives peace of mind about water quality and filter performance.
Tips For Maximizing Filter Efficiency
Maximizing the efficiency of a charcoal filter helps ensure clean and safe water. Simple steps improve how well your filter works. These tips help your filter remove more impurities and last longer.
Proper Installation
Install the charcoal filter carefully. Follow the instructions from the manufacturer. Place the filter in the right direction so water flows through it properly. Avoid leaks by tightening connections well. Poor installation can reduce filtering power.
Regular Replacement
Change the charcoal filter regularly. Over time, the filter fills with contaminants and stops working well. Check the replacement schedule on the filter packaging. Using a worn-out filter lets impurities pass through. Fresh filters keep water clean and fresh.
Water Quality Testing
Test your water quality often. Testing shows if the filter removes harmful substances. Use simple water test kits available online or in stores. If water quality drops, replace the filter sooner. Testing helps protect your health by ensuring safe drinking water.
Frequently Asked Questions
What Contaminants Do Charcoal Filters Remove From Water?
Charcoal filters effectively remove chlorine, sediment, volatile organic compounds (VOCs), and bad odors from water. They improve taste and clarity by trapping these impurities, making water safer and more pleasant to drink.
How Does A Charcoal Filter Improve Water Taste?
Charcoal filters absorb chlorine and other chemicals that cause unpleasant taste and odors. This process enhances the water’s freshness, making it more enjoyable and healthier for daily consumption.
Can Charcoal Filters Remove Heavy Metals From Water?
Charcoal filters have limited ability to remove heavy metals like lead or mercury. For heavy metal removal, specialized filters such as reverse osmosis or ion exchange are more effective.
How Often Should Charcoal Filters Be Replaced?
Charcoal filters should be replaced every 3 to 6 months, depending on usage and water quality. Regular replacement ensures effective filtration and prevents clogging or bacterial growth.
Conclusion
Charcoal filters clean water by removing many harmful substances. They trap chlorine, bad tastes, and odors effectively. These filters also reduce some chemicals and small particles. This makes water safer and better to drink. Using charcoal filters helps improve water quality at home.
Clean water supports health and daily life. Choose charcoal filters for simpler, clearer water every day.
Hasan Al Sarker is a Reverse Osmosis Specialist. He has worked for many years to ensure safe drinking water for all. His research paper has been published in several journals, including Issue, Medium, and Slideshare. He is recognized as a water doctor among specialists though he did not attend medical college.
Besides working as a researcher of reverse osmosis technology, he is also very fancy with the kitchen and cooking. His guides are reading thousands of people every day. As a head of content, he is responsible for all the published articles at RO System Reviews.
If you rely on well water, you know how important it is to keep it clean and safe. But where exactly should you install a sediment filter to protect your water system?
Placing the filter in the right spot can save you money, prevent damage, and ensure better water quality for your home. You’ll discover the best location to install a sediment filter so you get the most out of your well water system.
Keep reading—your water’s clarity and your peace of mind depend on it.
Purpose Of Sediment Filters
Sediment filters play a vital role in treating well water. They remove dirt, sand, rust, and other particles. These filters help keep water clean and safe for daily use. Installing them correctly improves the whole water system’s performance.
Protecting Plumbing Systems
Sediment filters stop particles from reaching pipes and appliances. These particles can cause clogs and damage over time. By filtering out sediments, the pipes last longer. This reduces the need for costly repairs. Appliances such as water heaters and dishwashers also work better with clean water.
Improving Water Quality
Removing sediments makes water clearer and more pleasant to use. It helps prevent stains on sinks and clothes. Clean water tastes better and feels smoother on the skin. Sediment filters also reduce cloudiness in water. This makes the water safer for drinking and cooking.
Common Sediment Filter Types
Sediment filters remove dirt, sand, and rust from well water. They protect plumbing and appliances. Choosing the right type helps keep water clean and clear. Common sediment filters come in three main types. Each has unique features and uses. Learn about spin-down, cartridge, and backwashing filters below.
Spin-down Filters
Spin-down filters use a spinning action to remove large particles. Water enters a cylindrical chamber, where dirt spins to the bottom. Users clean the filter by flushing out trapped sediment. These filters last long and need little maintenance. They work best as a first filter in well water systems.
Cartridge Filters
Cartridge filters use replaceable filter cartridges to trap particles. They come in different sizes and micron ratings. Fine cartridges remove tiny sediment, while coarse ones catch larger debris. These filters are easy to install and replace. They suit homes with moderate sediment levels in well water.
Backwashing Filters
Backwashing filters clean themselves by reversing water flow. Dirt and particles wash out into a drain automatically. They have longer filter life and require less manual cleaning. These filters handle heavy sediment loads well. Ideal for homes with high sediment in well water.
Ideal Locations For Installation
Choosing the right spot for your sediment filter is key to clean well water. Proper placement helps protect your plumbing and appliances from dirt and particles. It also extends the life of your filter and keeps your water clear.
Below are the best places to install a sediment filter in your well water system.
Right After The Well Pump
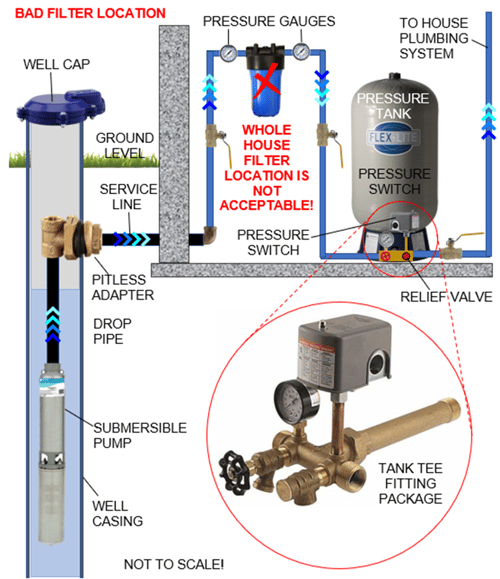
Installing the filter right after the well pump stops dirt early. It catches large particles before they enter the system. This protects pipes and the pressure tank from damage. The filter works best here because water pressure is high.
Before The Pressure Tank
Placing the filter before the pressure tank keeps sediments out of the tank. This prevents buildup and corrosion inside the tank. It also helps maintain steady water pressure. The filter removes particles that could cause problems later.
Near The Main Water Line Entry
Installing the filter near the main water line entry protects the whole home. It filters all water before it reaches taps and appliances. This location ensures clean water for drinking, cooking, and cleaning. It also helps avoid clogs in pipes throughout the house.
Installation Tips And Best Practices
Installing a sediment filter for well water needs careful planning. Proper setup helps the filter work well and last longer. Follow these tips and best practices to get the best results. Focus on easy maintenance, correct fittings, and steady water flow.
Ensuring Easy Access For Maintenance
Place the filter where you can reach it without trouble. Leave enough space around it for cleaning or changing parts. Avoid tight spots or places with hard access. Easy access saves time and effort during upkeep.
Using Proper Pipe Fittings
Use fittings that match the filter size and type. Tight connections prevent leaks and keep pressure steady. Avoid using old or damaged fittings. Choose durable materials like brass or PVC for long life.
Avoiding Pressure Drops
Install the filter in a straight pipe section. Avoid sharp bends or narrow pipes before and after the filter. Large pipes help keep water pressure steady. Check the filter’s flow rate to match your water demand.
Signs You Need To Adjust Filter Placement
Knowing the right place to install a sediment filter for well water is important. Sometimes, the filter may not work well if it is in the wrong spot. Watch for signs that show you need to change the filter’s position. These signs help keep your water clean and your system running smoothly.
Persistent Sediment In Water
Finding small dirt or sand in your water is a clear sign. The filter might not catch all the sediment if placed too far from the well. Sediment in water can cause damage to pipes and appliances. Move the filter closer to the water source for better cleaning.
Reduced Water Pressure
Low water pressure can mean the filter is blocking the flow. This often happens if the filter sits after a long pipe or many bends. The water has to push too hard to get through. Changing the filter location can help keep good pressure.
Frequent Filter Clogging
Clogging happens when the filter collects too much dirt quickly. This may mean the filter is too close to the well or in a bad spot. A clogged filter needs more cleaning or replacement. Adjust the filter place to reduce clogging and save time.
Maintenance And Replacement Guidelines
Maintaining your sediment filter is essential for clean well water. Proper care keeps the filter working well and extends its life. Knowing when to clean and replace parts helps avoid water problems. Check the filter often to catch issues early.
Cleaning Frequency
Clean the sediment filter every 3 to 6 months. This stops dirt buildup and keeps water flow steady. If your well water has more dirt, clean it more often. Use clean water to rinse the filter screen or cartridge. Avoid harsh chemicals that can damage the filter.
Filter Cartridge Replacement
Replace the filter cartridge every 6 to 12 months. Some cartridges may last longer, depending on water quality. Look for signs like low water pressure or cloudy water to know when to change it. Always use the right cartridge size and type for your system.
Monitoring System Performance
Watch your water quality and pressure regularly. A drop in pressure might mean the filter is clogged. Cloudy or bad-tasting water signals a need for maintenance. Keep a log of cleaning and replacements to track filter health over time.
Additional Filtration Options For Well Water
Well water often contains various impurities. A sediment filter removes dirt and sand. But other contaminants may need extra treatment. Additional filtration options improve water quality and protect plumbing. These filters target specific problems in well water. Choosing the right filter depends on your water’s condition.
Iron Filters
Iron is common in many wells. It causes stains and bad taste. Iron filters remove iron from water. They use oxidation or filtration methods. These filters prevent rusty water and damage. Installing an iron filter helps keep water clear.
Water Softeners
Hard water has high minerals like calcium and magnesium. It causes scale buildup on pipes and appliances. Water softeners remove these minerals. They replace hardness with sodium or potassium. Soft water feels better on skin and hair. It also improves soap and detergent efficiency.
Uv Purifiers
Well water can contain bacteria and viruses. UV purifiers use ultraviolet light to kill germs. This process does not add chemicals. UV purification provides safe drinking water. It is ideal for disinfecting well water. Regular maintenance ensures the system works well.
Frequently Asked Questions
Where Should I Install A Sediment Filter For Well Water?
Install the sediment filter right after the well pump. This placement protects your plumbing and appliances from sediment damage. It ensures cleaner water enters your home, improving water quality and system longevity.
Can A Sediment Filter Be Installed Inside The House?
Yes, it can be installed inside, typically near the pressure tank. This location allows easy maintenance and filter replacement. However, installing it outside, close to the well, can prevent sediment buildup in pipes.
How Often Should I Replace My Well Water Sediment Filter?
Replace your sediment filter every 3 to 6 months. Frequency depends on water quality and sediment levels. Regular replacement maintains efficient filtration and prevents clogging, ensuring clean water flow.
Does Installing A Sediment Filter Improve Well Water Taste?
Yes, it removes sand and particles that affect water taste. Cleaner water feels fresher and reduces unpleasant odors. While not removing all contaminants, it significantly improves water clarity and flavor.
Conclusion
Installing a sediment filter early in your water system protects pipes and appliances. Place it just after the well pump or pressure tank for best results. This setup keeps dirt and particles out of your home water supply. Clean water helps your family stay healthy and your equipment last longer.
Regular filter checks ensure it works well over time. Choose the right spot carefully for effective filtration and easy maintenance. Clear water starts with the right sediment filter placement.
Hasan Al Sarker is a Reverse Osmosis Specialist. He has worked for many years to ensure safe drinking water for all. His research paper has been published in several journals, including Issue, Medium, and Slideshare. He is recognized as a water doctor among specialists though he did not attend medical college.
Besides working as a researcher of reverse osmosis technology, he is also very fancy with the kitchen and cooking. His guides are reading thousands of people every day. As a head of content, he is responsible for all the published articles at RO System Reviews.
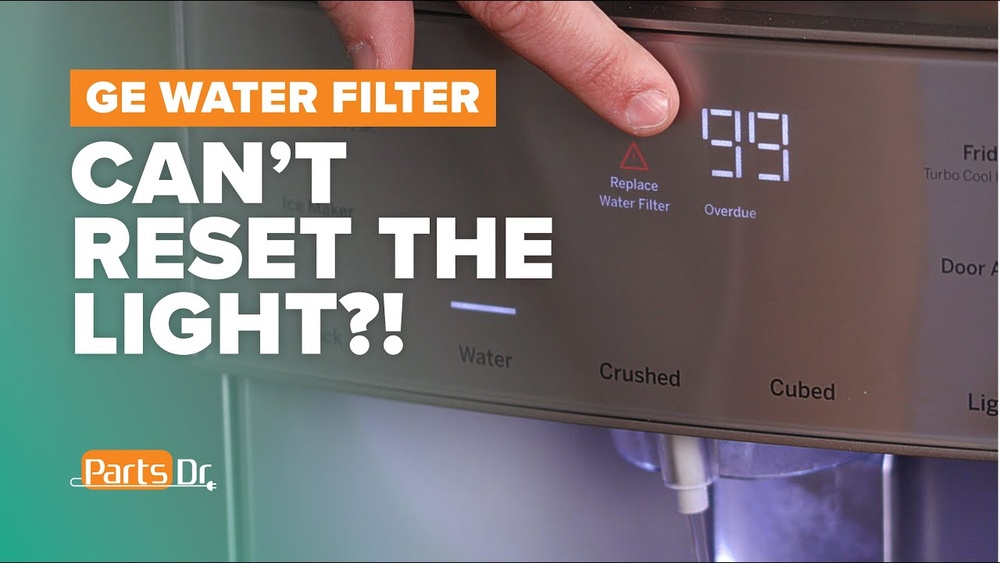
Is your GE fridge’s water filter indicator stuck on or not resetting after you’ve changed the filter? You’re not alone, and it can be frustrating when your fridge won’t recognize the new filter.
But don’t worry—resetting your water filter is easier than you think. In this guide, you’ll learn simple, step-by-step instructions to reset your GE fridge water filter quickly. By the end, you’ll know exactly how to keep your water tasting fresh and your fridge running smoothly.
Keep reading to find out how!
Signs To Reset Water Filter
Knowing when to reset the water filter in your GE fridge is important. It keeps your water clean and fresh. Watch for signs that tell you the filter needs attention. These signs help you keep your fridge working well.
Water Taste And Odor Changes
Water that tastes strange or smells bad can mean the filter is old. The filter may no longer remove bad tastes and odors. Fresh, clean water should taste clear and pure. If it does not, reset the filter soon.
Filter Indicator Light
The filter indicator light on your fridge shows the filter status. When it glows or blinks, it means the filter needs resetting. This light helps you know the right time to act. Ignoring it can cause water quality to drop.
Water Flow Issues
Slow water flow from the dispenser may point to a clogged filter. A dirty filter blocks water and reduces flow. Resetting the water filter can restore normal flow. Watch for weak water streams as a sign to reset.
Locate The Water Filter
Finding the water filter in your GE fridge is the first step to resetting it. The filter cleans the water and keeps your drinks fresh. Knowing its exact location helps you replace or reset it quickly. Water filters are usually easy to reach but can be in different spots depending on the model.
Common Filter Locations
Most GE fridge water filters sit inside the fridge. Often, they are near the top right corner or the bottom grille. Some models have the filter in the fresh food compartment, close to the door. Others place it in the base grille or behind a panel. Check these usual spots first to save time.
Check Your Model Manual
The user manual gives clear directions about your water filter’s location. It shows pictures and exact spots. Manuals help avoid confusion and prevent damage. If you lost the paper copy, you can download it from GE’s official website. Use your model number to find the right guide fast.
Steps To Reset The Filter
Resetting the water filter on your GE fridge is simple. Follow clear steps to remove the old filter, install the new one, and reset the filter indicator. This keeps your water tasting fresh and your fridge running well.
Remove The Old Filter
Locate the water filter inside your fridge. It is usually in the upper right corner or bottom grille. Turn the filter counterclockwise to unlock it. Pull the filter straight out gently. Dispose of the old filter properly.
Install The New Filter
Take your new filter out of the packaging. Align the filter with the slot in the fridge. Push the filter in until it stops. Turn it clockwise to lock it in place. Make sure it is secure and snug.
Reset The Filter Indicator
Find the filter reset button on the control panel. Press and hold the button for about 3 seconds. The filter indicator light will turn off. This shows the filter has been reset. Your fridge is now ready to use.
Manual Vs. Automatic Reset
Resetting the water filter on a GE fridge is simple. Some models need manual reset. Others reset automatically. Knowing your fridge type helps save time and effort. It also ensures the filter works well and water stays clean.
Models With Manual Reset
Manual reset models require you to press a button or switch. This button is usually near the water filter or on the fridge control panel. You must press and hold it for a few seconds. The filter light will turn off. This shows the reset is complete. If the light stays on, try again or check the user manual. Manual reset gives control to the user. It helps track filter changes easily.
Models With Automatic Reset
Automatic reset models reset by themselves after you change the filter. The fridge senses the new filter and clears the alert. No button pressing needed. The water filter light will turn off in a few minutes. This feature is convenient. It reduces the chance of errors. Users just replace the filter and wait. The fridge handles the rest. It makes maintenance quick and easy.
Troubleshooting Tips
Troubleshooting your GE fridge water filter reset can save time and effort. Small issues may stop the filter indicator from working properly or affect water flow. Simple checks and fixes often solve these problems quickly. This guide helps you handle common issues with ease.
Filter Indicator Stays On
The filter light may stay on after a reset. This usually means the reset process did not complete. Try pressing and holding the reset button for about 3 seconds until the light changes. If the light remains, check if the filter is installed correctly. A loose filter can cause the indicator to stay lit.
Make sure to use the right filter model for your fridge. Some models have different reset methods. Consult your fridge manual to confirm the exact steps. Power cycling the fridge by unplugging it for a minute can also help clear the error.
Water Flow Problems After Reset
After resetting the filter, water flow might slow down or stop. This happens if air gets trapped in the water line. Run water through the dispenser for several minutes to clear air pockets. Also, check the water supply valve is fully open and not blocked.
Inspect the filter for clogs or damage. A faulty filter can reduce water flow. Replace it if necessary with a genuine GE filter. If water flow issues continue, the fridge’s water inlet valve may need checking or replacement.
Maintenance Tips For Water Filters
Keeping your GE fridge water filter clean and working well is key. Good maintenance helps your water taste fresh and keeps the filter lasting longer. Simple care steps make a big difference in water quality and fridge performance.
Follow these tips to keep your water filter in top shape and avoid common problems. Regular attention saves time and money in the long run.
Filter Replacement Frequency
Change the water filter every six months for best results. This timing keeps your water clear and safe to drink. Some filters may need changing sooner if you use a lot of water. Watch for signs like slow water flow or odd taste. These hints mean the filter is full and less effective.
Cleaning The Filter Housing
Clean the area where the filter sits each time you replace it. Dirt and buildup can block water flow and reduce filter life. Use a soft cloth and mild soap to wipe the housing gently. Rinse well to remove soap residue. Dry the housing fully before installing a new filter.
Frequently Asked Questions
How Do I Reset The Water Filter On A Ge Fridge?
Press and hold the “Reset” or “Filter Reset” button for 3 seconds. The indicator light will blink and then turn off, signaling the reset is complete.
When Should I Reset My Ge Fridge Water Filter?
Reset your water filter after every filter change or every 6 months. This ensures the filter status light accurately reflects the current filter’s condition.
What If The Water Filter Reset Light Won’t Turn Off?
Try pressing and holding the reset button longer, about 5 seconds. If it still stays on, check the filter installation or replace the filter if needed.
Can I Reset The Water Filter Without Replacing It?
Yes, you can reset the filter light without replacing the filter. However, it’s recommended to replace the filter regularly for clean water and ice.
Conclusion
Resetting the water filter on your GE fridge is simple. Just follow the steps carefully. This helps keep your water fresh and clean. Regular resets also keep your fridge working well. Don’t skip this task to avoid bad taste or leaks.
A quick reset saves time and effort. Now, you can enjoy fresh water anytime. Keep your fridge in good shape with this easy tip. Small actions make a big difference in daily use.
Hasan Al Sarker is a Reverse Osmosis Specialist. He has worked for many years to ensure safe drinking water for all. His research paper has been published in several journals, including Issue, Medium, and Slideshare. He is recognized as a water doctor among specialists though he did not attend medical college.
Besides working as a researcher of reverse osmosis technology, he is also very fancy with the kitchen and cooking. His guides are reading thousands of people every day. As a head of content, he is responsible for all the published articles at RO System Reviews.