Are you wondering where the water filter is on your Kenmore refrigerator? Finding it might seem tricky at first, but once you know where to look, changing or checking it becomes quick and simple.
Your water filter plays a big role in keeping your drinking water clean and tasting great. You’ll discover exactly where the water filter is located on your Kenmore fridge and how to access it easily. Keep reading—your next refreshing sip depends on it!
Kenmore Refrigerator Models
Kenmore offers many refrigerator models. Each model varies in size, style, and features. Understanding these differences helps find the water filter location. Some models include built-in water filters. Others do not have this feature. Knowing your model type makes filter replacement easier. It also helps maintain clean, fresh water.
Common Types With Water Filters
Many Kenmore refrigerators have built-in water filters. These often appear in side-by-side or French door models. The filter usually sits inside the fridge compartment. You may find it in the upper right corner or near the bottom grille. Some filters are inside the back wall. The filter cartridge needs regular changing to keep water pure.
Models Without Built-in Filters
Not all Kenmore refrigerators include water filters. Some basic or older models skip this feature. These units often rely on external filtration or bottled water. Without a built-in filter, there is no cartridge to replace. Users must use separate water filters or pitchers. Always check your model’s manual for specific details.
Filter Locations
Kenmore refrigerators have water filters placed in easy-to-reach spots. These filters clean the water and ice, making them safe and fresh. Knowing the exact location helps with quick replacement and maintenance.
Inside The Refrigerator Compartment
Many Kenmore models place the filter inside the fridge. It is usually in the upper right or left corner. You can find it near the top shelf or behind a small door. This spot makes it easy to reach without bending down.
Base Grille Or Toe Kick Area
Some models have the filter in the base grille. It is the vent area at the bottom front. Look below the fridge door. This location keeps the filter hidden but accessible. You can twist and pull the filter out from here.
Back Of The Refrigerator
In rare cases, the filter sits at the back. It is near the water line connection. This spot might need moving the fridge from the wall. Be careful when handling the filter in this area. It connects directly to the water supply.
Identifying The Water Filter
Finding the water filter on a Kenmore refrigerator can be simple. Knowing what it looks like helps you spot it fast. The filter cleans water and ice before you use them. It needs to be changed regularly for fresh water.
Appearance And Size
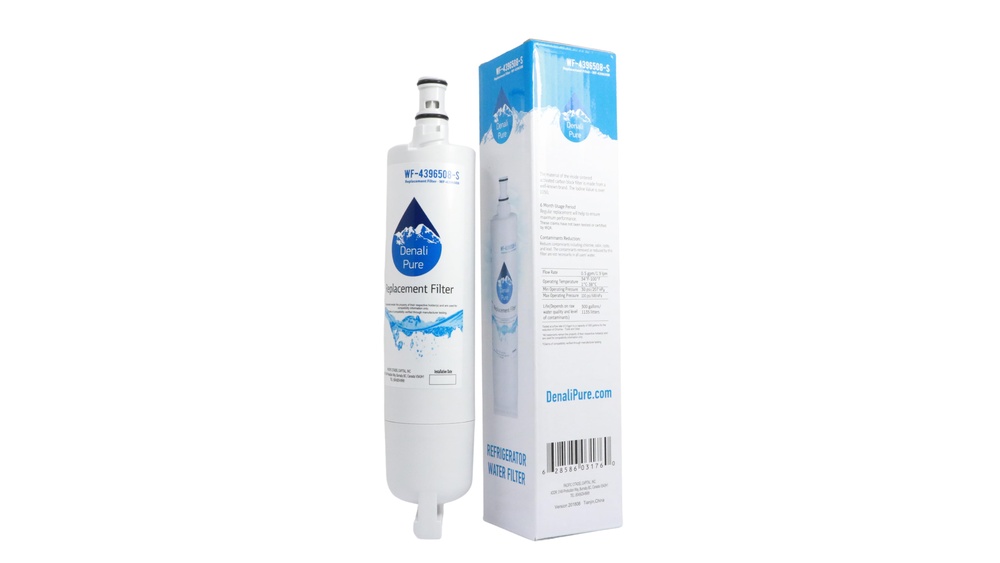
The water filter is usually white or light gray. It has a small, round shape, about the size of a soda can. Some filters have labels or brand names on them. The filter fits snugly inside the fridge or at the base.
Its compact size helps it fit into tight spaces. You can often see it in the upper right or bottom front area inside the fridge. Sometimes, it hides behind a small cover or panel.
Filter Cartridge Vs. Housing
The filter cartridge is the replaceable part that removes impurities. It looks like a small cylinder and slides in and out easily. The cartridge holds the filtering material inside.
The housing is the fixed part inside the fridge. It holds the cartridge in place and connects to water lines. You do not need to remove the housing when changing the filter.
Knowing the difference helps when you replace the filter cartridge. Only the cartridge needs to be changed, not the housing. This keeps your fridge running well and your water clean.
Removing The Old Filter
Removing the old water filter from a Kenmore refrigerator is a simple task. It keeps your water clean and fresh. Changing the filter regularly helps maintain good water taste and quality. The process only takes a few minutes.
Steps To Twist And Pull Out
First, open the refrigerator door. Locate the filter inside, usually in the upper right corner or bottom grille. Hold the filter firmly. Turn the filter counterclockwise about a quarter turn. The filter will loosen from its slot. Gently pull the filter straight out. Be careful not to spill water. Set the old filter aside for disposal.
Precautions To Take
Turn off the water supply before removing the filter. Keep a towel nearby to catch any drips. Avoid using excessive force to prevent damage. Make sure your hands are dry to avoid slipping. Dispose of the old filter properly. Follow the manufacturer’s instructions for your specific model.
Installing A New Filter
Installing a new water filter in your Kenmore refrigerator is simple. It keeps your water clean and tasting fresh. Follow these steps carefully to fit the new filter correctly. This helps avoid leaks and ensures the best water quality.
Aligning And Inserting The Cartridge
Hold the new filter with the arrows facing outward. Match these arrows with the slots in the filter housing. Push the filter straight into the slot gently. Do not force it. Stop once it fits snugly inside.
Securing The Filter In Place
Turn the filter clockwise until it locks. You will feel it click or stop turning. This means the filter is secure. Do not over-tighten. Wipe any spilled water around the area. Your filter is now ready to use.
Filter Replacement Indicators
The water filter in a Kenmore refrigerator needs regular replacement. The fridge has special indicators to tell you when it is time to change the filter. These signals help keep your water clean and fresh. Understanding these indicators saves you from drinking bad water.
Filter Reset Button
After changing the water filter, press the filter reset button. This action clears the old filter alert. The button is usually on the control panel. It may light up or flash when the filter needs replacement. Pressing it resets the timer for the new filter.
Water Quality Alerts
The refrigerator may show alerts about water quality. These alerts warn you if the filter is clogged or old. The water might taste bad or flow slower. The alert helps protect your health by reminding you to replace the filter. Always check these alerts to keep water fresh and safe.
Troubleshooting Filter Issues
Water filter issues can disrupt your Kenmore refrigerator’s performance. Knowing how to fix common problems saves time and hassle. This guide helps with typical filter troubles.
Leaks And Drips
Leaks often come from a loose or damaged filter. Check if the filter is tightly installed. Remove and reinstall the filter to ensure a proper fit.
Inspect the O-ring on the filter. A cracked or missing O-ring causes water leaks. Replace the O-ring if you find damage.
Look for cracks in the filter housing. Cracks lead to drips and water loss. Replace the housing or contact a technician if damaged.
Water Flow Problems
Slow water flow usually means a clogged filter. Replace the filter every six months to avoid blockages. This keeps water fresh and flowing well.
Check the water supply line for kinks or bends. These reduce water pressure to the filter. Straighten or replace the line if needed.
Air trapped in the system can lower water flow. Run water through the dispenser for several minutes to clear air pockets.
Maintaining Water Filter Performance
Maintaining the water filter in your Kenmore refrigerator is important for clean and fresh water. A well-kept filter removes impurities and improves taste. Regular care helps your fridge work better and lasts longer. Follow simple steps to keep the filter performing well.
Recommended Replacement Frequency
Change the water filter every six months. This keeps the water safe and fresh. Some models may need faster replacement. Check your user manual for specific advice. Signs like slow water flow mean it’s time to replace.
Tips For Extending Filter Life
Use water gently to avoid strain on the filter. Avoid ice buildup near the filter area. Keep the fridge clean to prevent dirt reaching the filter. Store water bottles properly to reduce filter load. Regularly check the filter for cracks or damage.
Frequently Asked Questions
Where Is The Water Filter Located In Kenmore Refrigerators?
The water filter in Kenmore refrigerators is usually inside the fridge compartment. Look at the upper right or bottom grille area. Some models have it behind the base grille at the bottom front. Check your manual for the exact position.
How Do I Replace The Kenmore Refrigerator Water Filter?
To replace, first turn off the water supply. Twist the old filter counterclockwise to remove it. Insert the new filter and twist clockwise until secure. Flush water for a few minutes to clear air and impurities.
How Often Should I Change The Kenmore Water Filter?
Change your Kenmore water filter every six months or after filtering 300 gallons. Frequent replacement ensures clean, fresh water and prevents clogging. If taste or flow decreases, change it sooner for optimal performance.
What If My Kenmore Water Filter Is Leaking?
A leaking filter often means incorrect installation or a damaged O-ring. Remove and reinstall the filter firmly. If leaking persists, replace the filter or check for cracks in the filter housing.
Conclusion
Finding the water filter on your Kenmore refrigerator is simple. Most models place it inside the fridge or at the bottom grille. Changing the filter regularly keeps your water clean and tasting fresh. A clean filter also helps your fridge work well.
Check your user manual for exact filter location and replacement steps. Taking care of the filter saves time and money. Now, you can enjoy fresh, filtered water every day without trouble. Easy and important for healthy living.
Hasan Al Sarker is a Reverse Osmosis Specialist. He has worked for many years to ensure safe drinking water for all. His research paper has been published in several journals, including Issue, Medium, and Slideshare. He is recognized as a water doctor among specialists though he did not attend medical college.
Besides working as a researcher of reverse osmosis technology, he is also very fancy with the kitchen and cooking. His guides are reading thousands of people every day. As a head of content, he is responsible for all the published articles at RO System Reviews.
Are you noticing a strange taste or odor in your tap water? It might be time to change your home water filter.
Keeping your water filter fresh is essential for clean, healthy water every day. But if you’re unsure how to do it, don’t worry—this guide will walk you through each simple step. By the end, you’ll feel confident in maintaining your water filter, ensuring your family always drinks pure water.
Let’s get started and make your water safer now!
Signs To Replace Your Water Filter
Knowing when to replace your home water filter is key to clean, safe water. Filters trap dirt, chemicals, and other particles. Over time, they fill up and lose effectiveness. This can harm water quality and taste. Watch for clear signs your filter needs changing.
Reduced Water Flow
Slow water flow is a common sign of a clogged filter. As debris builds up, water struggles to pass through. You might notice weaker water pressure at taps or appliances. This means the filter is blocked and needs replacement to restore flow.
Unusual Taste Or Odor
Changes in water taste or smell signal a worn filter. Water may taste metallic, bitter, or strange. Sometimes it smells like chlorine or mold. These unpleasant changes mean the filter no longer removes contaminants well. Replace it to improve water quality.
Filter Lifespan Indicators
Many filters have a recommended lifespan or indicator. This can be a date, time frame, or usage volume. Check the manufacturer’s instructions for your filter model. Follow these guidelines to change the filter before performance drops. Staying ahead keeps your water fresh and clean.
Choosing The Right Filter
Choosing the right water filter is key to clean and safe water at home. The right filter removes harmful substances effectively. It also fits your home system perfectly. This section guides you through selecting a filter that meets your needs.
Types Of Home Water Filters
There are several types of water filters for home use. Carbon filters remove chlorine and bad taste. Reverse osmosis filters clean many contaminants. Sediment filters catch dirt and rust. Each type targets different impurities. Knowing these helps in picking the best one.
Matching Filter To Your System
Filters must fit your water system size and style. Some fit under the sink, others attach to taps. Check the filter size and connection type. Also, confirm water pressure limits. Proper match avoids leaks and poor water flow. Always read your system’s manual before buying.
Tools And Materials Needed
Changing a home water filter is a simple task. Having the right tools and materials makes the job easier. Prepare everything before you start. This saves time and avoids mistakes.
Basic Tools
You need a few basic tools. A filter wrench helps remove the old filter. A bucket catches water spills. A clean cloth wipes any drips. These tools keep your work neat and safe.
Replacement Filter
Use the correct replacement filter. Check your water system’s model number. Buy a filter that matches it exactly. This ensures clean water and proper fit.
Protective Gloves
Wear gloves to keep hands clean. Gloves protect from dirt and bacteria. Use disposable or reusable gloves. They also give a better grip on the filter.
Teflon Tape
Teflon tape seals the filter threads. It prevents leaks after installation. Wrap the tape around the threads tightly. This helps keep your water system leak-free.
Step-by-step Filter Replacement
Changing your home water filter is simple and helps keep water clean. Follow these clear steps to replace the filter safely and quickly. Each step ensures your water system works well and stays fresh.
Shutting Off Water Supply
Start by turning off the main water supply. This stops water flow and prevents spills. Look for the valve near your filter or main pipe. Turn it clockwise until it stops.
Removing The Old Filter
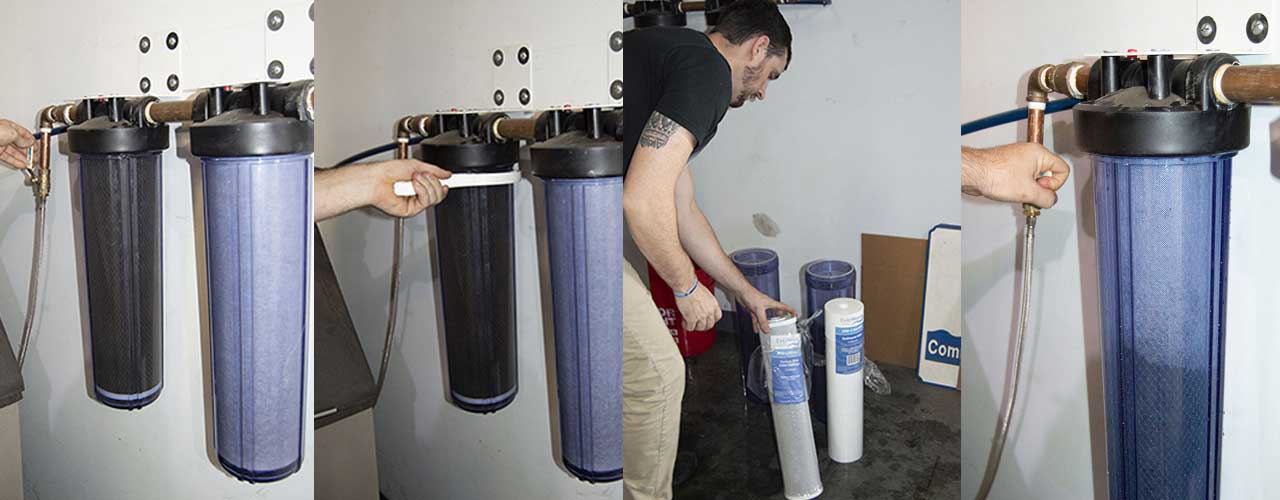
Next, remove the old filter cartridge. Twist or pull it out carefully. Use a cloth for a better grip if it is tight. Dispose of the old filter properly.
Installing The New Filter
Take the new filter out of its packaging. Align it with the filter housing. Push or twist it in place firmly. Make sure it fits snugly to avoid leaks.
Flushing The System
Turn the water supply back on slowly. Let water run through the new filter for a few minutes. This clears out air and loose particles. Check for leaks and fix if needed.
Maintaining Your Water Filter
Keeping your home water filter in good shape is key to clean water. Regular care helps your filter work well. It stops bad tastes and smells in your water. A well-maintained filter keeps your water safe and fresh.
Regular Cleaning Tips
Clean the filter housing every month. Use a soft cloth and mild soap. Avoid harsh chemicals that can damage parts. Rinse well before putting the filter back. Check for cracks or leaks while cleaning. Clean parts help stop blockages and keep water flowing.
Scheduling Timely Replacements
Replace the filter cartridge as the maker says. Most filters last three to six months. Write down the date of each change. Set reminders on your phone or calendar. Timely changes keep your water pure. Old filters can let dirt and germs through.
Troubleshooting Common Issues
Troubleshooting common issues during a home water filter change helps keep your water clean and safe. Some problems might appear even after a correct filter replacement. Knowing how to fix these issues saves time and effort. Here are two frequent problems and easy ways to solve them.
Leaks And Drips
Leaks and drips often happen after changing the filter. Check if the filter is tightened properly. A loose filter causes water to escape. Remove the filter and screw it back firmly.
Inspect the O-ring or gasket inside the filter housing. If it is damaged or missing, water will leak. Replace the O-ring with a new one to stop leaks. Clean the sealing area to remove dirt or debris. This ensures a tight fit and no drips.
Poor Water Quality After Change
Sometimes water tastes or smells bad after changing the filter. This can occur if the new filter is not flushed correctly. Run water through the filter for a few minutes to clear out any loose carbon or debris.
Check that the filter is the correct type for your system. Using the wrong filter may not clean water properly. Also, verify the filter’s expiration date. An expired filter cannot remove impurities effectively. Replace it with a fresh, compatible filter for better water quality.
Frequently Asked Questions
How Often Should I Change My Home Water Filter?
You should change your home water filter every 3 to 6 months. Frequency depends on water quality and usage. Regular changes ensure clean, safe water and prevent filter clogging.
What Tools Do I Need To Change A Water Filter?
Typically, you need a filter wrench, a bucket, and gloves. Some filters require no tools. Always check the manufacturer’s instructions before starting the replacement.
How Do I Know When The Water Filter Needs Changing?
Signs include reduced water flow, bad taste, or odor. Some filters have indicator lights or color changes. Regular checks help maintain water quality and filter efficiency.
Can I Change The Water Filter Myself Safely?
Yes, changing the filter is usually simple and safe. Turn off water supply and follow instructions carefully. If unsure, consult a professional for assistance.
Conclusion
Changing your home water filter keeps your water clean and safe. It takes only a few steps and little time. Regular changes help your filter work well and last longer. Clean water supports your health every day. Remember to check your filter’s instructions for the best results.
Simple care makes a big difference. Stay consistent and enjoy fresh water at home.
Hasan Al Sarker is a Reverse Osmosis Specialist. He has worked for many years to ensure safe drinking water for all. His research paper has been published in several journals, including Issue, Medium, and Slideshare. He is recognized as a water doctor among specialists though he did not attend medical college.
Besides working as a researcher of reverse osmosis technology, he is also very fancy with the kitchen and cooking. His guides are reading thousands of people every day. As a head of content, he is responsible for all the published articles at RO System Reviews.
You rely on your PUR water filter to keep your drinking water clean and fresh. But how do you know when it’s time to replace it?
Using a filter past its prime can affect taste and safety, while changing it too soon might waste money. You’ll discover exactly how long a PUR water filter lasts, signs that it’s time for a change, and tips to get the most out of your filter.
Keep reading to make sure every sip you take is pure and refreshing.
Pur Water Filter Basics
Understanding the basics of Pur water filters helps you know how they work and how long they last. These filters clean your tap water, making it safer and better tasting. Different models serve different needs. Knowing the types and how they function helps you choose the right one.
Types Of Pur Water Filters
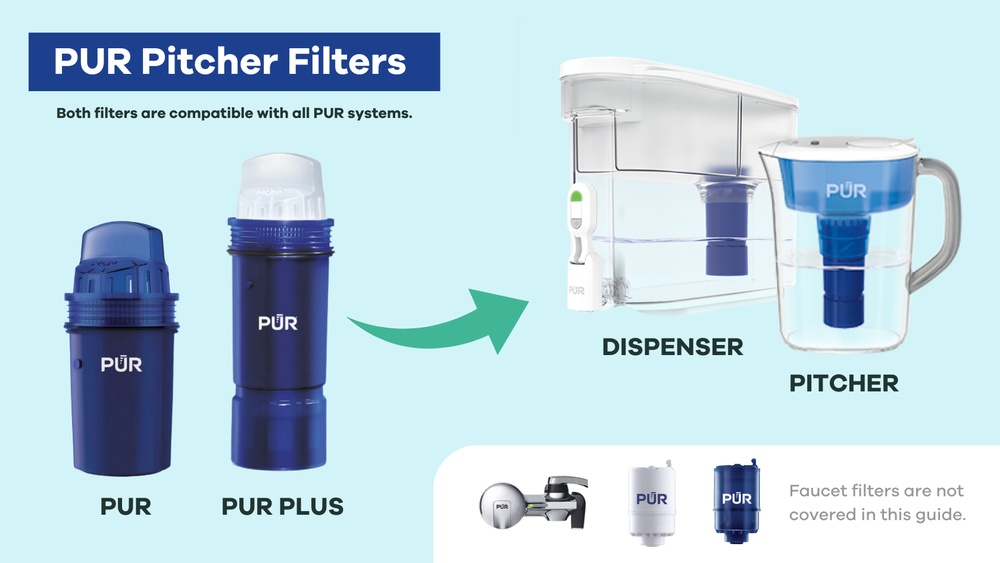
Pur offers several filter types. Some attach directly to your faucet. Others fit inside pitchers for easy use. There are also filters designed for refrigerators. Each type targets different water issues like chlorine, lead, or sediment. The choice depends on your water source and personal needs.
Key Components And Functions
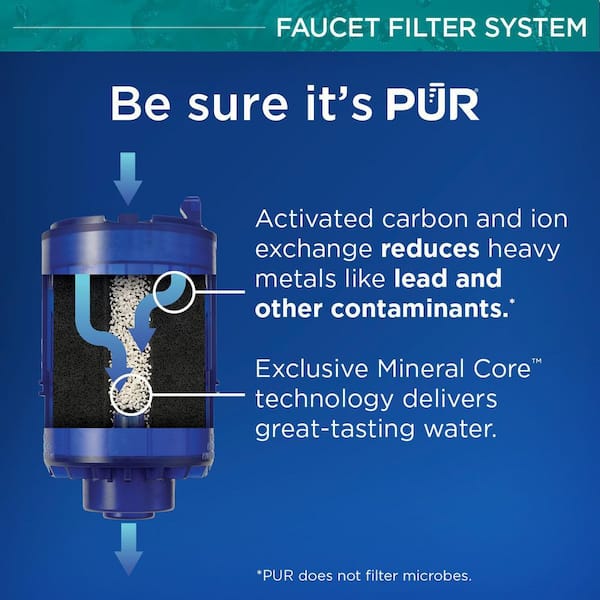
Pur filters use activated carbon to trap impurities. This carbon absorbs chemicals and bad tastes. Some filters also have ion exchange to reduce metals like lead. The filter housing holds these materials tightly. Water flows through the filter slowly to clean well. This process makes your water safer and tastier.
Factors Affecting Filter Lifespan
The lifespan of a PUR water filter depends on several factors. These factors affect how long the filter can clean your water effectively. Knowing these can help you get the best use from your filter. It also helps you understand when to replace it for safe drinking water.
Water Quality And Usage
Water quality plays a big role in filter life. Hard water or water with many impurities can clog the filter faster. The more contaminants, the shorter the filter lasts. How often you use the filter also matters. Using it more means it will wear out quicker. Less use can extend its lifespan.
Filter Model Differences
Different PUR filter models last for different times. Some models have higher capacity and can filter more water. Others are designed for specific types of contaminants. Always check the filter’s specifications for lifespan details. Choosing the right model for your needs helps maximize filter life.
Maintenance And Care
Proper care keeps your filter working longer. Regular cleaning of the filter housing can prevent blockages. Avoid letting the filter dry out, as this can damage it. Replace the filter on time to avoid bacteria build-up. Good care means safer and cleaner water for longer.
Typical Lifespan Expectations
Understanding how long a PUR water filter lasts helps keep water clean and safe. Filters remove dirt, chemicals, and bad tastes. Over time, filters get full and less effective. Knowing typical lifespan expectations helps plan replacements and maintain water quality.
Standard Filter Duration
Most PUR filters last about 40 gallons or two months. This depends on daily water use and water quality. Using more water or dirtier water can shorten filter life. Changing filters on time ensures fresh and safe water.
Extended Use Filters
Some PUR filters have longer lifespans. These can clean up to 100 gallons or last three months. They work well for larger families or heavier water use. Still, check the filter guide to avoid using it too long.
Signs It’s Time To Replace
Water tastes strange or smells bad. Flow slows down noticeably. Filter indicator shows replacement is needed. These signs mean the filter no longer cleans well. Replace it promptly to keep water safe and fresh.
How To Monitor Filter Performance
Knowing how well your Pur water filter works is important. It helps you decide when to replace it. Monitoring filter performance keeps your water clean and safe. Simple checks can tell you if the filter needs changing. You do not need special skills or tools for this.
Indicators On Pur Devices
Many Pur filters have built-in indicators. These lights or signals show filter status. A green light means the filter is good. A yellow or red light warns it is time to change. Some models count the gallons filtered. This count helps track filter life. Check your device manual for exact signals. Follow these signs to avoid using an old filter.
Testing Water Quality At Home
Home water test kits can measure quality easily. These kits test for chlorine, lead, and bacteria. Use them to check filtered water regularly. If test results worsen, replace the filter soon. Testing ensures your water stays fresh and healthy. Kits are affordable and simple to use. Test strips give quick results without special tools.
Replacing And Recycling Filters
Replacing and recycling your PUR water filter is important for clean water and the environment. Changing filters on time keeps your water pure and fresh. Proper disposal helps reduce waste and protect nature.
Step-by-step Replacement Guide
First, remove the old filter from your water pitcher or faucet. Turn the filter counterclockwise to unlock it. Throw away the used filter in the trash if no recycling option exists.
Next, take the new filter out of the package. Remove any plastic covers or seals. Insert the new filter by aligning it with the slot.
Turn the filter clockwise until it locks securely in place. Run cold water through the new filter for a few minutes. This cleans the filter and prepares it for use.
Reset any filter change indicators on your device. Note the date to remind yourself when the next change is due.
Eco-friendly Disposal Options
Many PUR filters can be recycled through special programs. Check if your local recycling center accepts water filters. Some stores offer drop-off points for used filters.
PUR runs a recycling program that accepts old filters by mail. Visit their website for details on how to send your filters. This keeps plastic and metal parts out of landfills.
Recycling filters helps save resources and reduces pollution. Always separate any cardboard or plastic packaging for recycling too.
Maximizing Filter Longevity
Maximizing the life of your PUR water filter helps save money and ensures clean water. Proper care keeps the filter working well longer. Simple steps can make a big difference in how long the filter lasts.
Proper Storage Tips
Store your filter in a cool, dry place. Avoid direct sunlight or heat sources. Keep it away from dust and dirt. Always keep the filter sealed until use. Do not let the filter freeze. Store it upright to prevent damage.
Regular Cleaning Practices
Clean the filter housing regularly with warm water. Use a soft cloth to wipe away dirt. Avoid strong chemicals or soaps. Rinse the filter under cold water before installation. Replace the filter as recommended by the manufacturer. Regular cleaning stops buildup that can block water flow.
Common Issues And Troubleshooting
Pur water filters provide clean drinking water, but issues can arise over time. Knowing common problems helps you fix them quickly. This keeps your filter working well and your water safe.
Reduced Water Flow
Water may flow slower if the filter clogs. Dirt and particles block the filter’s pores. This lowers the water pressure and flow rate. Check the filter’s age; old filters clog easily. Replace the filter if flow is very low. Also, check for kinks in the hose or tube. Clean the filter housing if dirt builds up there.
Unusual Taste Or Odor
Bad taste or smell can mean the filter needs changing. Old filters lose their ability to remove impurities. Contaminants pass through and affect water taste. Sometimes, water sitting too long in the filter causes odors. Flush the filter with cold water before use. If the problem stays, replace the filter cartridge. Regular filter changes keep water tasting fresh and clean.
Frequently Asked Questions
How Often Should I Replace My Pur Water Filter?
You should replace your PUR water filter every 2 to 3 months. This ensures optimal filtration and water quality. Frequent replacement prevents clogging and maintains flow rate. Always check the manufacturer’s instructions for specific model guidelines.
What Factors Affect Pur Filter Lifespan?
Factors like water quality, usage frequency, and filter type impact lifespan. Hard water or heavy use may shorten filter life. Regular maintenance and timely replacement extend filter effectiveness and ensure safe drinking water.
How Do I Know When To Change My Pur Filter?
Signs include reduced water flow, bad taste, or odor. The filter indicator light on some models also signals replacement time. Regularly monitor these signs to maintain clean and safe water.
Can I Use A Pur Filter Longer Than Recommended?
Using a PUR filter beyond recommended time reduces effectiveness. Contaminants may build up, compromising water safety. It’s best to follow replacement guidelines for optimal health benefits.
Conclusion
A PUR water filter usually lasts about 2 to 3 months. This depends on how much water you use daily. Changing the filter on time keeps your water clean and safe. Old filters can let dirt and chemicals through. Pay attention to the taste and smell of your water.
If it changes, it may be time to replace the filter. Regular replacement helps your filter work well. Clean water is important for your health and taste. Keep track of your filter’s lifespan for best results.
Hasan Al Sarker is a Reverse Osmosis Specialist. He has worked for many years to ensure safe drinking water for all. His research paper has been published in several journals, including Issue, Medium, and Slideshare. He is recognized as a water doctor among specialists though he did not attend medical college.
Besides working as a researcher of reverse osmosis technology, he is also very fancy with the kitchen and cooking. His guides are reading thousands of people every day. As a head of content, he is responsible for all the published articles at RO System Reviews.
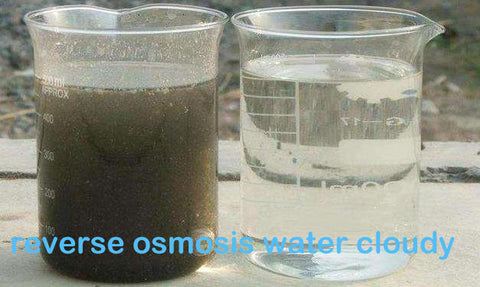
Have you ever poured yourself a glass of filtered water, only to notice it looks cloudy or murky? You might wonder, “Why is my filter water cloudy?” It’s a common problem that can make you question the safety and taste of the water you rely on every day.
But don’t worry—you’re not alone, and there’s a simple explanation behind this unsettling sight. Understanding the reasons for cloudy water will help you fix the issue quickly and enjoy clear, fresh water again. Keep reading to find out what’s causing your filter water to look cloudy and what you can do about it.
Causes Of Cloudy Filtered Water
Cloudy filtered water can cause concern. It often signals something affecting water quality. Understanding the common causes helps find the right fix. Several factors can make filtered water look cloudy or milky.
Air Bubbles In Water
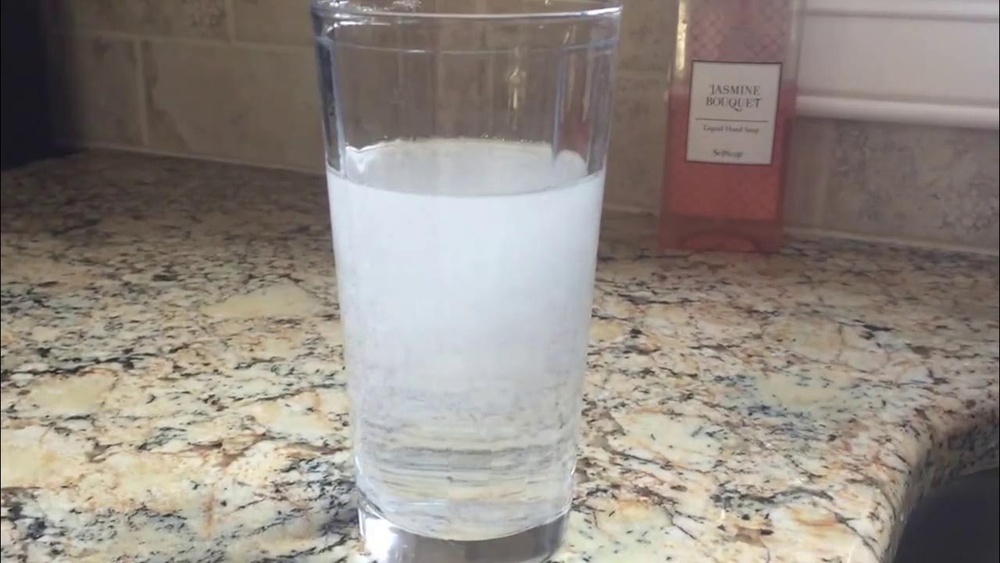
One common cause of cloudy water is tiny air bubbles. These bubbles form during water filtration or pressure changes. They make the water appear white or foggy. Usually, the bubbles disappear after a few minutes. This type of cloudiness is harmless and clear water returns quickly.
Sediment And Particles
Particles and sediment can cause water to look cloudy. Dirt, sand, or rust may enter the water supply. Filters may not catch all these particles at first. This issue often happens with new filters or old pipes. Flushing the system can help remove sediment buildup.
Mineral Deposits
Minerals like calcium and magnesium cause water hardness. Hard water may look cloudy due to these minerals. When minerals dissolve, they create a white, cloudy look. This type of cloudiness often settles at the bottom. Using a water softener can reduce mineral deposits.
Filter Cartridge Issues
Problems with the filter cartridge can cause cloudy water. A clogged or damaged cartridge cannot clean water properly. Old filters lose their ability to trap particles and minerals. Replacing the cartridge regularly keeps water clear and safe. Always check the filter’s condition to avoid cloudiness.
Identifying The Source Of Cloudiness
Cloudy filtered water can be confusing and concerning. Before fixing the issue, find where the cloudiness starts. This helps to choose the right solution. The source may be the water supply, the filter, or something else. Follow these steps to identify the cause clearly.
Checking Water Supply Quality
Start by checking the water from your main supply. Run a clear glass under the tap and watch closely. Is the water cloudy right from the start? Cloudy water here means the problem is before filtration. It could be minerals, air bubbles, or dirt. Knowing this helps decide if you need to treat the supply water.
Inspecting The Filter System
Next, look at your filter system carefully. Check if the filter is installed correctly and clean. A dirty or damaged filter can cause cloudy water. Also, see if the filter type matches your water needs. Filters that are old or the wrong kind might not clear the water properly.
Testing Water After Filtration
Finally, test the water after it passes through the filter. Use a clean glass to collect water from the filter output. If the water is clear here, the filter works well. If it stays cloudy, the filter or system may need repair or replacement. Testing after filtration confirms the filter’s role in water quality.
Quick Fixes For Cloudy Water
Cloudy water from your filter can be frustrating. It may look unsafe, but often, simple steps clear it up fast. These quick fixes help restore your water’s clarity and taste. They also keep your filter working well for longer.
Flushing The Filter
Flushing removes trapped air and loose particles in the filter. Start by running water through the system for several minutes. This clears out any leftover debris causing cloudiness. Flushing also helps the filter settle and work better.
Replacing The Filter Cartridge
Old cartridges can clog and reduce water quality. Check the filter’s lifespan and replace the cartridge if needed. New cartridges remove impurities more effectively. This simple step often stops cloudiness immediately.
Cleaning The Filter Housing
Dirt and buildup inside the housing affect water clarity. Turn off the water supply and open the filter case. Clean the housing with warm water and mild soap. Rinse well before reassembling. Clean housing means clearer water every time.
Preventive Measures To Keep Water Clear
Keeping your filtered water clear is important for health and taste. Cloudy water often means the filter needs care. Taking simple steps can stop cloudiness before it starts. These measures help your filter work well and keep water fresh.
Regular Filter Maintenance
Clean your filter regularly to avoid build-up. Replace cartridges as recommended by the maker. Check the system for leaks or cracks. This keeps dirt and particles from mixing with water. A well-maintained filter lasts longer and works better.
Using Quality Filter Cartridges
Choose cartridges that fit your filter model exactly. Cheap or wrong cartridges may not filter well. High-quality cartridges remove more impurities and reduce cloudiness. Always buy from trusted brands or suppliers. This ensures your water stays clear and safe.
Monitoring Water Source Changes
Water quality can change due to weather or local work. Watch for changes in taste, smell, or color. Test water if you notice anything unusual. Adjust filter type or maintenance based on water changes. Staying aware helps you keep water clear at all times.
When To Seek Professional Help
Knowing when to get expert help can save time and protect your water quality. Cloudy water in your filter may signal a deeper issue. Simple fixes might not solve persistent problems. Professionals have tools and knowledge to diagnose and repair complex issues. They ensure your water is safe and clear.
Persistent Cloudiness Issues
Cloudy water that does not clear after cleaning needs expert checks. It could mean filter damage or clogging. A professional can inspect and replace parts. They prevent health risks from poor water quality. Persistent cloudiness should never be ignored.
Complex Filtration Systems
Advanced water filters have many parts and settings. Troubleshooting these requires technical skills. Professionals understand system design and operation. They adjust or repair without causing damage. Trust experts for complicated filtration problems.
Water Quality Testing Services
Experts offer water tests to find hidden contaminants. They check for bacteria, minerals, and chemicals. Testing helps identify the cause of cloudiness. It guides proper treatment or filter upgrades. Use professional testing to keep water safe.
Frequently Asked Questions
Why Is My Filtered Water Cloudy?
Cloudy filtered water often contains tiny air bubbles trapped during filtration. It is usually harmless and clears up after a few minutes. Sometimes, minerals or filter issues can cause cloudiness, so check your filter’s condition.
Can A Dirty Filter Cause Cloudy Water?
Yes, a dirty or clogged filter can cause cloudy water. It may fail to remove impurities effectively. Regular filter replacement ensures clear, clean water and prevents cloudiness caused by buildup or contamination.
How Can I Fix Cloudy Filter Water?
To fix cloudy water, try replacing the filter cartridge first. Also, flush the system with clean water. If cloudiness persists, check for air leaks or mineral buildup and clean the filter housing.
Is Cloudy Filtered Water Safe To Drink?
Usually, cloudy filtered water is safe to drink if caused by air bubbles. However, if cloudiness is due to contaminants, avoid drinking it and replace the filter promptly for safety.
Conclusion
Cloudy water in your filter often signals trapped air or dirt. Cleaning or replacing the filter usually clears the water. Running water for a few minutes helps remove trapped air. Regular maintenance keeps your water clear and safe. Watch for changes in taste or smell too.
Clear water means healthy and clean drinking water. Taking simple steps solves most cloudiness problems quickly. Stay aware, and your filtered water will stay fresh.
Hasan Al Sarker is a Reverse Osmosis Specialist. He has worked for many years to ensure safe drinking water for all. His research paper has been published in several journals, including Issue, Medium, and Slideshare. He is recognized as a water doctor among specialists though he did not attend medical college.
Besides working as a researcher of reverse osmosis technology, he is also very fancy with the kitchen and cooking. His guides are reading thousands of people every day. As a head of content, he is responsible for all the published articles at RO System Reviews.
Are you struggling to find the right micron filter size for your well water? Choosing the correct filter can make a huge difference in the quality and safety of the water you use every day.
If your water tastes off, looks cloudy, or leaves residue, the problem might be the filter size. But how do you know which micron rating is best for your well? You’ll discover exactly what size micron filter you need to protect your home and family.
Keep reading to make sure your well water is clean, clear, and safe.
Micron Filters Basics
Micron filters help clean well water by removing tiny particles. These filters protect your home and improve water quality. Understanding how micron filters work is key to choosing the right one.
Micron filters come in different sizes and types. Each type serves a special purpose. Knowing the basics can save you money and keep your water safe.
What Micron Rating Means
Micron rating shows the size of particles a filter can remove. It is measured in microns. One micron equals one-millionth of a meter. Smaller micron numbers mean finer filtration.
For example, a 5-micron filter removes particles bigger than 5 microns. It lets smaller particles pass through. Lower micron ratings catch more dirt and debris.
Types Of Micron Filters
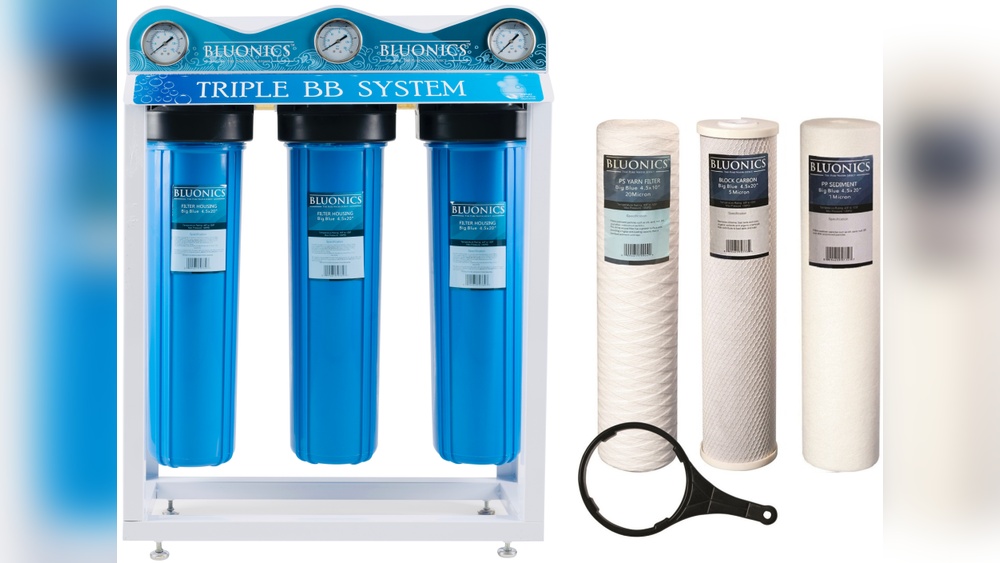
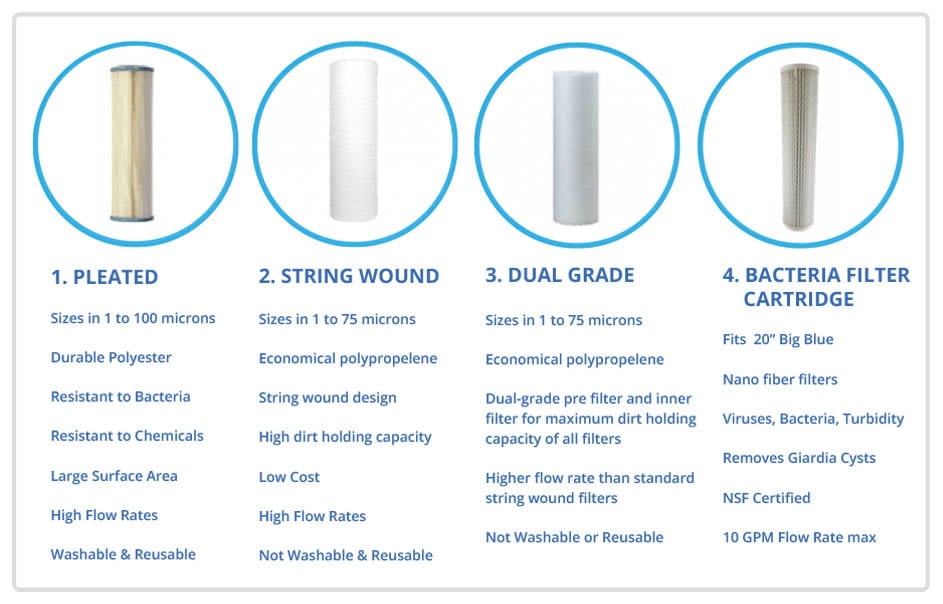
Several types of micron filters exist for well water. The most common are sediment filters and pleated filters. Sediment filters trap large particles like sand and rust.
Pleated filters have folded material for more surface area. They filter smaller particles and last longer. Carbon filters can also have micron ratings and remove chlorine and odors.
Choosing the right type depends on your water quality and needs.
Common Contaminants In Well Water
Well water often contains several types of contaminants. These affect water quality and safety. Knowing common contaminants helps choose the right micron filter size. Filters remove particles based on their size. Understanding what is in well water guides filter selection.
Sediment And Particulates
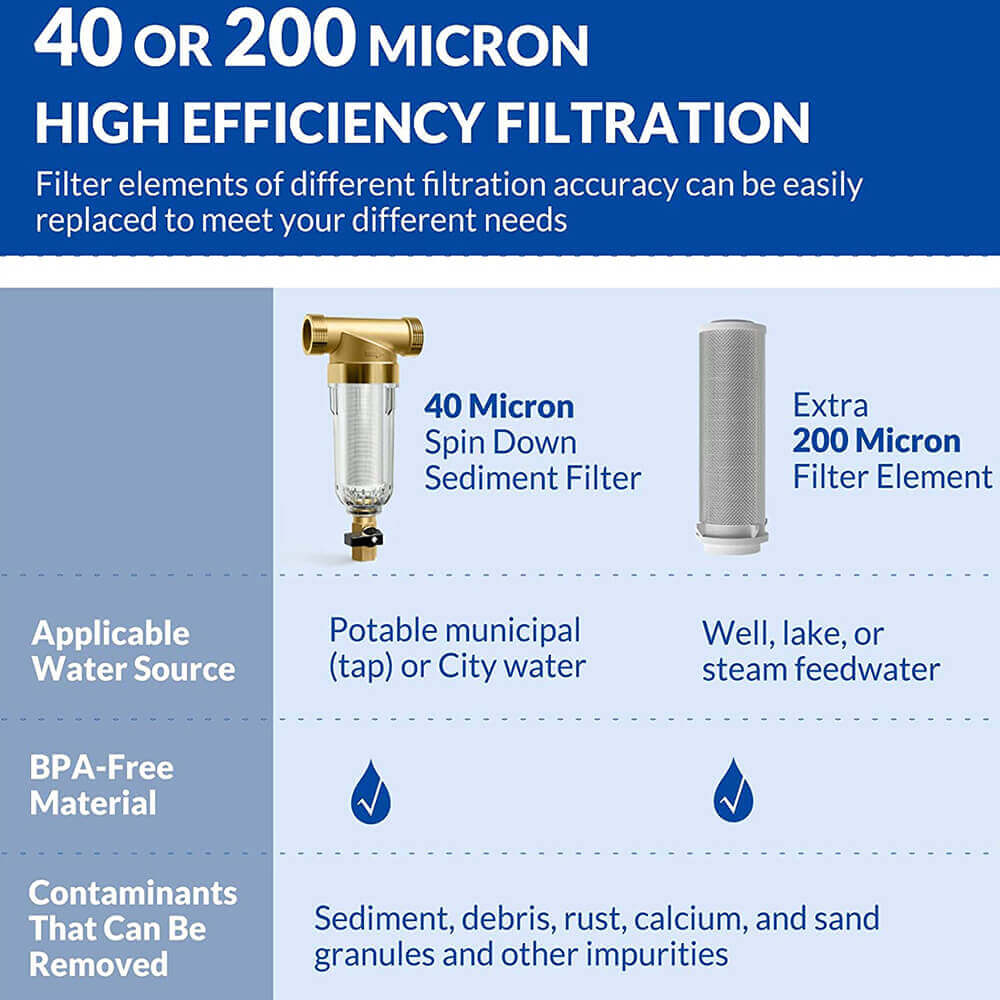
Sediment includes sand, dirt, and rust. These particles are visible to the eye. They can clog pipes and damage appliances. Sediment size varies but often ranges from 10 to 50 microns. A filter with 20 to 50 microns removes most sediment. Smaller particles require finer filters.
Bacteria And Microorganisms
Bacteria and microorganisms are tiny and invisible. They include harmful germs that cause illness. Filters need to be very fine to catch these. Micron sizes of 1 or less can remove bacteria. Some filters use special materials to kill germs.
Chemical Impurities
Chemicals like pesticides and fertilizers can enter well water. These are dissolved and not visible. Filters cannot remove all chemicals by size alone. Activated carbon filters help reduce many chemicals. Combining filter types often gives the best result.
Choosing The Right Micron Size
Choosing the right micron size for your well water filter is important. The micron size controls what particles the filter can remove. It affects water clarity, taste, and safety. Picking a proper size helps protect your plumbing and appliances from damage. It also ensures cleaner water for drinking and cooking.
Different well water sources need different micron sizes. Knowing the water condition guides your choice. Understanding the micron ratings helps you remove the right contaminants. This section explains key factors and common micron ratings for well water filters.
Factors Affecting Filter Size
Water quality varies by location and well depth. Some wells have large sand or dirt particles. Others contain tiny silt or clay. The type and size of particles affect the micron filter needed. Water testing shows what particles are present.
Flow rate matters too. Smaller micron filters slow down water flow. Larger micron filters allow faster flow but remove fewer particles. Your household water use helps decide the right balance. Pipe size and pump strength also influence filter size.
Micron Ratings For Sediment Removal
Sediment includes sand, dirt, and rust particles. These can damage appliances and clog pipes. Filters rated 20 to 50 microns remove larger particles effectively. For finer sediment, 5 to 10 micron filters work better. A 1 micron filter catches very small sediment but may reduce flow rate.
Choosing the right sediment filter size keeps water clear. It protects water heaters, faucets, and washing machines. Regular filter changes ensure continued sediment removal.
Micron Ratings For Bacteria Filtration
Bacteria are much smaller than sediment. They often require filters rated 1 micron or less. Some filters use special materials to trap bacteria. Others combine filtration with UV or chemical treatments.
Filters rated 0.5 to 1 micron reduce bacteria risks. They improve water safety for drinking and cooking. Always test water for bacteria before choosing these filters. Proper maintenance keeps bacterial filters effective.
Filter Material And Durability
Choosing the right filter material affects how well your well water filter works. It also impacts how long the filter lasts. Durability is key for a filter that keeps your water clean without frequent changes. Different materials offer different strengths and weaknesses. Understanding these helps you pick the best filter for your needs.
Polypropylene Vs. Pleated Filters
Polypropylene filters are made from a solid plastic material. They trap dirt by blocking particles in their tight fibers. These filters handle dirt well and are good for removing sediment. Polypropylene filters are usually less expensive and simple to use.
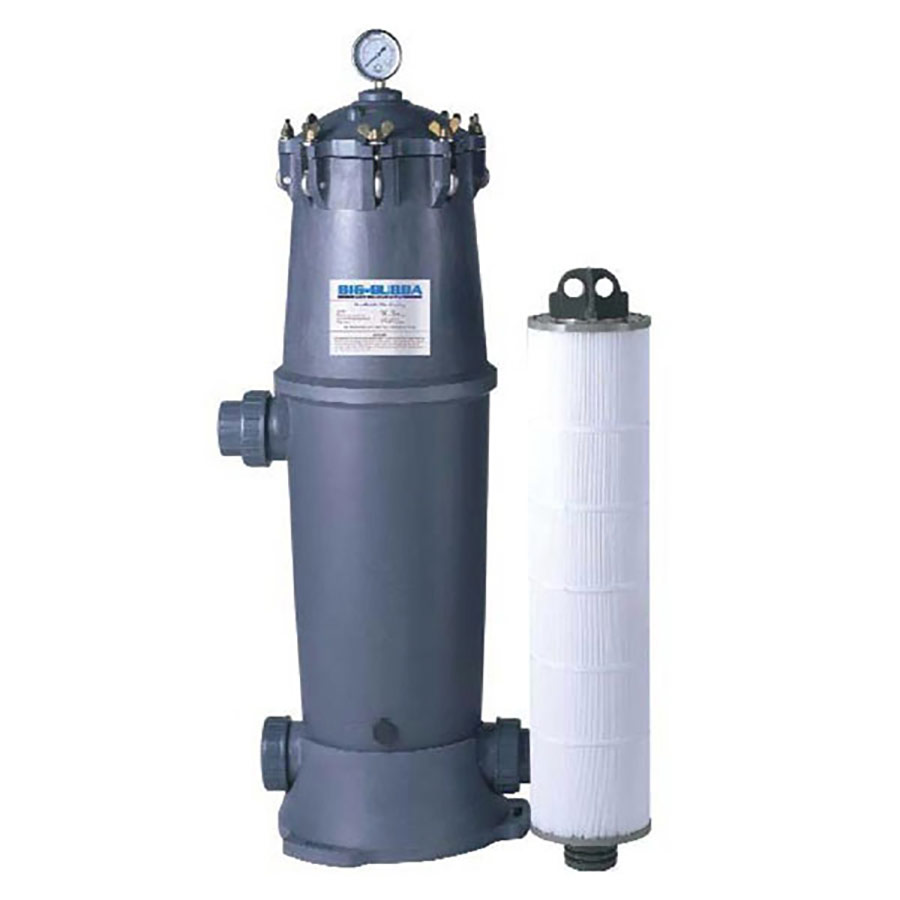
Pleated filters have a folded design that increases surface area. They catch more particles without clogging quickly. Pleated filters often last longer and clean water better. They work well for removing fine particles in well water.
Lifespan And Maintenance
Polypropylene filters need changing more often. Dirt builds up and reduces water flow faster. Changing them every 3 to 6 months is common. Pleated filters can last longer, sometimes up to a year. They need less frequent replacement, saving time and money.
Regular cleaning helps pleated filters perform better. Polypropylene filters are usually disposable. Keeping your filter clean means better water quality and longer filter life. Check your filter often to avoid problems.
Installation Tips For Well Water Filters
Installing a well water filter needs careful planning. This ensures the filter works well and lasts long. Proper setup helps keep your water clean and safe. Follow these tips for a smooth installation process.
Pre-filtration Needs
Check your water before installing the filter. Test for dirt, sand, or rust. These particles can clog your filter quickly. Use a sediment filter to catch large particles first. This step protects your main filter. It also improves water flow and filter life.
Placement And Flow Rate Considerations
Choose a spot with easy access for maintenance. The filter should be near the main water line. Avoid places with temperature extremes or direct sunlight. Keep the filter upright for best performance. Match the filter size with your water flow rate. A filter too small slows water and clogs fast. A larger filter handles more water and lasts longer.
Signs You Need To Change Your Filter
Knowing when to change your well water filter is important. A clogged filter can cause problems. It stops working well and might not clean your water properly. Watch for signs that tell you it’s time to replace the filter. These signs help keep your water safe and fresh.
Reduced Water Flow
Water flows slower than usual. You notice less water coming from your taps. This happens because the filter is full of dirt and debris. The filter blocks the water, making it hard to pass through. Changing the filter restores normal water flow and pressure.
Unusual Water Taste Or Odor
Your water tastes strange or smells bad. This can mean the filter no longer cleans the water well. Contaminants build up and affect the water’s smell and taste. Replacing the filter improves water quality and makes it safe to drink again.
Additional Water Treatment Options
Choosing the right micron filter is important for well water. Still, other treatments help make water safer and better. These options remove or reduce different problems. They work well with filters to improve water quality.
Uv Purifiers
UV purifiers use ultraviolet light to kill bacteria and viruses. This method does not add chemicals to water. It helps keep water clean and safe to drink. UV purifiers need electricity to work. They are good for water with germs or microbes. Using a UV purifier after a filter gives extra protection.
Water Softeners
Water softeners remove hard minerals like calcium and magnesium. Hard water can cause spots on dishes and damage pipes. Softeners replace these minerals with sodium or potassium. This makes water gentler on skin and appliances. Soft water also helps soap work better. Using a water softener with a micron filter improves water quality greatly.
Frequently Asked Questions
What Micron Filter Size Is Best For Well Water?
A 5-micron filter is commonly ideal for well water. It effectively removes sediment, rust, and dirt while preserving water flow. For finer contaminants, a 1-micron filter may be used, but it requires more frequent replacement.
How To Choose The Right Micron Filter For Well Water?
Test your water for sediment and particle size first. Choose a filter size that captures the largest contaminants. Typically, 5-micron filters suit most well water systems for balanced filtration and flow rate.
Can A 1-micron Filter Improve Well Water Quality?
Yes, a 1-micron filter removes smaller particles like cysts and bacteria. It improves water clarity and safety but may reduce flow rate. Regular maintenance is essential to avoid clogging.
Why Not Use Too Small Micron Filters For Well Water?
Using very small micron filters can clog quickly. This reduces water pressure and increases filter replacement frequency. Choose a size that balances filtration efficiency and flow rate.
Conclusion
Choosing the right micron filter size helps keep well water clean and safe. Smaller filters catch tiny particles but may slow water flow. Larger filters allow faster flow but let some debris pass through. Balance is key for good water quality and pressure.
Test your water to know what size works best. Regular filter changes keep your system running well. Clear, clean water starts with the right filter choice. Simple steps lead to better water every day.
Hasan Al Sarker is a Reverse Osmosis Specialist. He has worked for many years to ensure safe drinking water for all. His research paper has been published in several journals, including Issue, Medium, and Slideshare. He is recognized as a water doctor among specialists though he did not attend medical college.
Besides working as a researcher of reverse osmosis technology, he is also very fancy with the kitchen and cooking. His guides are reading thousands of people every day. As a head of content, he is responsible for all the published articles at RO System Reviews.