Are you thinking about improving your home’s water quality but wondering, “How much is a Culligan water filter system?” You’re not alone. Choosing the right water filter can feel overwhelming, especially when price is a big factor.
But what if you could get clear, fresh water without breaking the bank? This guide will break down the costs and help you see the real value behind Culligan’s popular water filtration options. Keep reading to find out exactly what you can expect to pay—and why it might be worth every penny for your health and peace of mind.
Culligan Water Filter Types
Culligan offers several types of water filter systems. Each type serves different needs and spaces. Knowing the options helps you choose the best fit for your home and budget.
Under Sink Filters
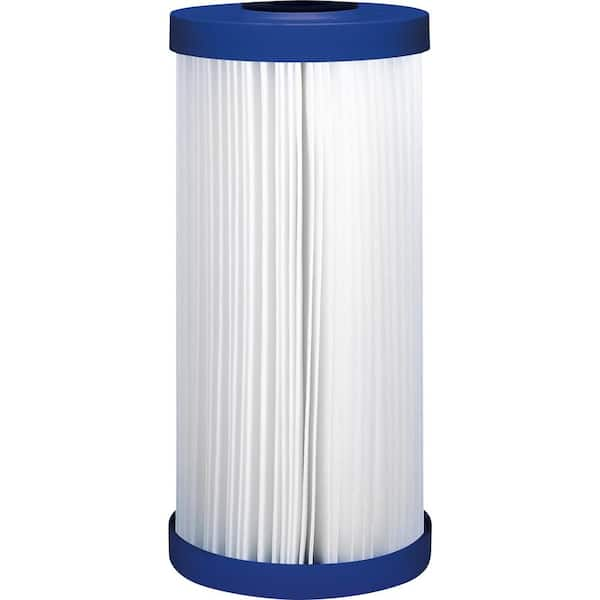
These filters install under your kitchen sink. They clean water right before you use it. They remove chlorine, bad tastes, and odors. These are compact and save space. Maintenance is simple with easy-to-change cartridges.
Whole House Systems
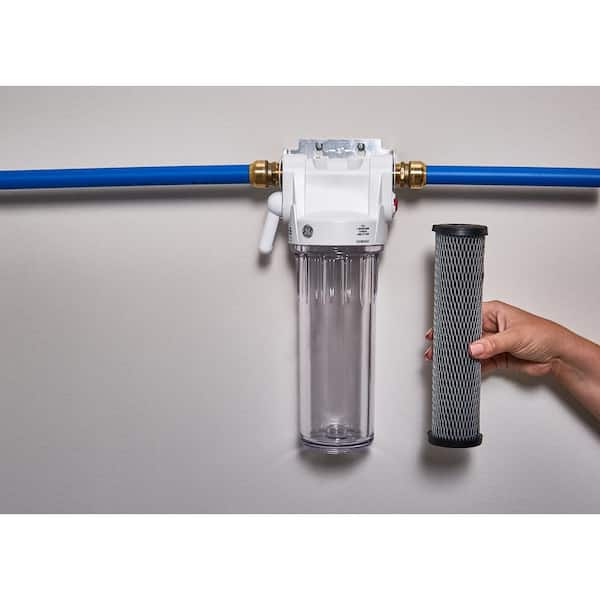
Whole house systems filter water at the main entry point. This means all taps and showers get clean water. They remove sediments, chlorine, and some chemicals. These systems protect pipes and appliances too. They require more space and a professional install.
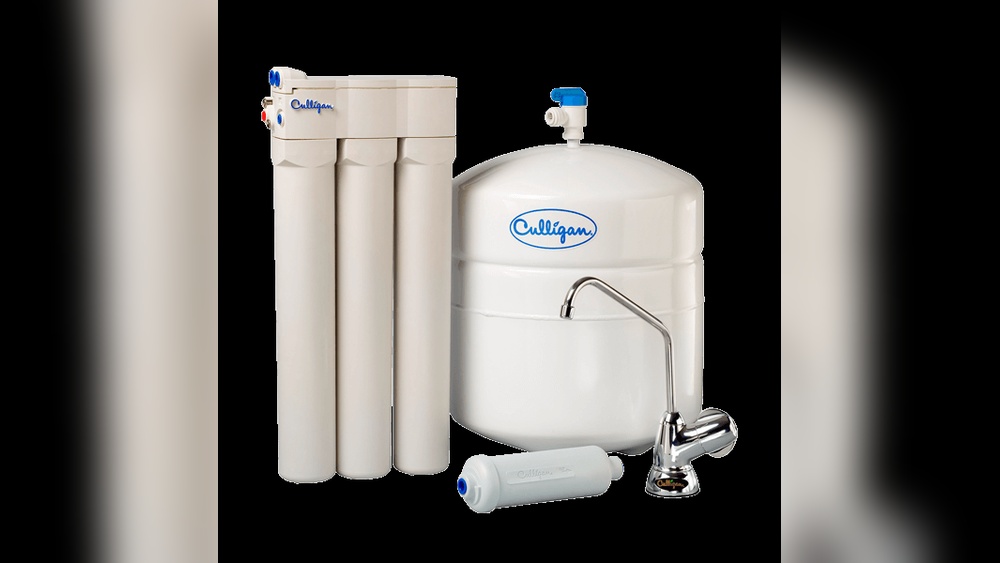
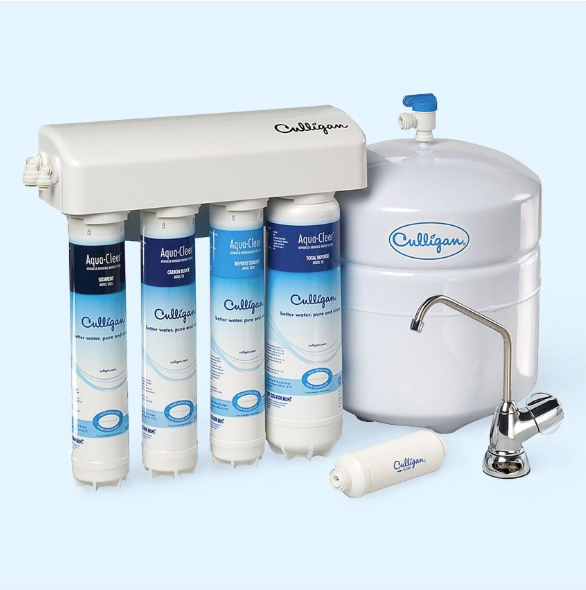
Reverse Osmosis Units
Reverse osmosis units use a fine membrane to filter water. They remove many impurities, including heavy metals and salts. These units work well under the sink. They provide very pure drinking water. Some models add minerals back for better taste.
Countertop Filters
Countertop filters sit on your kitchen counter. They connect directly to your faucet. These filters are easy to install and remove. They save space and are good for renters. They improve taste and reduce chlorine and particles.
Factors Affecting Culligan Prices
Several factors affect the price of a Culligan water filter system. Understanding these can help you choose the right system for your needs and budget. Prices vary based on the type of filter, installation fees, maintenance, and extra features.
Filter Type And Size
The type of filter you select impacts the cost significantly. Basic filters cost less, while advanced models with multiple stages are pricier. Larger systems made for whole-house use also cost more than small, under-sink filters. The size depends on your water usage and needs.
Installation Costs
Installation fees vary based on system complexity and location. Simple setups cost less to install. Systems that require plumbing changes or special fittings will increase the price. Professional installation is recommended to ensure proper function and safety.
Maintenance And Replacement
Regular maintenance keeps your system working well but adds to the total cost. Filter replacements are needed every few months or years, depending on the model. Replacement parts and service plans can add to ongoing expenses. Proper care extends the life of the system.
Additional Features
Some Culligan systems come with extra features like smart monitoring or water softening. These features increase the price but offer added convenience and benefits. Decide which features matter most to you to find a good balance between cost and value.
Price Range By System
Understanding the price range of Culligan water filter systems helps in choosing the right option. Different systems fit different needs and budgets. Prices vary based on system type and capacity. Below is a breakdown of costs by system type.
Under Sink Filter Costs
Under sink filters usually cost between $200 and $600. This price includes installation and basic maintenance. They offer clean water directly from your kitchen tap. These systems fit well in small spaces.
Whole House System Costs
Whole house systems range from $1,000 to $4,000. They filter water for the entire home. This ensures clean water from every tap and shower. Higher prices reflect larger capacity and advanced filters.
Reverse Osmosis Price Range
Reverse osmosis systems cost between $300 and $1,000. They remove many impurities for very pure water. These systems often need more maintenance. Prices depend on stages and filter quality.
Countertop Filter Pricing
Countertop filters usually cost from $150 to $400. They are easy to install and portable. Good for renters or small kitchens. These filters improve taste and remove common contaminants.
Comparing Culligan With Competitors
Choosing the right water filter system means comparing options carefully. Culligan stands out but faces strong competition. Each brand offers different features, prices, and benefits. Understanding these can help you pick the best system for your home.
Cost Vs Performance
Culligan water filters often cost more than many brands. This price reflects quality and advanced technology. Some competitors offer cheaper options but may lack long-term durability. Culligan systems deliver consistent water purity and better filtration. You pay extra for reliable performance and cleaner water.
Warranty And Support
Culligan provides solid warranties, usually covering parts and service for years. Customer support is available through phone and local dealers. Competitors may offer shorter warranties or limited support options. Culligan’s service network helps with installation and maintenance. Good support means less hassle and longer system life.
Customer Reviews
Many Culligan users praise its reliability and water taste improvement. Some reviews note the higher initial cost but value the quality. Competitors get mixed reviews, with some complaints about filter replacement costs. Overall, Culligan scores well for customer satisfaction and trust.
Ways To Save On Culligan Systems
Buying a Culligan water filter system is an important choice. Saving money makes this decision easier. Many ways exist to reduce the cost without losing quality. These tips can help you get a good deal and save cash.
Explore options before buying. Some methods cut the upfront price. Others lower long-term expenses. Understanding these ways helps you choose smartly.
Promotions And Discounts
Culligan often offers deals and special prices. Check their website for current promotions. Seasonal sales can lower system costs. Local dealers may provide exclusive discounts. Ask about bundle offers for extra savings. These offers reduce your initial payment.
Financing Options
Many Culligan dealers offer payment plans. Spreading cost over time makes purchases easier. Low-interest or no-interest plans are common. This option fits different budgets. Confirm terms clearly before agreeing. Financing helps manage expenses smoothly.
Diy Installation Tips
Installing the system yourself can save money. Read manuals and watch online videos. Basic plumbing skills are needed. Prepare tools and parts before starting. Take time to follow steps carefully. Avoiding professional fees cuts total cost.
Maintenance And Long-term Expenses
Owning a Culligan water filter system means thinking about maintenance and long-term costs. These expenses affect the total price you pay over time. Understanding them helps you plan your budget better. Regular upkeep keeps the system working well and water clean.
Filter Replacement Costs
Filters need changing to keep water pure. Culligan filters last about 3 to 6 months. The cost for each filter ranges from $30 to $60. Changing filters on time avoids damage and poor water quality. You can order filters online or through Culligan dealers.
Service Plans
Culligan offers service plans for maintenance. These plans cover filter changes and system checks. Plans cost between $100 and $300 yearly. Service plans save time and ensure expert care. They provide peace of mind for system health.
Energy Efficiency
Culligan systems use little electricity. They do not increase your power bill much. Efficient designs reduce waste and lower energy use. This keeps long-term costs low and system eco-friendly. Energy savings add value over the years.
Where To Buy Culligan Filters
Finding the right place to buy Culligan water filter systems can save time and money. There are several options to explore. Each offers different benefits depending on your needs and location.
Authorized Dealers
Authorized Culligan dealers sell genuine filters and systems. They provide expert advice and installation services. Buying from them ensures product authenticity and warranty coverage. Dealers often offer local support and maintenance plans.
Online Retailers
Many online stores stock Culligan water filters. Shopping online offers convenience and a wide selection. Prices may vary, and some sites offer discounts. Read customer reviews to choose reliable sellers. Check for return policies before purchasing.
Local Stores
Home improvement and hardware stores often carry Culligan filters. Visiting local stores allows you to see products in person. Store staff can help with product questions. Local shopping supports nearby businesses and may offer quick pickup.
Frequently Asked Questions
How Much Does A Culligan Water Filter System Cost?
Culligan water filter systems typically range from $300 to $3,000. The price depends on model, features, and installation fees. Higher-end systems with advanced filtration cost more. Installation charges vary by location and complexity.
Are There Ongoing Costs For Culligan Water Filters?
Yes, ongoing costs include filter replacements every 3-6 months. Maintenance and service plans may add to expenses. These costs ensure optimal performance and clean water quality.
Does Culligan Offer Financing Options?
Culligan often provides financing plans to ease upfront costs. Options vary by dealer and location. Financing helps customers manage payments over time conveniently.
What Factors Influence Culligan System Pricing?
Pricing depends on system type, filtration capacity, and installation. Additional features like softening or UV treatment increase cost. Service plans and maintenance agreements also affect total expense.
Conclusion
Culligan water filter systems offer clear benefits for clean water. Prices vary based on model and features. Basic systems cost less, while advanced ones are pricier. Consider your budget and water needs carefully. Clean water improves health and taste at home.
Investing in a good filter makes daily life better. Choose a system that fits your household size. Remember, quality water is worth the cost. Think about long-term savings from fewer bottled water buys. A Culligan system can be a smart choice for many families.
Hasan Al Sarker is a Reverse Osmosis Specialist. He has worked for many years to ensure safe drinking water for all. His research paper has been published in several journals, including Issue, Medium, and Slideshare. He is recognized as a water doctor among specialists though he did not attend medical college.
Besides working as a researcher of reverse osmosis technology, he is also very fancy with the kitchen and cooking. His guides are reading thousands of people every day. As a head of content, he is responsible for all the published articles at RO System Reviews.
Are you wondering where the water filter is on your Frigidaire refrigerator? Finding it quickly can save you time and hassle when it’s time to change or clean the filter.
Knowing exactly where to look means you can enjoy fresh, clean water without any delay. You’ll discover the exact spot of the water filter in your Frigidaire fridge and some simple tips to keep your water tasting great. Keep reading to make sure your fridge is working at its best!
Locating The Water Filter
Finding the water filter in your Frigidaire refrigerator is important for maintaining clean water. The filter removes impurities and keeps your drinking water fresh. Knowing where to find it makes replacement easier and faster.
Water filters in refrigerators can be in different spots. This section helps you find the exact location for your model. Simple tips guide you to spot the filter quickly.
Common Filter Locations
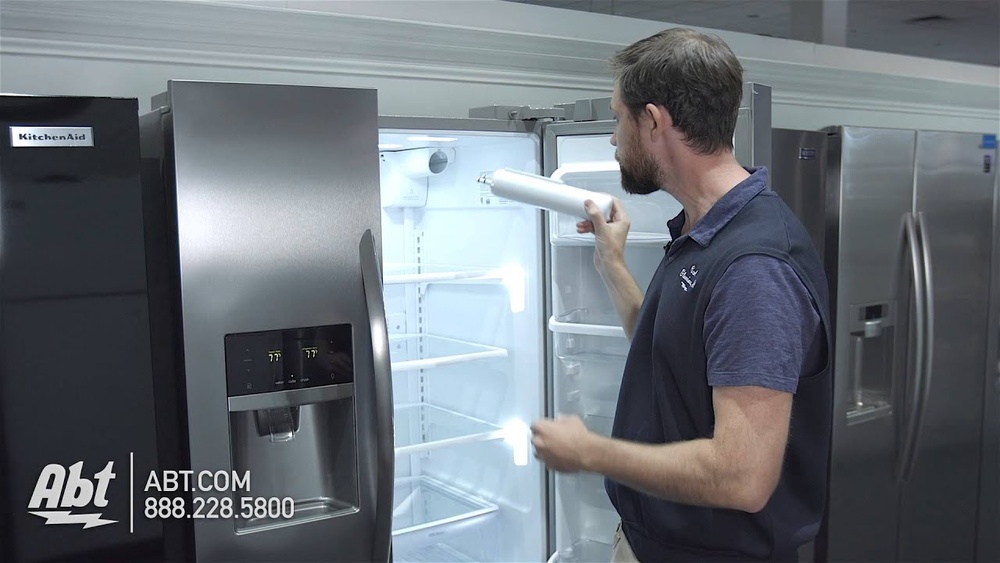
Most Frigidaire water filters sit in one of three places. Some models have the filter inside the fridge compartment, usually in the upper right corner. Others place it at the base, behind a grille near the kickplate. A few models use a filter near the water dispenser area. Look for a cylindrical part that twists out.
Checking The User Manual
Your refrigerator’s user manual is a helpful tool. It shows exact filter placement and instructions for removal. Manuals often include diagrams and pictures. If you lost your manual, check online with your fridge’s model number. This saves time and avoids guessing.
Visual Clues Inside The Refrigerator
Open the fridge and look carefully inside. The water filter looks like a small cartridge or cylinder. It usually has a twist or pull handle. Sometimes, a small door or cover hides the filter. Check near the upper walls or the back panel. Spotting these clues helps find the filter fast.
Types Of Water Filters
Frigidaire refrigerators use different types of water filters. These filters clean the water you drink and use for ice. Knowing the types helps you pick the right one. It also makes replacing the filter easier. Let’s explore the common types of Frigidaire water filters.
Standard Cartridge Filters
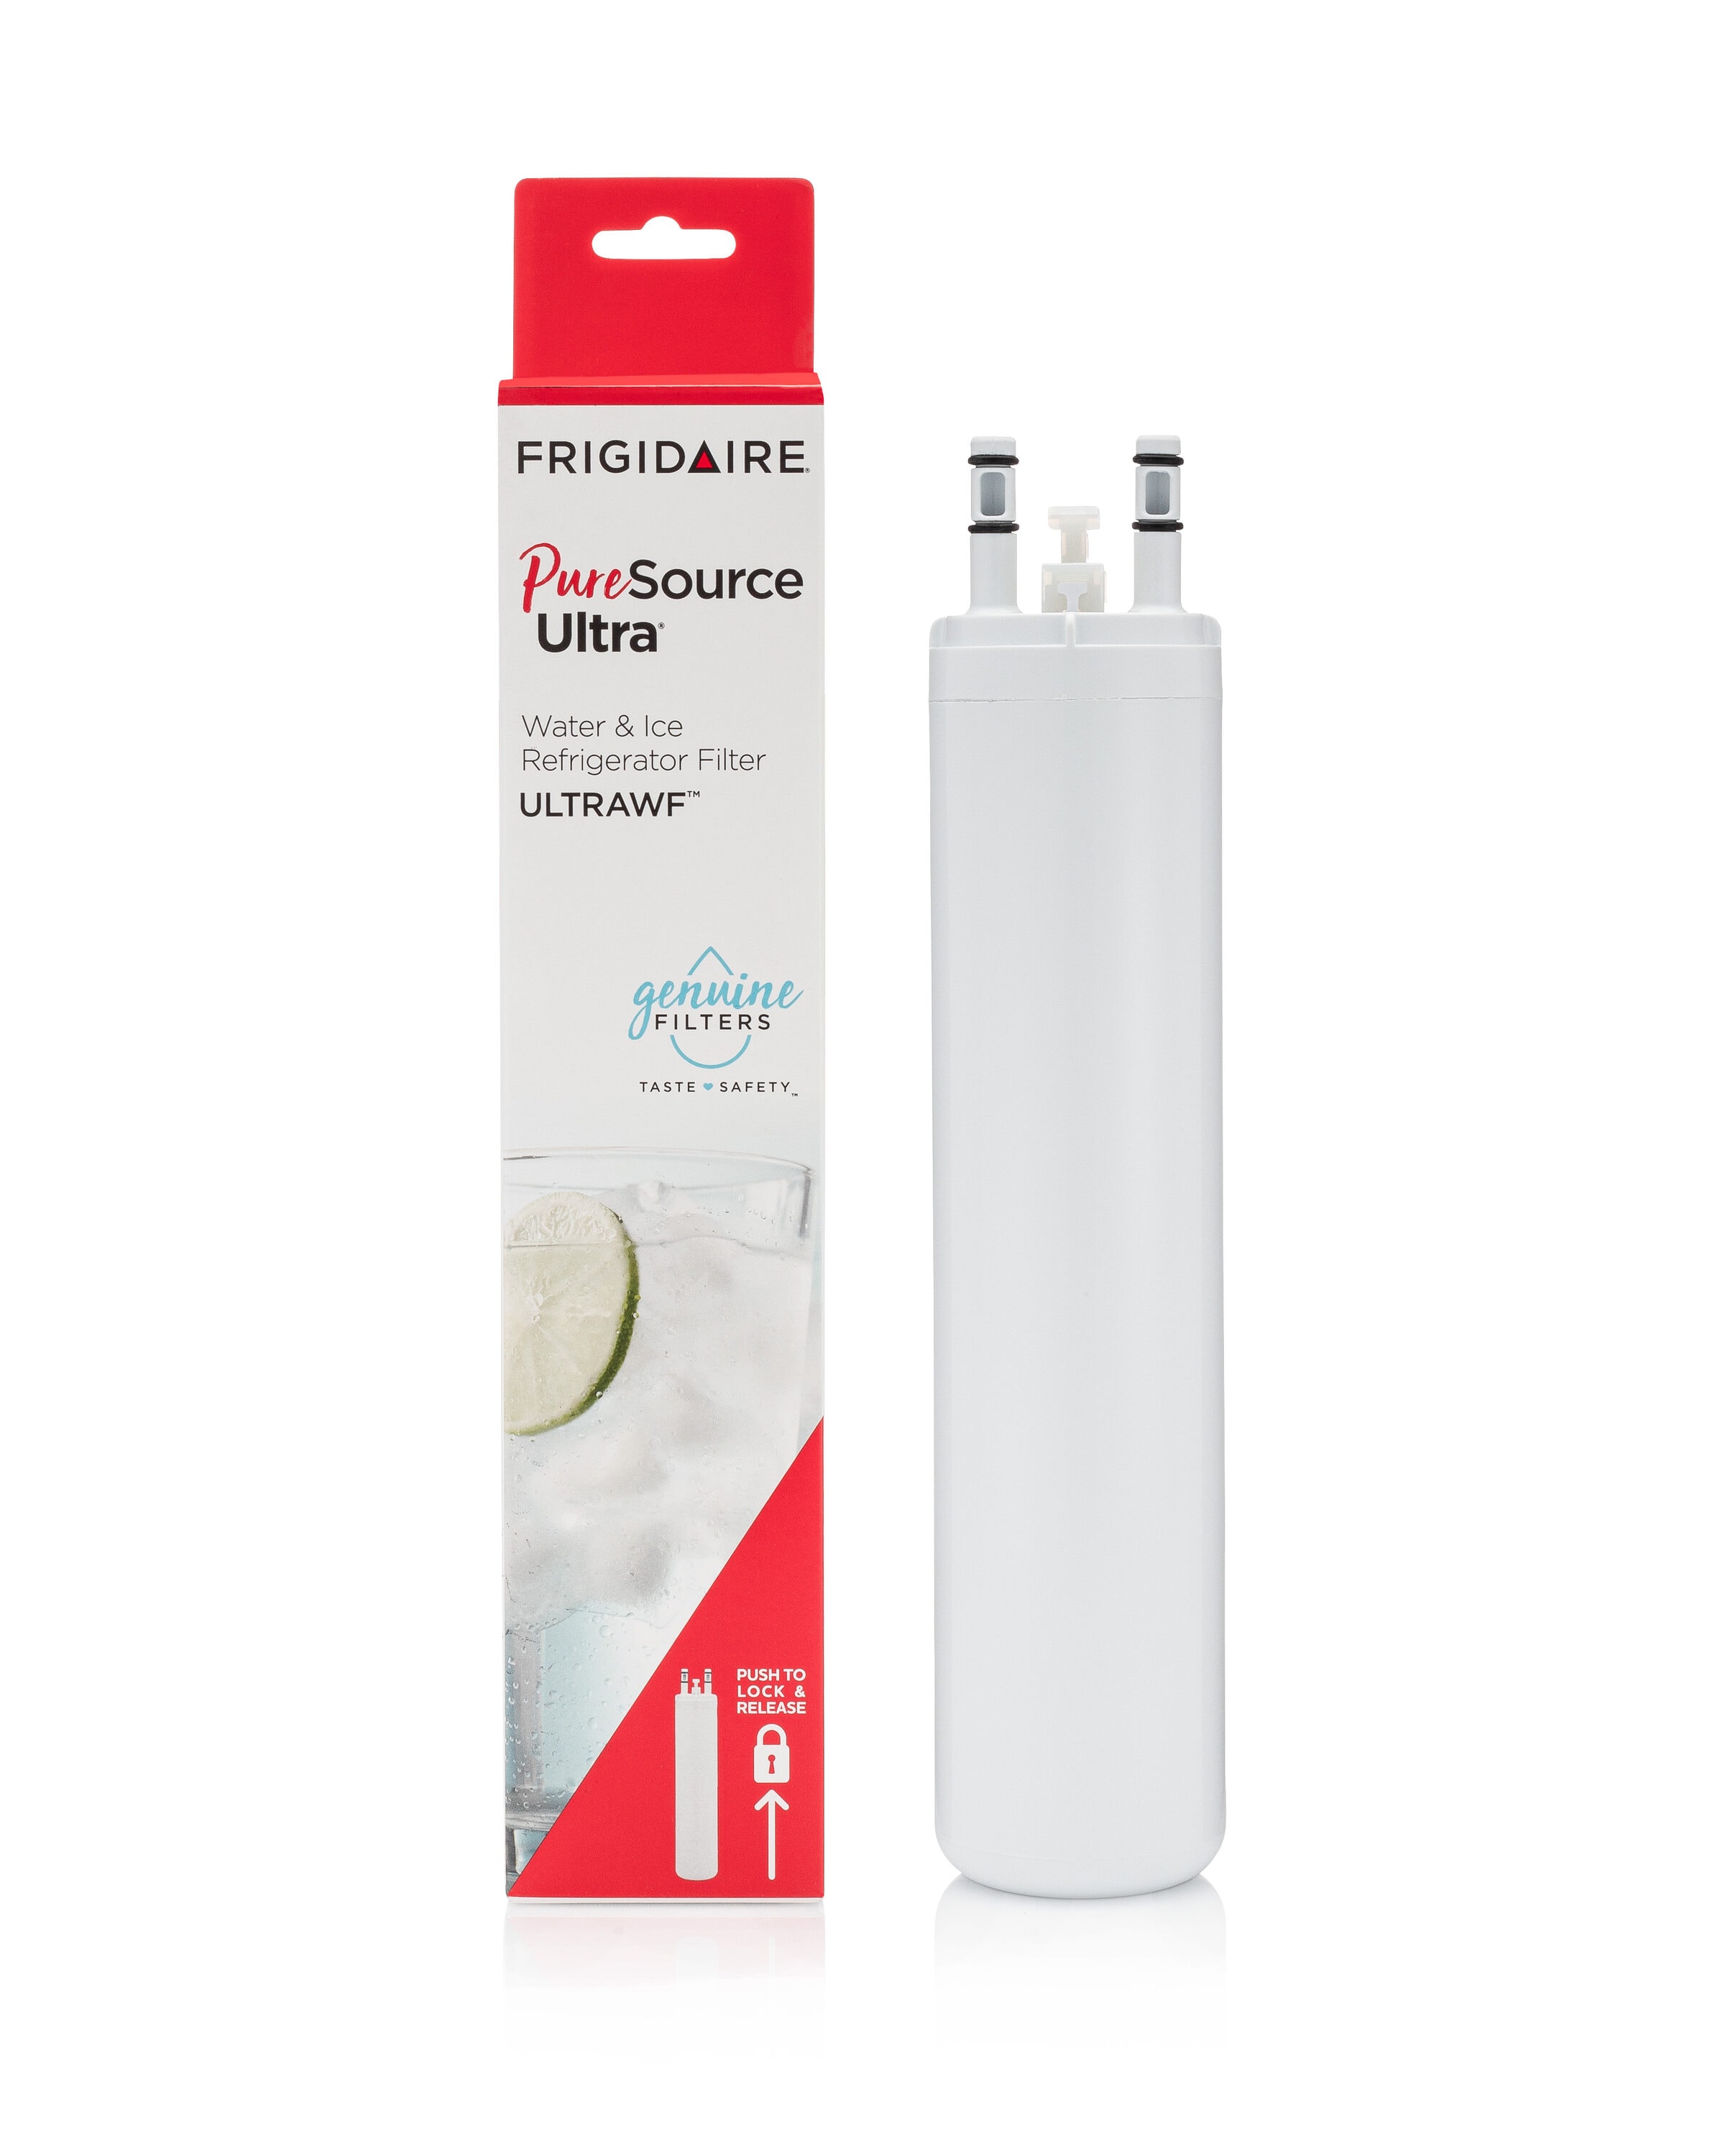
Standard cartridge filters are the most common type. They fit inside the fridge and filter water as it passes through. These filters remove chlorine, sediment, and bad tastes. They keep your water fresh and clear. Replacing them regularly is important for clean water.
Push-in Vs. Twist-in Filters
Frigidaire filters come in two styles: push-in and twist-in. Push-in filters snap into place easily. You just push the filter until it clicks. Twist-in filters need a twist to lock or unlock. Make sure you know your filter type before buying a replacement.
Filter Compatibility
Not all filters fit all Frigidaire models. Check your fridge model number first. Use filters designed for your specific fridge. Using the wrong filter can cause leaks or poor water quality. Always buy from trusted brands or the manufacturer.
Replacing The Water Filter
Replacing the water filter in your Frigidaire refrigerator keeps water clean and tastes fresh. Over time, filters get clogged with impurities. Changing the filter regularly helps avoid bad taste and low water flow. The process is simple and quick. Follow these steps to replace the filter safely and correctly.
Step-by-step Replacement
First, locate the water filter inside your fridge. It is usually in the upper right corner or at the base grille. Turn the old filter counterclockwise to remove it. Some models have a push button to release the filter. Take out the old filter carefully.
Remove the protective caps from the new filter. Insert the new filter into the slot. Turn it clockwise until it locks in place. Run water through the dispenser for a few minutes. This clears air and activates the new filter.
Resetting The Filter Indicator
Your fridge has a light that tells when to change the filter. After replacing the filter, you must reset this light. Press and hold the reset button on the control panel. Hold for about 3 seconds until the light turns off. This tells the fridge the filter is new.
Safety Tips
Always use the correct filter model for your fridge. Turn off the water supply before removing the filter. Avoid forcing the filter in or out to prevent damage. Wash hands before handling the new filter. Replace the filter every six months for best results.
Troubleshooting Filter Issues
Troubleshooting filter issues on a Frigidaire refrigerator can solve many common problems. The water filter plays a key role in keeping water clean and fresh. Problems with the filter affect water taste, flow, and more. Understanding how to fix these issues helps maintain your fridge’s performance.
Water Taste And Odor Problems
Bad taste or smell often means the filter needs changing. A clogged or old filter fails to remove impurities. Changing the filter every six months keeps water fresh. Rinse the new filter before installing to avoid odd tastes. Always use the right filter model for your fridge.
Leaks And Water Flow Issues
Leaks near the filter may come from loose installation. Check the filter is pushed in firmly and clicks into place. Cracks in the filter or housing cause leaks too. Low water flow can mean a blocked or expired filter. Replace the filter to restore normal flow and stop leaks.
Filter Indicator Not Resetting
The filter light may stay on after replacement. This happens if the reset step is missed. To reset, press and hold the reset button for three seconds. Some models use different reset methods; check your manual. Resetting the indicator helps track the next filter change.
Maintaining Your Water Filter
Maintaining your water filter in a Frigidaire refrigerator keeps your water clean and fresh. A well-kept filter helps your fridge work better and lasts longer. Regular care avoids bad taste and odor in your drinking water.
Recommended Replacement Frequency
Change the water filter every six months. This schedule keeps water pure and safe. Some filters may need more frequent changes if used a lot. Follow the fridge manual for exact timing.
Cleaning Tips
Clean the filter area regularly to stop dirt buildup. Use a soft cloth and mild soap around the filter housing. Avoid harsh chemicals that can damage the fridge parts. Rinse well after cleaning.
Signs You Need A New Filter
Look for slow water flow or strange taste. Cloudy water or odd smell also means a new filter is needed. If the filter light turns on, replace the filter soon. These signs show the filter is no longer working well.
Frequently Asked Questions
Where Is The Water Filter Located On Frigidaire Refrigerators?
The water filter is usually inside the fresh food compartment, either in the upper right corner or at the base. Some models have it behind the grille at the bottom front. Check your user manual for the exact location.
How Do I Access The Water Filter On My Frigidaire Fridge?
Open the fresh food door and look for a twist or push-in filter cartridge. Some filters slide out, while others twist to unlock. Use gentle pressure and follow the model’s instructions to avoid damage.
How Often Should I Replace The Frigidaire Water Filter?
Replace the water filter every six months or after filtering 200 gallons. Timely replacement ensures clean water and better taste. Your fridge may also have an indicator light to remind you.
Can I Use Any Water Filter For My Frigidaire Fridge?
No, use only Frigidaire-approved water filters or compatible models. Using the wrong filter may cause leaks or damage and void your warranty. Always check compatibility before purchase.
Conclusion
Finding the water filter on your Frigidaire refrigerator is simple. It usually sits inside the fridge or at the bottom grille. Changing it regularly keeps your water clean and fresh. A clean filter helps your fridge work well and your water taste better.
Remember to check your manual for the exact location. Now, you can easily replace the filter yourself. Clean water is just a filter change away.
Hasan Al Sarker is a Reverse Osmosis Specialist. He has worked for many years to ensure safe drinking water for all. His research paper has been published in several journals, including Issue, Medium, and Slideshare. He is recognized as a water doctor among specialists though he did not attend medical college.
Besides working as a researcher of reverse osmosis technology, he is also very fancy with the kitchen and cooking. His guides are reading thousands of people every day. As a head of content, he is responsible for all the published articles at RO System Reviews.
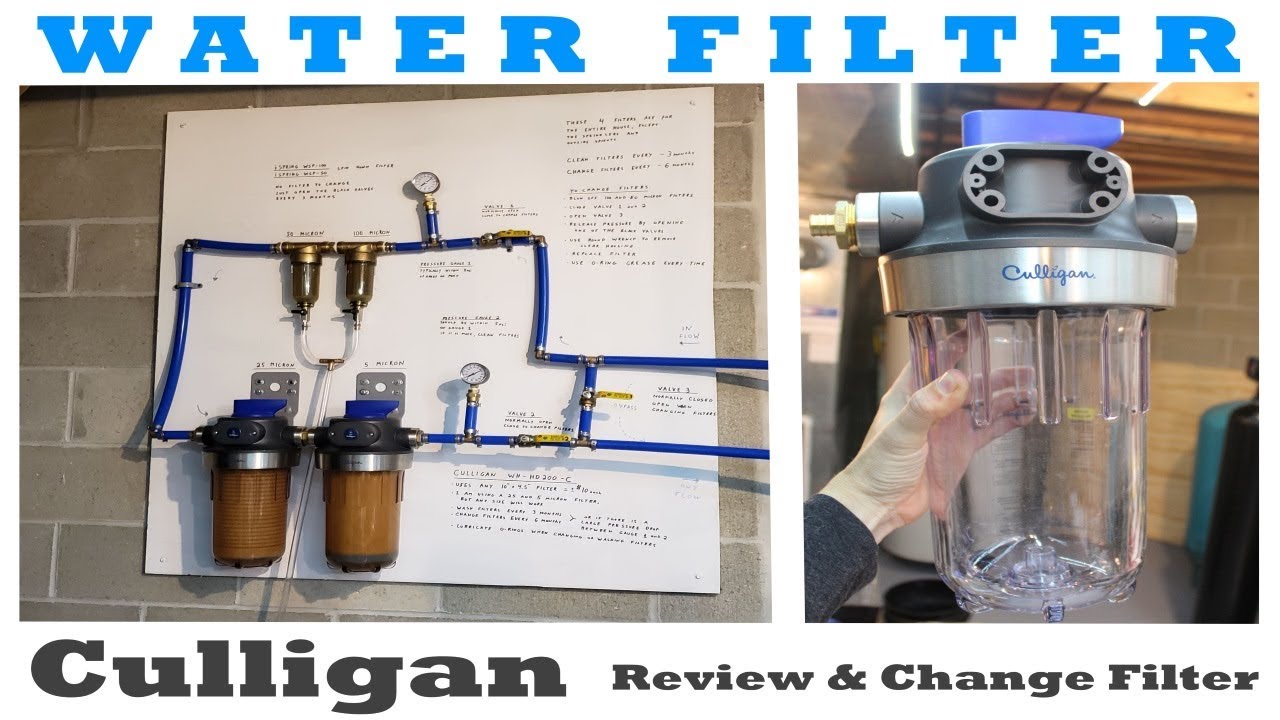
Is your Culligan water filter not working as well as it used to? Changing your water filter regularly is key to keeping your water clean and tasting great.
But if you’re unsure how to do it, don’t worry—you’re in the right place. This simple step-by-step guide will show you exactly how to change your Culligan water filter quickly and easily. By the end, you’ll have fresh, pure water flowing in no time.
Keep reading to learn how to take control of your water quality today!
Culligan Water Filter Basics
Culligan water filters help improve water quality in homes. They remove impurities and make water safer to drink. Understanding the basics of these filters helps in proper maintenance. This section covers the types of Culligan filters and when to replace them.
Types Of Culligan Filters
Culligan offers several types of water filters. Each type serves a different purpose. Some filters focus on removing chlorine and bad taste. Others target sediment, dirt, and rust particles. There are also filters designed to reduce lead and other harmful chemicals. Knowing your filter type helps in choosing the right replacement. It ensures your water stays clean and fresh.
When To Replace The Filter
Replacing the filter on time is important for water quality. Most Culligan filters need changing every 3 to 6 months. Usage and water quality affect this timing. Signs like bad taste or smell mean it’s time to replace. Some systems have indicators to show filter status. Regular replacement keeps water pure and system working well. Don’t wait too long to change the filter.
Tools And Materials Needed
Changing a Culligan water filter needs some basic tools and materials. Having these ready makes the task easier and faster. It helps to avoid interruptions and mistakes during the process.
Using the right tools also protects your filter system from damage. It keeps the water clean and safe. Here is a list of what you need for this job.
Replacement Culligan Filter Cartridge
The new filter cartridge matches your Culligan model. Choose the correct type for your water system. This ensures clean water and proper function.
Filter Wrench
A filter wrench helps loosen and tighten the filter housing. It fits around the filter canister for a firm grip. This tool prevents damage from excessive force.
Towel Or Small Bucket
A towel or small bucket catches water that spills out. It keeps the area dry and clean. This reduces mess and slip risks.
Gloves
Wear gloves to keep your hands clean and safe. Gloves protect against germs and sharp edges. They also help grip slippery parts better.
Clean Cloth
Use a clean cloth to wipe the filter housing. It removes dirt and debris before installing the new filter. Clean surfaces improve filter sealing.
Preparing For Filter Replacement
Preparing for a Culligan water filter replacement is simple but important. This step keeps your system safe and clean. It helps avoid water spills and damage during the change. Follow these steps carefully to get ready.
Turning Off The Water Supply
First, find the main water valve near your Culligan system. Turn it clockwise to close it. This stops water from flowing into the filter. Check if the water flow has stopped by opening a nearby faucet. If no water comes out, you are ready to continue.
Relieving Pressure From The System
Next, release pressure inside the water filter system. Open the faucet connected to the Culligan filter. Let the water run until it slows down or stops. This step prevents water from spraying out when you remove the filter. It also makes the process safer and cleaner.
Removing The Old Culligan Filter
Removing the old Culligan water filter is the first step in keeping your water clean. This process helps maintain the water system’s efficiency. Follow these simple steps to remove the old filter safely and quickly.
Locating The Filter Housing
Start by finding the filter housing. It is usually under the kitchen sink or near the water meter. The housing is a round or cylindrical container that holds the filter inside. Look for a plastic or metal case attached to the water pipe.
Opening The Filter Canister
Turn off the water supply before opening the canister. Use a filter wrench or your hands to twist the canister counterclockwise. Be careful not to spill water. Place a towel or bowl underneath to catch drips. Open the canister slowly to avoid sudden water flow.
Taking Out The Used Filter
Reach inside and pull out the old filter cartridge. It might be wet and dirty, so handle it carefully. Dispose of the old filter according to local rules. Clean the inside of the canister with a soft cloth before inserting a new filter.
Installing The New Culligan Filter
Installing the new Culligan filter is an important step in keeping your water clean. Follow each part carefully to ensure the filter works well. This process is simple and does not take much time.
Checking The New Filter
First, take the new filter out of its packaging. Look for any damage or dents on the filter. Make sure the model number matches your water system. Check the expiration date to ensure the filter is fresh. A good filter means better water quality.
Placing The Filter Correctly
Hold the filter with the label facing out. Align the filter with the housing slot. Push the filter straight in without forcing it. You should feel it click or fit snugly. Proper placement prevents leaks and ensures clean water.
Sealing The Filter Housing
Close the filter housing carefully. Turn the housing cap clockwise until tight. Do not over-tighten to avoid damage. Check for any gaps around the seal. A tight seal stops water from leaking and keeps the filter secure.
Restarting The Water System
Restarting the water system is a key step after changing your Culligan water filter. This step ensures clean water flows properly through your home again. It also helps avoid any damage or leaks that could happen if the system is not started right.
Take your time and follow each step carefully. This will help keep your water system safe and working well.
Turning On The Water Supply
Find the main water valve near your Culligan filter. Slowly turn the valve to open the water flow. Listen for any unusual sounds as water starts moving. Opening the valve too fast may cause pressure spikes. These spikes can damage your plumbing or filter system.
Wait a few moments for water to fill the filter housing. This lets your new filter work properly. If water does not flow, check if the valve is fully open. Sometimes valves need a gentle push to turn completely.
Checking For Leaks
Look closely at all filter connections and fittings. Use a dry cloth to spot any water drops or dampness. Leaks can waste water and lower system pressure. Tighten any loose fittings by hand, but avoid over-tightening. Over-tightening can crack the filter housing or pipes.
Run water through the system for several minutes. Watch again for any leaks that may appear under pressure. Early leak detection saves costly repairs later. If leaks persist, turn off the water supply and check the filter installation again.
Flushing The New Filter
Flushing the new Culligan water filter is a key step after installation. It removes loose carbon dust and cleans the filter. This process helps ensure fresh and clean water from the start. Skipping flushing can cause cloudy water or strange taste.
Why Flushing Is Important
Flushing clears out dust and particles trapped in the filter. New filters often have small carbon bits inside. These bits can make water look dirty or taste odd. Flushing also activates the filter media. This helps the filter work better and last longer.
How To Flush Properly
Start by turning on the cold water faucet. Let the water run through the new filter for about 5 minutes. Use a clean container to catch the water during flushing. Watch for clear water without cloudiness. Turn off the water and check for leaks. The filter is ready once the water runs clear and fresh.
Maintenance Tips For Culligan Filters
Keeping your Culligan water filter in good shape helps ensure clean, fresh water. Regular maintenance extends the filter’s life and keeps it working well. Simple steps can make a big difference in the water quality you enjoy every day.
Setting Reminders For Replacement
Mark the date when you install a new filter. Use a phone alarm or calendar app to set a reminder. Culligan filters usually need changing every three months. Timely replacement prevents clogging and keeps water pure. This small habit saves trouble later.
Regular System Checks
Check your Culligan system every few weeks. Look for leaks or unusual sounds. Clean around the filter area to avoid dust buildup. Check water flow; slow flow may mean a clogged filter. Early checks help catch problems before they grow.
Frequently Asked Questions
How Often Should I Change My Culligan Water Filter?
Culligan recommends changing your water filter every 3 to 6 months. Frequency depends on water quality and usage. Regular changes ensure clean, fresh water and prevent clogging. Always check your filter’s indicator for best results.
What Tools Do I Need To Change A Culligan Water Filter?
Most Culligan filters require no tools for replacement. Some models may need a filter wrench included in the package. Always read your specific filter manual to know if tools are necessary.
Can I Change The Culligan Filter Myself?
Yes, you can change the Culligan filter yourself. The process is simple and involves turning off water, removing the old filter, and installing the new one. Follow your filter’s manual for step-by-step instructions.
How Do I Dispose Of An Old Culligan Water Filter?
Dispose of old Culligan filters according to local recycling guidelines. Many components are recyclable. Avoid throwing filters in regular trash to reduce environmental impact.
Conclusion
Changing a Culligan water filter keeps your water clean and fresh. Regular changes help your system work well. The steps are simple and save you money. A clean filter protects your health every day. Take a few minutes to do this task right.
Clean water tastes better and feels safer. Stay on schedule to avoid any water issues. You can do this yourself without any hassle. Clear water is just a filter change away.
Hasan Al Sarker is a Reverse Osmosis Specialist. He has worked for many years to ensure safe drinking water for all. His research paper has been published in several journals, including Issue, Medium, and Slideshare. He is recognized as a water doctor among specialists though he did not attend medical college.
Besides working as a researcher of reverse osmosis technology, he is also very fancy with the kitchen and cooking. His guides are reading thousands of people every day. As a head of content, he is responsible for all the published articles at RO System Reviews.
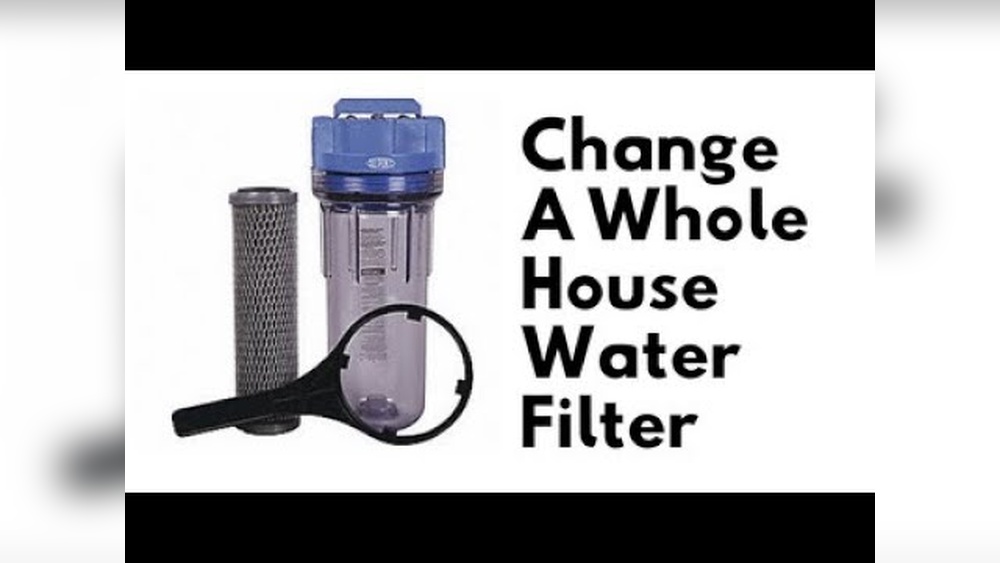
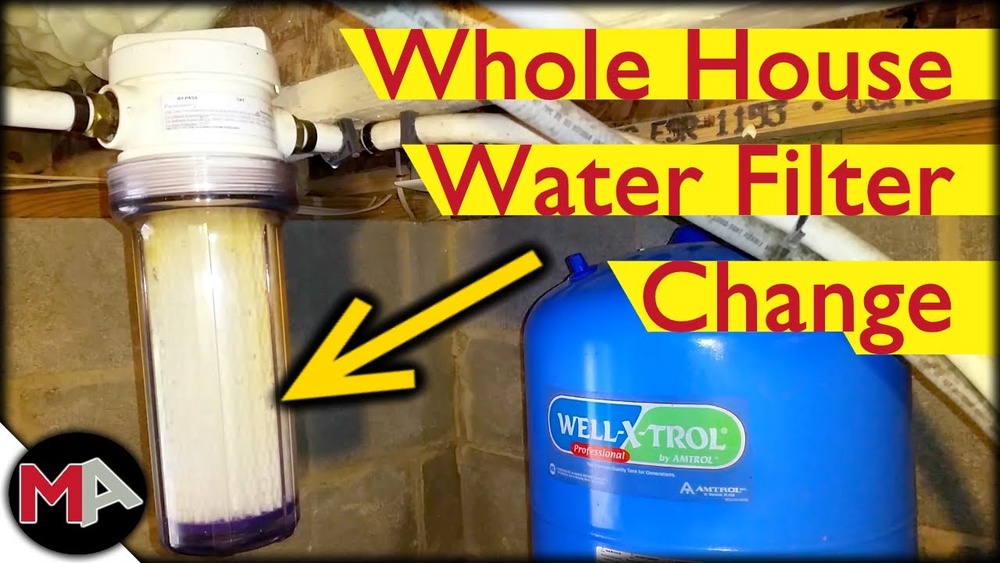
Are you wondering how to change your whole house water filter without hassle? You’re in the right place.
Clean water is essential for your family’s health, and a fresh filter makes all the difference. Changing the filter might seem tricky, but with the right steps, you can do it yourself quickly and confidently. Keep reading, and you’ll learn exactly what to do to keep your water pure and your home running smoothly.
Preparing For The Replacement
Preparing to replace a whole house water filter is an important first step. Proper preparation makes the process easier and safer. It helps avoid water spills and damage to your system. Follow these steps to get ready for the replacement.
Gathering Necessary Tools
Collect all tools before starting. You will need a filter wrench, bucket, and clean cloth. Gloves protect your hands. Have the new filter cartridge ready. Check your filter model to get the right replacement.
Turning Off Water Supply
Shut off the main water supply to your house. This stops water flow during the filter change. Look for the main valve near your water meter or where the pipe enters your home. Turn it clockwise until fully closed.
Relieving Pressure From The System
Open a faucet on the lowest floor to drain water. This lowers pressure inside the pipes. Press the pressure release button on the filter housing if available. Wait until water stops flowing before opening the filter housing.
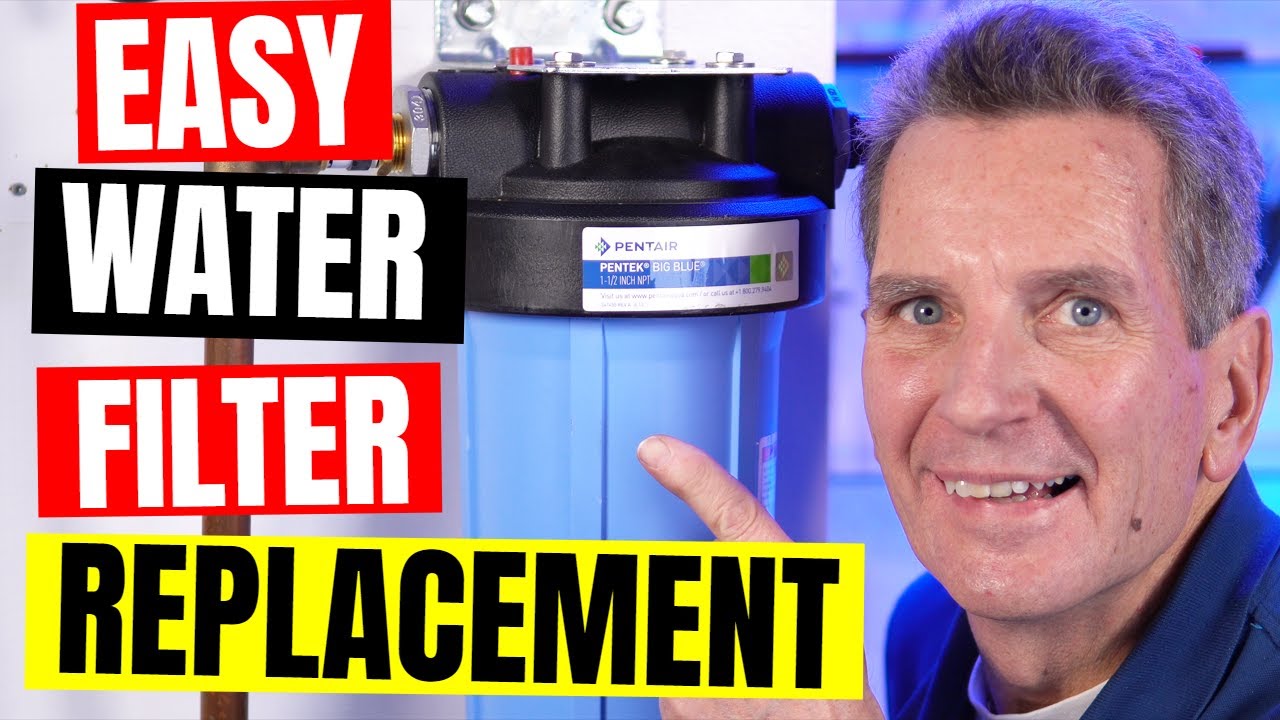
Removing The Old Filter
Removing the old filter is an important step in changing your whole house water filter. It makes sure your water stays clean and fresh. This process is simple if you follow the right steps carefully. Each part needs attention to avoid leaks or damage.
Locating The Filter Housing
Start by finding the filter housing in your home. It is usually near the main water line. Look for a large plastic or metal casing. This housing holds the filter cartridge inside. Sometimes it is in the basement or utility room. Knowing the exact spot helps you work faster and safer.
Opening The Filter Housing
Turn off the water supply before opening the housing. Use a filter wrench or your hands to twist the housing counterclockwise. This may need some force but go slowly. Keep a bucket or towel nearby for any water spills. Once loose, carefully remove the housing without dropping it.
Taking Out The Used Filter
Pull the used filter cartridge straight out from the housing. It might be wet and dirty, so handle it carefully. Check the inside of the housing for any dirt or debris. Clean the housing if needed before placing a new filter. Proper removal prevents damage and helps maintain water quality.
Installing The New Filter
Installing the new whole house water filter is a key step in keeping your water clean. Proper installation ensures the filter works well and lasts long. Follow these simple steps to install the new filter correctly and safely.
Checking The New Filter
First, inspect the new filter carefully. Look for any damage or defects on the filter or its housing. Make sure it matches the size and type of your old filter. Check the filter’s instructions for any special details. Clean your hands before handling the filter to avoid dirt contamination.
Placing The Filter Correctly
Next, place the new filter in the housing the right way. Align the filter according to the arrows or marks on the filter and housing. Do not force it; the filter should fit smoothly. Ensure the filter is seated evenly to avoid leaks. Double-check the position before sealing.
Sealing The Filter Housing
Finally, seal the filter housing tightly. Use your hands or a filter wrench if needed, but avoid over-tightening. Make sure the O-ring or gasket is in place and clean. A good seal stops water from leaking during use. After sealing, turn on the water slowly to check for leaks.
Restarting The System
Restarting the system is the final step after changing your whole house water filter. This process ensures your new filter works correctly and your water supply is safe. Follow each step carefully to avoid problems.
Turning On The Water Supply
Slowly open the main water valve to turn the water supply back on. Do it gently to avoid pressure shocks. Watch the filter housing closely for any unusual sounds or leaks. Let the water flow through the system for a few minutes to fill the new filter.
Checking For Leaks
Inspect all connections around the filter housing. Look for drips or wet spots. Tighten any loose fittings by hand. Avoid using too much force to prevent damage. Leaks can cause water damage and reduce filter efficiency.
Flushing The New Filter
Flush the new filter by running water through it for 5 to 10 minutes. This step removes any loose particles or carbon dust. Use a nearby faucet or outside hose if available. Clear water flow means the filter is ready for use.
Maintenance Tips
Proper maintenance keeps your whole house water filter working well. It helps avoid problems and ensures clean water for your family. Follow simple tips to make your filter last longer and perform better.
Regular Replacement Schedule
Change the filter cartridge on time. Most filters need replacement every 3 to 6 months. Check the user manual for exact timing. Set reminders to avoid forgetting. Old filters can clog and reduce water flow.
Monitoring Water Quality
Watch for changes in taste, smell, or color of water. These signs show the filter may need attention. Test your water regularly with easy kits. Clear water means your filter works well. Cloudy or bad-smelling water means it needs checking.
Troubleshooting Common Issues
Low water pressure often means a clogged filter. Replace the cartridge if pressure drops. Leaks around the filter housing need tightening or new seals. Strange noises may come from air trapped in the system. Flush the filter to fix this. Keep tools and spare parts handy for quick fixes.
Frequently Asked Questions
How Often Should I Change A Whole House Water Filter?
You should change the filter every 3 to 6 months. Frequency depends on water quality and usage. Regular changes ensure clean, safe water and protect your plumbing system.
What Tools Do I Need To Change The Filter?
Basic tools include a filter wrench, bucket, and gloves. Sometimes, you may need a screwdriver. Having these ready makes the process smooth and efficient.
How Do I Turn Off The Water Supply Safely?
Locate the main water shutoff valve before starting. Turn it clockwise to stop water flow. This prevents leaks and water damage during filter replacement.
Can I Change The Filter Without Professional Help?
Yes, many filters are designed for DIY replacement. Follow the manufacturer’s instructions carefully. If unsure, consult a professional to avoid damage or leaks.
Conclusion
Changing a whole house water filter keeps your water clean and safe. It saves money by avoiding plumber visits. The steps are simple and quick to follow. Regular changes help protect your pipes and appliances. Clean water means better health for your family.
Stay consistent with filter changes to enjoy fresh water daily. Taking small steps today prevents big problems tomorrow. Your effort makes a big difference in water quality. Keep your home’s water flowing clear and fresh.
Hasan Al Sarker is a Reverse Osmosis Specialist. He has worked for many years to ensure safe drinking water for all. His research paper has been published in several journals, including Issue, Medium, and Slideshare. He is recognized as a water doctor among specialists though he did not attend medical college.
Besides working as a researcher of reverse osmosis technology, he is also very fancy with the kitchen and cooking. His guides are reading thousands of people every day. As a head of content, he is responsible for all the published articles at RO System Reviews.
Are you worried about fluoride in your drinking water but don’t want to buy an expensive filter? You’re not alone.
Many people want a simple, natural way to remove fluoride without complicated gadgets. What if you could improve your water’s quality using easy methods right at home? You’ll discover practical, effective ways to reduce fluoride in your water—without spending a fortune or relying on filters.
Keep reading, because your health and peace of mind are worth it.
Why Remove Fluoride
Fluoride is a common additive in many water supplies. It helps reduce tooth decay but can cause health worries for some people. Knowing why you might want to remove fluoride from your water is important for making safe choices. This section explains the main reasons to consider fluoride removal.
Health Concerns
Too much fluoride can cause health problems. It may lead to dental fluorosis, which changes the look of teeth. High fluoride levels can also affect bones and joints. Some studies suggest fluoride might impact the thyroid gland and brain health. People with certain health conditions should be cautious about fluoride intake.
Fluoride Sources In Water
Fluoride gets into water naturally from rocks and soil. Many cities add fluoride to water to help dental health. Well water can have high natural fluoride levels. Bottled water may or may not contain fluoride. Knowing the source of fluoride helps decide if removal is needed.
Benefits Of Fluoride Removal
Removing fluoride can improve water taste and safety. It helps protect children and sensitive adults from excess fluoride. Lower fluoride levels can reduce risks of dental and bone issues. Clean water without fluoride suits people who prefer natural water. It also supports overall health and peace of mind.
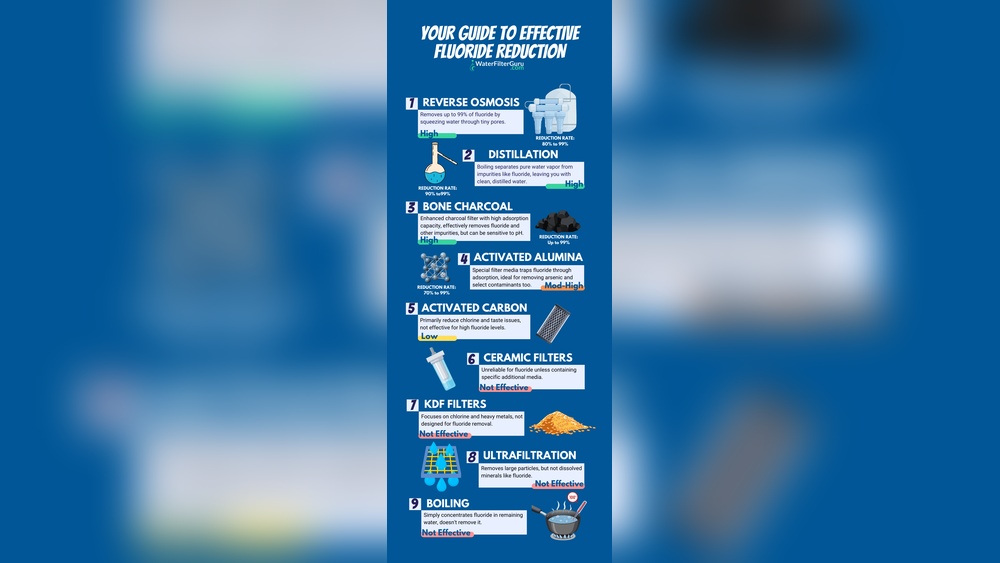
Natural Filtration Techniques
Natural filtration techniques offer simple ways to reduce fluoride in water. These methods use common materials and basic processes. They do not need special filters or machines. People can try them at home with some patience and care.
Boiling And Settling
Boiling water helps remove some impurities but not all fluoride. It can reduce fluoride slightly by evaporation. After boiling, let water sit for several hours. This lets heavy particles settle at the bottom. Carefully pour clear water from the top to avoid disturbing sediment. This method lowers fluoride a little but is not very strong.
Activated Alumina Method
Activated alumina is a natural material with a high surface area. It can absorb fluoride ions from water effectively. To use, soak activated alumina in water for some time. Then, pour water slowly through the alumina. The material traps fluoride while letting clean water pass. This technique needs replacing alumina regularly for best results. It works well without electric filters or chemicals.
Bone Char Filtration
Bone char is made by heating animal bones in low oxygen. It contains carbon and calcium compounds. These can attract and hold fluoride ions from water. You can make a simple bone char filter at home. Pour water slowly through a layer of bone char. The fluoride sticks to the char, and cleaner water comes out. This method is traditional and used in many parts of the world.
Chemical Treatment Options
Chemical treatment options offer ways to remove fluoride from water without using filters. These methods change the water’s chemistry to reduce fluoride levels. The treatments use common substances and simple processes. They suit small-scale or home use. Each method works by causing fluoride to settle or react, making it easier to remove.
Using Lime For Precipitation
Lime, or calcium hydroxide, helps remove fluoride by precipitation. Adding lime raises the water’s pH. This change causes fluoride to form solid particles. These solids settle at the bottom of the container. The clear water on top has less fluoride. This method is cost-effective and uses easy-to-find materials.
Adding Calcium Compounds
Calcium compounds like calcium chloride or calcium nitrate also reduce fluoride. They react with fluoride to form insoluble calcium fluoride. This solid can be separated from the water by settling or filtration. Using calcium compounds is simple and safe for household use. It improves water quality by lowering fluoride levels quickly.
Ph Adjustment Approaches
Changing the water’s pH affects fluoride removal. Fluoride ions react more at higher pH levels. Adding alkaline substances like sodium carbonate raises the pH. This helps fluoride form compounds that settle out. Careful pH control is important to avoid water damage. This method works best combined with other treatments.
Distillation And Evaporation
Removing fluoride from water can be done using distillation and evaporation. These methods rely on natural processes to separate fluoride from water. They do not need special filters. Both techniques use heat to turn water into vapor. The vapor leaves impurities behind, including fluoride. Later, the vapor turns back into clean water. This process works well for small amounts of water at home.
Simple Distillation Setup
Simple distillation uses boiling and condensation. First, boil the water in a pot with a lid. The lid should be tilted to guide steam. Place a clean container to catch the condensed water. The steam rises and hits the cool lid. It turns back into liquid and drips into the container. This water has less fluoride because fluoride stays in the pot. Repeat the process for better results.
Solar Evaporation Method
Solar evaporation uses the sun’s heat to clean water. Pour water in a shallow pan or tray. Cover the pan with a clear plastic sheet. Place a small weight in the center so water drips off. The sun heats the water, and it evaporates. The vapor collects on the plastic and drips into a clean container. This method is slow but uses no energy. It reduces fluoride by leaving it behind in the pan.
Diy Adsorption Materials
Removing fluoride from water can be done using natural materials at home. These materials work by adsorption, a process where fluoride sticks to their surfaces. DIY adsorption materials are affordable and easy to find. They do not need special equipment or filters. Using these materials can improve water quality safely.
Using Charcoal
Charcoal is a common material for adsorbing fluoride. It has many tiny pores that trap fluoride particles. Use activated charcoal for better results. Crush the charcoal into small pieces. Place it in a container and pour water over it. Let the water sit for several hours. The fluoride will stick to the charcoal, cleaning the water.
Rice Husk Ash
Rice husk ash is made by burning rice husks. It contains silica, which helps remove fluoride. Collect rice husks and burn them until they turn to ash. Cool the ash before use. Add the ash to water and stir well. Let it settle, then pour off the clean water. The ash adsorbs fluoride and other impurities.
Clay Minerals
Clay minerals like bentonite and kaolinite can absorb fluoride ions. These clays have a large surface area and charged particles. Mix clay with water to make a slurry. Pour the slurry into the water to be treated. Stir and let it sit for some time. The clay binds with fluoride, reducing its amount in water.
Testing Water At Home
Testing your water at home helps you know if fluoride is present. This step is important before trying to remove fluoride. You can get clear results with simple tools. Testing also saves money and time.
Fluoride Test Kits
Fluoride test kits are easy to use. These kits include test strips or liquid reagents. You dip the strip or add drops to your water sample. Then, wait a few minutes for color change. The kit usually comes with a color chart for comparison.
Buy test kits from online stores or local shops. Choose kits with clear instructions and good reviews. Some kits test fluoride only. Others check for multiple water chemicals.
Interpreting Results
Match the color on the test strip to the chart. Darker colors often mean higher fluoride levels. Light or no color means low or no fluoride. Follow the kit’s guide carefully to avoid mistakes.
Repeat the test two or three times for accuracy. Write down your results and compare over time. If fluoride levels are high, consider methods to reduce it.
Tips For Maintaining Safe Water
Maintaining safe water is important for health. Removing fluoride without a filter takes effort. Simple tips can help keep water clean and safe at home. These steps make a big difference in water quality.
Regular Water Testing
Testing water often shows if fluoride levels are safe. Use easy test kits available online or in stores. Check water quality every few months. Testing helps catch problems before they get worse. Knowing your water’s condition guides the next steps.
Combining Methods
Use more than one way to reduce fluoride. Boiling water can lower some fluoride but not all. Adding natural substances like activated alumina can help. Mixing methods improves results. Try simple home remedies alongside testing for better safety.
Safe Storage Practices
Store water in clean, sealed containers. Keep containers away from sunlight and heat. Clean storage jars regularly to avoid germs. Using safe containers stops new contamination. Proper storage keeps water fresh and healthy.
Frequently Asked Questions
How Can I Remove Fluoride From Water Without A Filter?
You can remove fluoride using methods like boiling, activated alumina, or natural adsorption materials. These options reduce fluoride without needing a traditional water filter.
Does Boiling Water Remove Fluoride Effectively?
Boiling water does not remove fluoride. In fact, it may concentrate fluoride levels as water evaporates. Alternative methods are recommended for fluoride removal.
Can Activated Alumina Remove Fluoride From Water?
Yes, activated alumina is highly effective at adsorbing fluoride. It is commonly used in water treatment to reduce fluoride levels safely.
Are Natural Methods Effective For Fluoride Removal?
Some natural materials like bone char and certain clays can reduce fluoride. However, their effectiveness varies and may require careful application.
Conclusion
Removing fluoride from water without a filter is possible. Simple methods like boiling or using activated alumina help reduce fluoride. Natural options such as bone char or certain clays also work. Keep in mind, no method removes all fluoride completely.
Testing water regularly ensures safer drinking water. Clean water supports better health and well-being. Try these easy steps to improve your water quality today.
Hasan Al Sarker is a Reverse Osmosis Specialist. He has worked for many years to ensure safe drinking water for all. His research paper has been published in several journals, including Issue, Medium, and Slideshare. He is recognized as a water doctor among specialists though he did not attend medical college.
Besides working as a researcher of reverse osmosis technology, he is also very fancy with the kitchen and cooking. His guides are reading thousands of people every day. As a head of content, he is responsible for all the published articles at RO System Reviews.