Are you worried about fluoride in your drinking water? You’re not alone.
Many people want to know if their water filter can actually remove fluoride and keep their water safe. Choosing the right filter can be confusing, but it’s important for your health and peace of mind. You’ll discover which water filters truly remove fluoride and how to pick the best one for your home.
Keep reading to protect your family and enjoy cleaner, healthier water every day.
Fluoride In Drinking Water
Fluoride is a mineral found in many water sources. It helps prevent tooth decay but can cause issues if there is too much. Understanding fluoride in drinking water is important for health and safety.
Sources Of Fluoride
Fluoride comes from natural and man-made sources. It occurs naturally in soil, rocks, and water. Some water supplies add fluoride to protect dental health. Industrial pollution can also increase fluoride levels.
Health Effects Of Fluoride
Small amounts of fluoride help keep teeth strong. Too much fluoride can cause dental fluorosis, which changes tooth appearance. High fluoride levels may harm bones and cause other health problems. Monitoring fluoride intake is key to staying healthy.
Types Of Water Filters
Water filters come in different types. Each type works in its own way to clean water. Some remove chemicals, others remove particles or bad tastes. For fluoride removal, certain filters work better than others. Understanding these types helps you pick the right filter for your needs.
Activated Carbon Filters
Activated carbon filters use charcoal to trap impurities. They remove chlorine and bad odors well. But they do not remove fluoride effectively. These filters improve taste but leave fluoride in water. Good for general use, not for fluoride removal.
Reverse Osmosis Systems
Reverse osmosis systems push water through a fine membrane. This process removes many impurities, including fluoride. These systems are very effective for fluoride removal. They also remove salts, metals, and other chemicals. Often used in homes for clean, safe drinking water.
Distillation Units
Distillation units boil water to create steam. The steam leaves impurities behind, then cools back to water. This method removes fluoride and many other contaminants. It produces very pure water but can be slow. Distilled water may taste flat due to lack of minerals.
Deionizers And Ion Exchange
Deionizers use ion exchange resins to remove minerals from water. They target charged particles like fluoride ions. These systems can reduce fluoride levels but are less common for home use. Often combined with other filters to improve water quality.
Filters That Remove Fluoride
Fluoride is a common chemical found in many water supplies. Some people want to remove it for health or taste reasons. Not all water filters can remove fluoride effectively. Choosing the right filter is important for cleaner water.
Reverse Osmosis Effectiveness
Reverse osmosis (RO) systems use a thin membrane to filter water. This membrane blocks fluoride molecules and other contaminants. RO systems can remove about 85% to 95% of fluoride. They also remove heavy metals and chemicals. Many homes use RO for safe drinking water.
Distillation And Fluoride Removal
Distillation boils water and collects the steam. The steam leaves behind fluoride and other minerals. This method removes nearly all fluoride from water. It also removes bacteria and viruses. Distillation units are easy to use at home. The process is slow but very effective.
Specialized Fluoride Filters
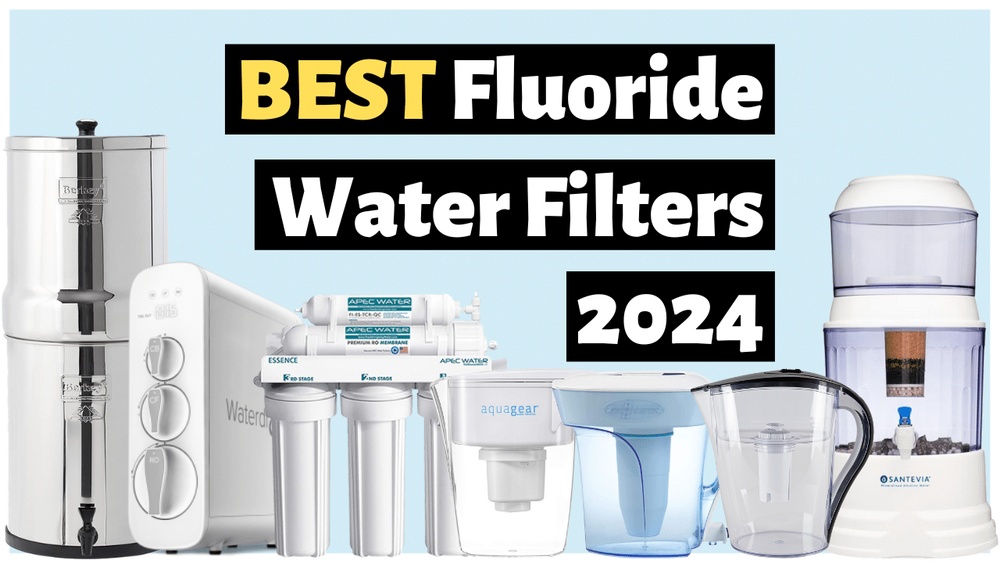
Some filters use activated alumina or bone char to remove fluoride. These materials attract and hold fluoride particles. They can remove up to 90% of fluoride. These filters fit into pitchers or under-sink systems. Check filter specifications to confirm fluoride removal ability.
Choosing The Right Filter
Choosing the right water filter to remove fluoride is important for clean and safe drinking water. Not all filters work the same. Some remove fluoride better than others. Knowing what to check helps you pick the best one for your needs. Consider how well the filter cleans water, the price, and how easy it is to use. This guide will help you make a smart choice.
Filter Efficiency And Certifications
Look for filters that specifically state they remove fluoride. Not all filters do this. Check the efficiency rate. A good filter removes 90% or more fluoride. Certifications from trusted groups show the filter works well. Look for NSF/ANSI Standard 58 or 53 certifications. These prove the filter meets safety and quality rules. Certified filters give more confidence in water safety.
Cost And Maintenance Considerations
Prices vary a lot between filters. Some cost more upfront but last longer. Others are cheaper but need frequent replacement. Factor in the cost of replacement filters. Maintenance is key to keep water clean. Some filters need simple cleaning. Others require changing cartridges regularly. Pick a filter with costs and upkeep you can handle.
Installation And Usage Tips
Some filters are easy to install yourself. Others need a plumber or special tools. Check the installation process before buying. Simple systems fit under the sink or attach to the faucet. Follow manufacturer instructions to use the filter properly. Regularly replace parts to keep fluoride removal effective. Proper use ensures your water stays safe and pure.
Testing Water For Fluoride
Testing water for fluoride is important for health and safety. Fluoride is added to many water supplies. Some people want to know the exact level of fluoride in their water. Testing helps decide if a water filter is needed to remove fluoride.
Water testing shows how much fluoride is in your tap water. It gives clear information about water quality. You can test water at home or use professional services. Both options help you understand your water better.
Home Testing Kits
Home testing kits are easy to use and affordable. They come with clear instructions for testing fluoride levels. You collect a small water sample and add chemicals to it. The color change shows how much fluoride is present. These kits give quick results and help you check water regularly.
Home kits are useful for basic fluoride testing. They may not be as accurate as lab tests. Still, they offer a good starting point for most people.
Professional Testing Services
Professional testing services provide detailed and accurate fluoride analysis. Experts collect water samples and test them in certified labs. They use advanced tools that measure fluoride precisely. These services are best for people who want exact data.
Professional testing can detect even small fluoride amounts. Results come with reports explaining water quality. This helps choose the right water filter to remove fluoride. Professional tests cost more but give trustworthy results.
Frequently Asked Questions
Which Water Filter Effectively Removes Fluoride?
Reverse osmosis filters effectively remove fluoride by pushing water through a semipermeable membrane. Activated alumina filters also reduce fluoride levels. These systems are proven to lower fluoride content, making water safer for consumption.
Can Activated Carbon Filters Remove Fluoride?
Activated carbon filters do not effectively remove fluoride. They mainly target chlorine, odors, and organic compounds. For fluoride removal, specialized filters like reverse osmosis or activated alumina are recommended.
How Does Reverse Osmosis Remove Fluoride?
Reverse osmosis uses a fine membrane to filter out fluoride ions. It forces water through this membrane, leaving fluoride and other contaminants behind. This method typically removes up to 95-99% of fluoride from water.
Are Fluoride Removal Filters Expensive To Maintain?
Fluoride removal filters require periodic maintenance, including membrane or media replacement. Costs vary by filter type and usage but are generally affordable. Proper upkeep ensures consistent fluoride reduction and prolonged filter lifespan.
Conclusion
Choosing the right water filter matters for removing fluoride. Activated alumina and reverse osmosis work well. They help keep your drinking water safe. Testing your water first shows which filter fits best. Clean water supports good health every day. Take action now for better water quality at home.
Hasan Al Sarker is a Reverse Osmosis Specialist. He has worked for many years to ensure safe drinking water for all. His research paper has been published in several journals, including Issue, Medium, and Slideshare. He is recognized as a water doctor among specialists though he did not attend medical college.
Besides working as a researcher of reverse osmosis technology, he is also very fancy with the kitchen and cooking. His guides are reading thousands of people every day. As a head of content, he is responsible for all the published articles at RO System Reviews.
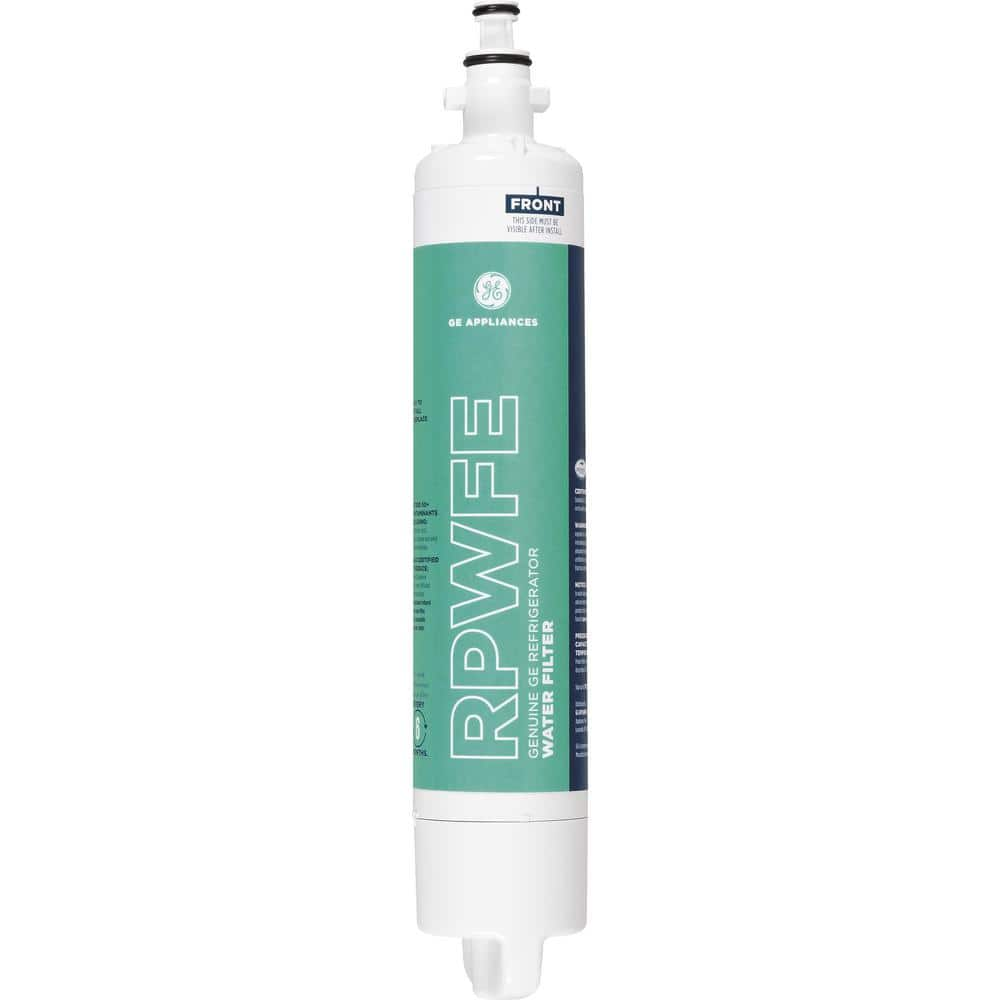
If you want clean, fresh-tasting water from your GE RPWFE refrigerator, knowing how to replace the water filter is key. Ignoring this simple task can lead to cloudy water, bad taste, or even damage to your fridge.
But don’t worry—changing your water filter is easier than you think. In this guide, you’ll get clear, step-by-step instructions that anyone can follow. Stick with me, and you’ll save money, avoid costly repairs, and enjoy crisp water every day. Ready to get started?
Let’s dive in!
Signs You Need To Replace The Filter
Knowing when to replace your GE RPWFE water filter helps keep your water clean and fresh. Old filters can cause problems. Recognizing the signs early protects your health and saves money. Here are key signs that show it is time to change your filter.
Reduced Water Flow
Water flows slower than usual from your dispenser. This happens because the filter clogs with dirt and particles. A clogged filter blocks water. Reduced flow means the filter cannot clean water well.
Change In Water Taste
Your water tastes different or odd. Sometimes it may taste metallic or stale. A filter that is old stops removing bad flavors and smells. Fresh filters keep water tasting clean and pure.
Filter Replacement Indicator
Many GE refrigerators have a light or message to signal filter change. This indicator turns on after months of use. It helps remind you to replace the filter on time. Trust the indicator for best water quality.
Tools And Materials Required
Replacing the GE RPWFE water filter requires a few simple tools and materials. Having these ready makes the process smooth and fast. Prepare everything before you start to avoid interruptions.
New Ge Rpwfe Filter
Get a new GE RPWFE water filter that matches your refrigerator model. Using the correct filter ensures clean and safe drinking water. Check the package for compatibility and expiration date.
Towel Or Cloth
Use a towel or cloth to catch any water drips during the replacement. It helps keep the area dry and prevents slips. A clean cloth also protects your hands from moisture.
Bucket Or Container
Place a small bucket or container under the filter area. This will catch water that spills out when you remove the old filter. It keeps your floor and cabinet dry and clean.
Preparing For Filter Replacement
Preparing to replace your GE RPWFE water filter ensures a smooth and quick process. Taking a few simple steps before starting saves time and avoids frustration. Clear the area around the filter for easy access and keep everything you need close by. Follow these instructions to get ready for the replacement.
Locate The Filter Housing
Find the filter housing in your refrigerator. It usually sits in the upper right corner or inside the fridge compartment. Check your user manual if unsure. Knowing the exact spot helps avoid wasting time searching during the replacement.
Turn Off Water Supply
Stop the water flow to prevent leaks or spills. Locate the water valve behind the fridge or under the sink. Turn it clockwise until it stops. Turning off the water protects your floor and keeps the area dry.
Gather Necessary Tools
Collect tools before starting. Most replacements need no tools, but having a towel, gloves, and a small bucket helps. A towel catches drips, gloves keep hands clean, and a bucket holds the old filter safely. Being prepared makes the task easier and faster.
Removing The Old Filter
Removing the old GE RPWFE water filter is the first step in keeping your water clean. This process is simple and fast. Follow these clear steps to remove the old filter safely and correctly.
Open The Filter Housing
Start by locating the filter housing. It is usually inside the refrigerator or under the sink. Turn the housing counterclockwise to open it. Use a cloth for better grip if the housing is tight. Open slowly to avoid water spills.
Remove The Used Filter
Pull the old filter straight out of the housing. Hold it firmly but gently. Avoid twisting or bending the filter. Check for any leftover water and wipe it with a cloth. Keep the filter upright to prevent spills.
Dispose Of The Old Filter Properly
Do not throw the old filter in the regular trash. Check local recycling programs for water filters. Some stores accept used filters for recycling. Proper disposal helps protect the environment and keeps your home clean.
Installing The New Ge Rpwfe Filter
Installing the new GE RPWFE water filter is a simple process. It ensures clean, fresh water. Follow clear steps to avoid leaks and errors. A properly installed filter works well and lasts longer.
Check Filter Compatibility
Start by confirming the new filter matches your fridge model. Using the correct filter avoids damage and poor water quality. Look for the model number on the filter and compare it with your fridge manual. Only the GE RPWFE filter fits certain GE refrigerators.
Insert The New Filter Correctly
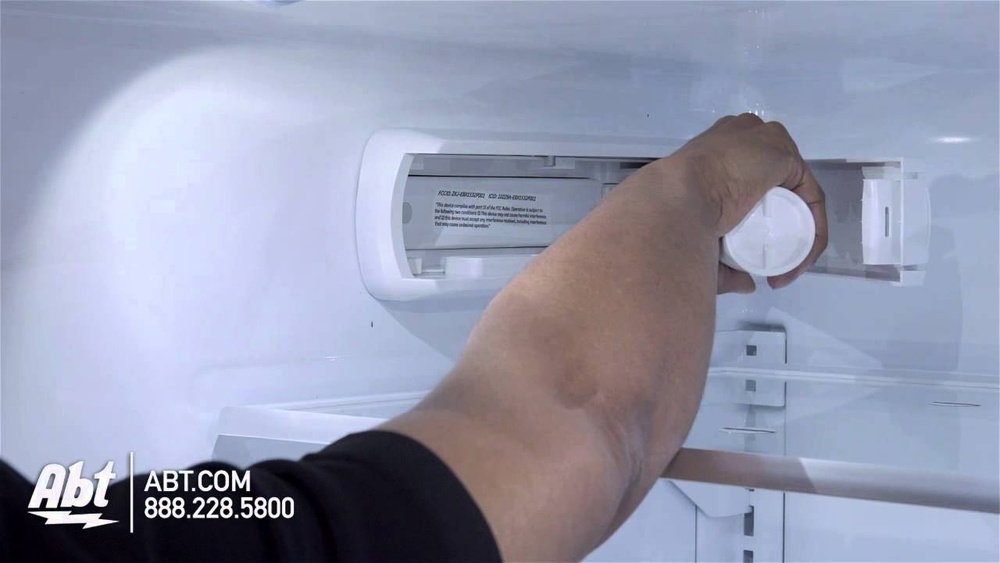
Hold the new filter with the arrows pointing in the right direction. Push it gently into the filter slot until it clicks. Do not force it, as this may cause damage. The filter should fit snugly and align with the housing.
Close The Filter Housing Securely
After inserting the filter, close the housing cover firmly. A tight seal prevents water leaks and keeps the filter in place. Check that the cover snaps shut without gaps or looseness. This step is crucial for the filter to work properly.
Flushing And Testing The New Filter
Flushing and testing the new GE RPWFE water filter is essential. It helps remove air and loose carbon particles. This step ensures clean and fresh water. Follow these simple actions to get the best results from your new filter.
Turn On Water Supply
Start by turning the water supply back on. Open the valve slowly. This avoids sudden pressure that could damage the filter. Wait a few seconds for water to fill the filter. You may hear some noise. This is normal as the filter fills.
Flush The Filter
Flush the new filter by running water through it. Let water flow for about 5 minutes. This removes any carbon dust inside. Use a container to catch the water. It may look dark at first but will clear quickly. Flushing improves taste and water quality.
Check For Leaks And Water Quality
Inspect the filter and connections for leaks. Look closely for drips or moisture. Tighten connections if needed. Next, taste the water. It should be fresh and clean. If water smells or tastes strange, flush longer. Testing ensures your filter works properly.
Maintenance Tips For Longer Filter Life
Maintaining your GE RPWFE water filter well helps it last longer and work better. Simple care steps keep water clean and fresh. Follow these tips to extend the life of your filter and enjoy pure water daily.
Regular Replacement Schedule
Change the filter every six months or as the manual suggests. Timely replacement prevents clogging and keeps water flow steady. Mark your calendar or set a reminder to avoid forgetting.
Keep Area Clean And Dry
Clean the filter area regularly to stop dirt buildup. Wipe the space around the filter with a dry cloth. Moisture can cause mold, so keep the area dry at all times.
Monitor Water Quality
Check the taste and smell of your water often. Any change might mean the filter needs replacing sooner. Clear, fresh water means the filter is working well. Pay attention to your water’s condition daily.
Frequently Asked Questions
How Often Should I Replace The Ge Rpwfe Water Filter?
Replace the GE RPWFE water filter every 6 months or after filtering 300 gallons. This ensures optimal water quality and taste. Regular replacement prevents clogging and maintains efficient filtration performance.
What Tools Do I Need To Replace The Ge Rpwfe Filter?
No special tools are required to replace the GE RPWFE filter. You just need clean hands to twist and remove the old filter. Ensure the water supply is off before starting the replacement process.
How Do I Reset The Filter Indicator After Replacement?
After replacing the GE RPWFE filter, press and hold the reset button on your refrigerator’s control panel. Hold it for 3 seconds until the filter indicator light turns off. This confirms the system recognizes the new filter.
Can I Use A Generic Filter Instead Of Ge Rpwfe?
Using a generic filter is possible but not recommended. Genuine GE RPWFE filters guarantee compatibility, performance, and safety. Non-original filters might reduce water quality or cause damage to your refrigerator.
Conclusion
Replacing the GE RPWFE water filter keeps your water clean and fresh. Changing the filter regularly helps your fridge work well. The process is quick and simple to follow. You save money by doing it yourself at home. Clean water means better taste and health for your family.
Keep track of when to change the filter next time. Small steps like this improve your daily life. Easy, fast, and important—don’t skip it.
Hasan Al Sarker is a Reverse Osmosis Specialist. He has worked for many years to ensure safe drinking water for all. His research paper has been published in several journals, including Issue, Medium, and Slideshare. He is recognized as a water doctor among specialists though he did not attend medical college.
Besides working as a researcher of reverse osmosis technology, he is also very fancy with the kitchen and cooking. His guides are reading thousands of people every day. As a head of content, he is responsible for all the published articles at RO System Reviews.
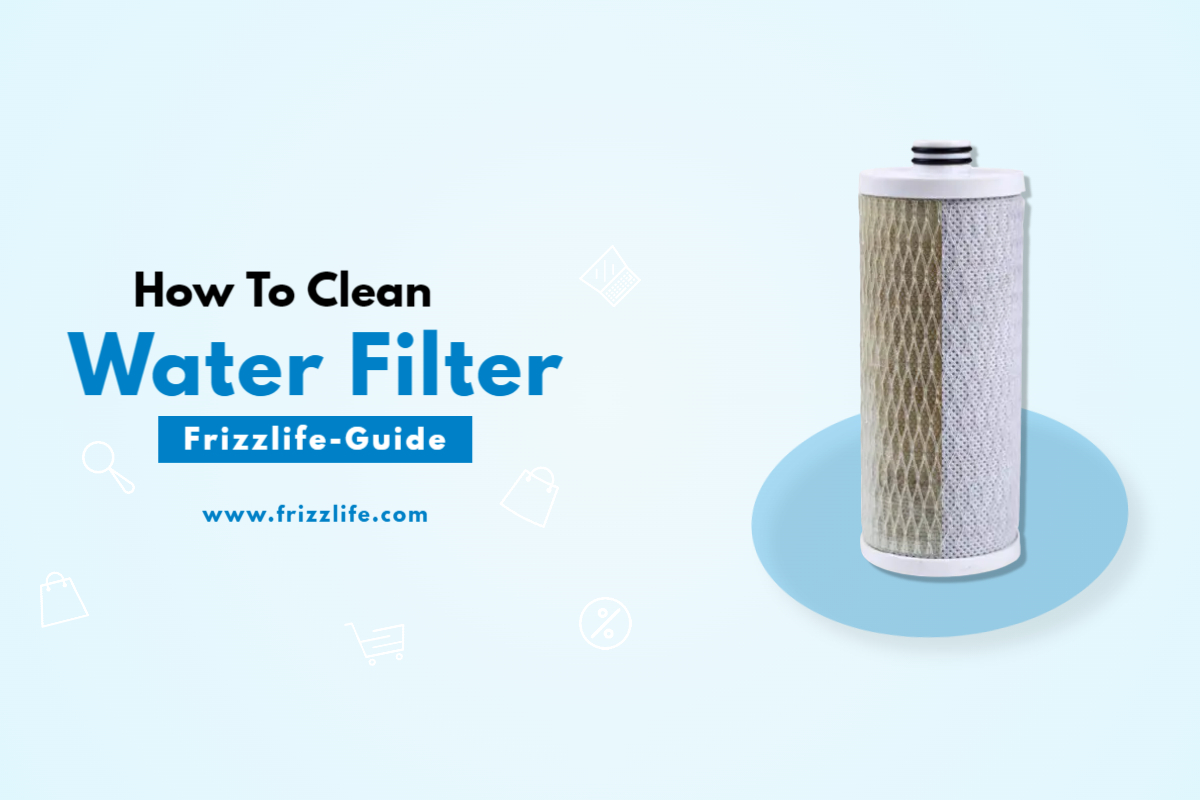
Is your water filter working as well as it should? Over time, filters get clogged with dirt and impurities, making your water taste off and reducing its quality.
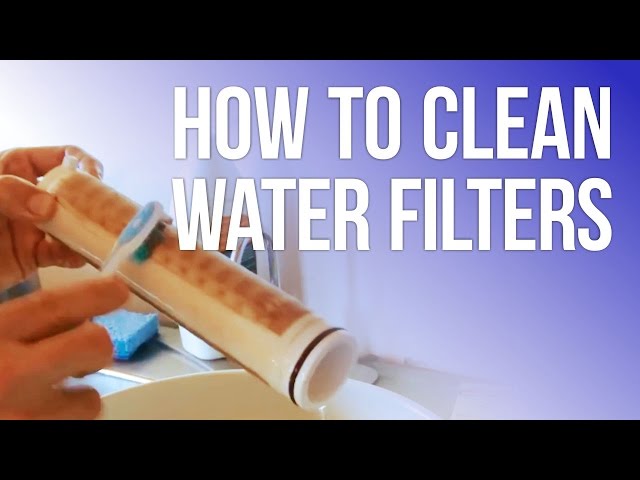
Knowing how to clean your water filter properly can save you money and keep your water fresh and safe to drink. You’ll discover simple, step-by-step methods to clean your filter at home. By the end, you’ll feel confident maintaining your filter and enjoying clear, pure water every day.
Keep reading—you won’t want to miss these easy tips that can make a big difference for your health and wallet!
Types Of Water Filters
Water filters come in many types. Each type works differently to clean your water. Choosing the right filter depends on your needs and space. Understanding these types helps you clean and maintain them properly.
Pitcher Filters
Pitcher filters are simple and easy to use. They sit on your counter and filter water as you pour. These filters remove chlorine, some metals, and bad tastes. Cleaning involves rinsing the pitcher and replacing the filter regularly.
Under-sink Filters
Under-sink filters install below your kitchen sink. They connect directly to your water line. These filters remove more impurities than pitchers. Cleaning requires changing cartridges and wiping the filter housing.
Reverse Osmosis Systems
Reverse osmosis systems use a special membrane to filter water. They remove many contaminants, including chemicals and minerals. These systems need regular filter and membrane replacement. Cleaning the system parts helps keep water pure.
Countertop Filters
Countertop filters sit near your sink but do not connect to pipes. They filter water as you pour or use a tap attachment. These filters need regular cartridge changes and occasional cleaning of the casing.
When To Clean Your Water Filter
Knowing when to clean your water filter is key for safe, fresh water. A dirty filter can slow water flow and reduce quality. Cleaning keeps your filter working well and your water pure. Below are clear signs and tips on timing your cleaning.
Signs Of Filter Clogging
Water flows slower than usual. Taste or smell changes in water. Visible dirt or discoloration on the filter. These signs show the filter needs cleaning. Ignoring them can harm water quality.
Recommended Cleaning Intervals
Most filters need cleaning every 3 to 6 months. Some models have specific schedules in their manuals. Check your filter type and follow its instructions. Regular cleaning prevents buildup and keeps water fresh.
Impact Of Water Quality
Hard water or water with many sediments clogs filters faster. Well water may need more frequent cleaning than city water. Testing your water helps decide how often to clean. Adjust cleaning times based on your water’s condition.
Tools And Materials Needed
Cleaning a water filter needs the right tools and materials. Having these ready makes the process easier and faster. It helps keep your filter working well for a long time.
Gather simple items found at home or in stores. Each tool has a special job during cleaning. Using them correctly keeps the filter safe from damage.
Cleaning Brushes
Use small brushes to reach tight spots inside the filter. Soft bristles work best to avoid scratches. They help remove dirt and buildup gently.
Vinegar And Baking Soda
These natural cleaners break down tough stains and kill germs. Vinegar dissolves mineral deposits, while baking soda scrubs away grime. Together, they clean deeply without harsh chemicals.
Soft Cloths
Soft cloths wipe the filter’s surface after brushing and rinsing. They absorb moisture and remove leftover dirt. Use clean cloths to avoid adding dust or particles.
Replacement Parts
Keep spare parts like seals and cartridges handy. Some parts wear out after cleaning or regular use. Changing old parts keeps your filter working well and safe.
Step-by-step Cleaning Process
Cleaning a water filter is essential to keep water pure and fresh. Follow this simple step-by-step process to clean your filter easily. This helps your filter work better and last longer. Each step is important for a thorough clean.
Disassemble The Filter
Start by turning off the water supply. Remove the filter from its housing carefully. Take apart all removable parts. Place them on a clean surface. Handle the filter elements gently to avoid damage.
Rinse And Soak Components
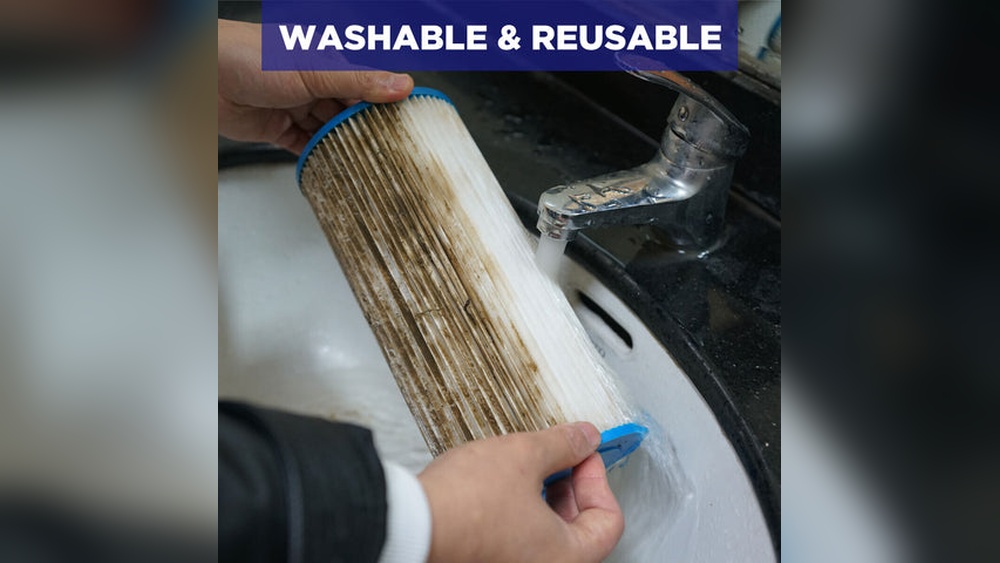
Rinse each part under clean water. Use lukewarm water for better results. Soak the filter elements in a mild cleaning solution. Let them soak for 15 to 30 minutes. This helps break down dirt and buildup.
Scrub Filter Elements
Use a soft brush to scrub the filter parts. Focus on areas with visible dirt or stains. Avoid using harsh brushes that may harm the filter. Rinse thoroughly after scrubbing to remove all debris.
Reassemble And Test
Dry all parts with a clean cloth or air dry. Put the filter back together carefully. Reattach the filter to its housing. Turn on the water supply and check for leaks. Run water through the filter to test its flow and clarity.
Maintenance Tips For Longevity
Keeping your water filter clean and well-maintained helps it last longer. Proper care saves money and ensures clean water every day. Follow these simple tips to keep your filter working at its best.
Regular Inspection
Check your water filter often for dirt and damage. Look for cracks, leaks, or clogged parts. Replace worn parts quickly to avoid bigger problems. A quick look every week can prevent filter failure.
Avoiding Harsh Chemicals
Use gentle cleaners only. Harsh chemicals can damage the filter’s materials. Stick to mild soap and water for cleaning. Harsh cleaners reduce the filter’s lifespan and can cause leaks.
Proper Storage
Store your water filter in a dry, cool place when not in use. Avoid direct sunlight and freezing temperatures. Keep the filter dry to stop mold and bacteria growth. Proper storage keeps the filter ready for use anytime.
Troubleshooting Common Issues
Troubleshooting common issues helps keep your water filter working well. Simple problems can affect water quality and flow. Fixing these early saves time and money. Understanding typical problems makes cleaning easier and more effective.
Persistent Odors
Bad smells come from bacteria build-up inside the filter. Cleaning with a vinegar solution can remove odors. Replace the filter if the smell stays after cleaning. Regular cleaning stops odors from returning quickly.
Reduced Water Flow
Slow water flow means the filter is clogged. Dirt and debris block water from passing through. Rinse the filter under running water to clear blockages. Change the filter if rinsing does not improve flow.
Filter Damage
Cracks or holes in the filter reduce its effectiveness. Inspect the filter carefully for any damage. Replace damaged filters immediately to avoid poor water quality. Handle filters gently during cleaning to prevent damage.
Frequently Asked Questions
How Often Should I Clean My Water Filter?
Clean your water filter every 3 to 6 months. Regular cleaning prevents clogging and ensures clean, fresh water. Frequency depends on usage and water quality.
What Are The Basic Steps To Clean A Water Filter?
First, unplug the filter and remove it. Rinse the filter under cold water. Use a soft brush to remove debris. Avoid soap unless specified by the manufacturer.
Can I Use Vinegar To Clean My Water Filter?
Yes, vinegar is effective for removing scale and bacteria. Soak the filter in diluted vinegar for 30 minutes. Rinse thoroughly afterward to remove vinegar residue.
How Do I Know When To Replace My Water Filter?
Replace the filter if cleaning doesn’t improve water flow or taste. Check manufacturer’s guidelines for lifespan. Usually, filters last 6 to 12 months.
Conclusion
Cleaning your water filter keeps your water fresh and safe to drink. Regular care stops dirt and bacteria from building up. Follow the simple steps to clean your filter well. This saves money and makes your filter last longer. Clean water helps your health and tastes better too.
Keep a routine and enjoy clear, pure water every day. Simple actions make a big difference. Start cleaning your water filter today for a healthier home.
Hasan Al Sarker is a Reverse Osmosis Specialist. He has worked for many years to ensure safe drinking water for all. His research paper has been published in several journals, including Issue, Medium, and Slideshare. He is recognized as a water doctor among specialists though he did not attend medical college.
Besides working as a researcher of reverse osmosis technology, he is also very fancy with the kitchen and cooking. His guides are reading thousands of people every day. As a head of content, he is responsible for all the published articles at RO System Reviews.
If you use a Keurig coffee maker, you know how important clean water is for a great cup of coffee. But how often should you replace your Keurig water filter to keep your coffee tasting fresh and your machine working smoothly?
You might think it’s not a big deal, but skipping this simple step can lead to bad tasting coffee and even damage your machine over time. You’ll discover exactly when and why to change your Keurig water filter, so you can enjoy perfect coffee every time without any hassle.
Keep reading to find out the easy steps to keep your Keurig in top shape!
Why Water Filters Matter
Water filters in your Keurig are important for many reasons. They help keep your coffee tasting fresh. They also protect your machine from damage. Using a clean filter makes a big difference every day. Here is why water filters matter.
Impact On Coffee Taste
Water quality changes the flavor of your coffee. A dirty filter lets minerals and chemicals pass through. These elements can make coffee taste bitter or odd. Clean filters remove impurities. This keeps your coffee smooth and rich. Fresh water means better coffee every single cup.
Extending Machine Lifespan
Minerals build up inside your Keurig without a filter. This buildup clogs parts and causes problems. A water filter traps these minerals before they enter the machine. Less buildup means fewer repairs and longer machine life. Replacing filters regularly helps your Keurig stay healthy.
Signs To Replace Your Filter
Knowing when to replace your Keurig water filter is important for great coffee. The filter keeps water clean and fresh. Over time, it gets clogged and less effective. Watch for clear signs that show it’s time for a new filter. These signs help keep your coffee tasting good and your machine working well.
Decreased Water Flow
Water flows slower than usual during brewing. The coffee takes longer to brew. This happens because the filter is clogged with minerals and dirt. A slow water flow means the filter needs replacing. Changing it improves water speed and coffee quality.
Off Flavors In Coffee
Coffee tastes different or strange. It may taste bitter or flat. Old filters cannot remove impurities well. These impurities affect the coffee’s flavor. A fresh filter keeps your coffee tasting clean and rich. Replace the filter to avoid bad flavors.
Filter Indicator Alerts
Your Keurig machine has a filter indicator light. It turns on when the filter needs changing. This alert helps you keep track easily. Do not ignore this light. Replace the filter as soon as you see the alert. It keeps your machine running smoothly.
Recommended Replacement Frequency
Knowing how often to replace your Keurig water filter is key. The right timing keeps your coffee tasting fresh. It also protects your machine from buildup. Several factors affect when to change the filter. Understanding these helps maintain your Keurig’s performance.
Manufacturer Guidelines
Keurig suggests changing the filter every two months. This is about every 60 days or 40 tank refills. The filter box usually includes this advice. Following these instructions keeps your machine safe. It ensures good water quality for each brew.
Based On Water Quality
The quality of your tap water matters. Hard water with minerals clogs filters faster. If your water has many minerals, replace the filter more often. Softer water lets the filter last longer. Test your water or ask your local water company. This helps decide the best replacement schedule.
Usage Patterns
The number of brews you make affects filter life. More coffee means the filter works harder. If you brew several cups daily, change the filter every month. For occasional use, two months may be enough. Track your coffee habits to pick the right time.
How To Change Your Keurig Filter
Changing your Keurig water filter is simple. This keeps your coffee tasting fresh and clean. Follow these steps to swap the old filter for a new one.
Removing The Old Filter
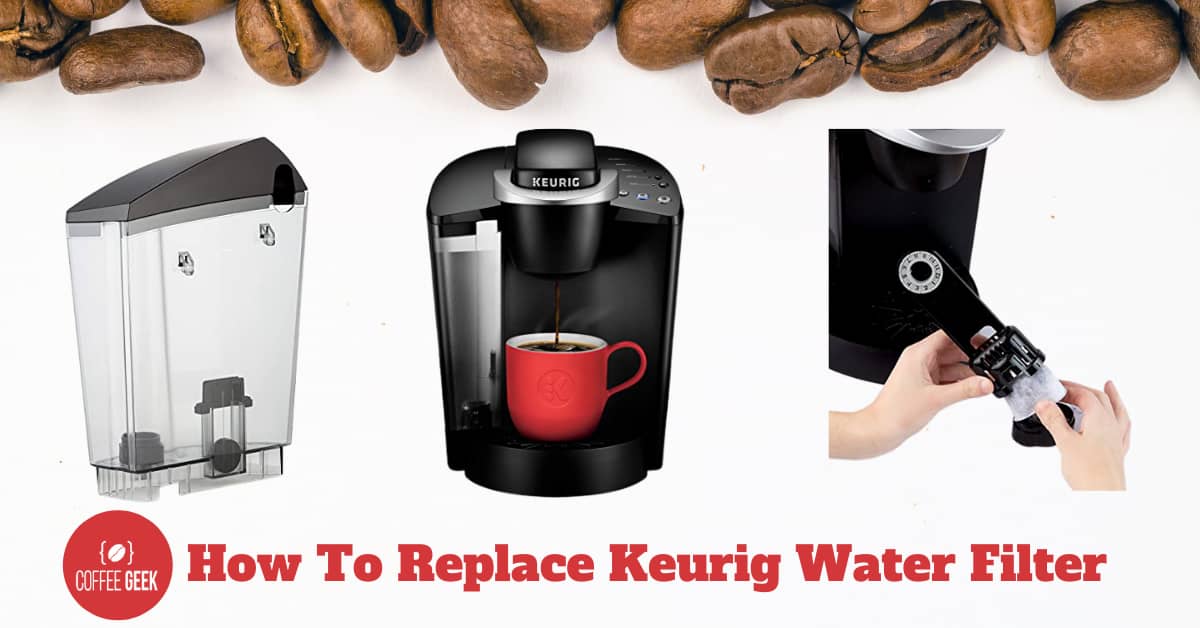
First, lift the handle on the water reservoir. Remove the reservoir from the machine. Take out the old water filter from the reservoir. Dispose of the old filter properly. Clean the reservoir if needed before adding the new filter.
Preparing The New Filter
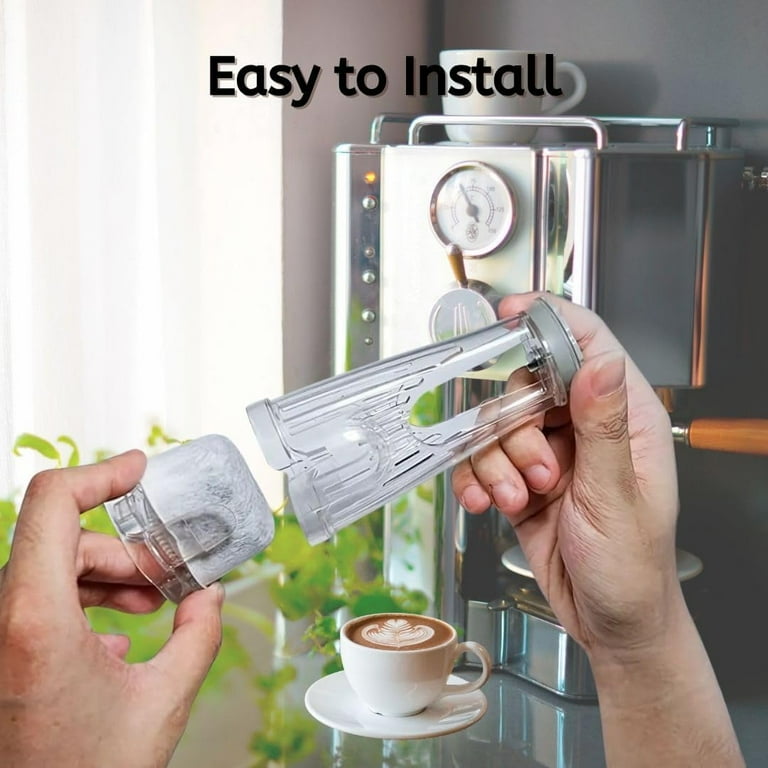
Take the new filter out of its package. Rinse it under cold water for about 15 seconds. Soak the filter in fresh water for five minutes. This removes loose carbon dust. Shake off any excess water gently.
Installing The New Filter
Place the new filter into the filter holder. Make sure it fits snugly and securely. Put the filter holder back into the water reservoir. Reattach the reservoir to the Keurig machine. Press down the handle to lock it in place.
Maintaining Your Keurig Machine
Maintaining your Keurig machine is key to getting fresh coffee every time. Regular care keeps the machine working well and extends its life. Simple steps can prevent buildup and keep water flowing freely. Clean parts and timely replacements matter for the best taste.
Regular Cleaning Tips
Clean the drip tray and K-cup holder often. Wipe the machine’s outside with a damp cloth. Remove and wash the water reservoir every week. Use warm, soapy water and rinse well. Run a brew cycle with just water to flush the system. This removes coffee residue and oils that build up inside.
Descaling Schedule
Descale your Keurig every three to six months. This removes mineral deposits that clog the machine. Use a descaling solution or white vinegar. Fill the water reservoir with the solution. Run several brew cycles without a K-cup. Then run clean water cycles to rinse. This helps keep the heating element clean and the coffee tasting fresh.
Common Mistakes To Avoid
Knowing how to properly care for your Keurig water filter can save you time and money. Many users make avoidable errors that reduce the filter’s effectiveness. Being aware of these mistakes helps keep your coffee tasting fresh and your machine working well.
Ignoring Filter Replacement
Many people forget to change the filter on time. This leads to bad taste and poor water quality. Old filters collect dirt and minerals. They stop cleaning water properly. Replace the filter every two months or after 60 tank refills. This keeps your coffee fresh and your machine safe.
Using Non-compatible Filters
Some try cheap or wrong filters to save money. These may not fit or work well. Using non-compatible filters can damage your Keurig. It also may not filter water correctly. Always buy filters made for your Keurig model. This protects your machine and ensures good water quality.
Frequently Asked Questions
How Often Should I Replace My Keurig Water Filter?
You should replace your Keurig water filter every 2 months or after brewing 60 tanks. This ensures optimal taste and machine performance. Regular replacement prevents mineral buildup and keeps your coffee fresh and clean.
What Happens If I Don’t Replace The Keurig Filter?
Not replacing the filter can cause mineral buildup inside the machine. This affects water flow, damages parts, and worsens coffee taste. The filter helps remove impurities, so skipping replacement reduces your Keurig’s lifespan and coffee quality.
Can I Use The Keurig Without A Water Filter?
Yes, you can use Keurig without a water filter, but it’s not recommended. Without a filter, minerals and impurities may damage the machine and affect coffee taste. Using filtered water enhances flavor and extends your Keurig’s life.
How Do I Know When To Change The Keurig Filter?
Keurig recommends changing the water filter every 2 months or after 60 uses. Some models have indicator lights to notify you. If your coffee tastes off or brewing slows, it might be time to replace the filter.
Conclusion
Replacing your Keurig water filter regularly keeps your coffee fresh and tasty. Change it every two months or after 60 tank refills. Clean water helps your machine work well and lasts longer. Don’t wait for problems to start. Stay on schedule for the best coffee experience.
Simple steps protect your machine and improve flavor. Keep your filter fresh and enjoy every cup. It’s easy and worth the effort.
Hasan Al Sarker is a Reverse Osmosis Specialist. He has worked for many years to ensure safe drinking water for all. His research paper has been published in several journals, including Issue, Medium, and Slideshare. He is recognized as a water doctor among specialists though he did not attend medical college.
Besides working as a researcher of reverse osmosis technology, he is also very fancy with the kitchen and cooking. His guides are reading thousands of people every day. As a head of content, he is responsible for all the published articles at RO System Reviews.
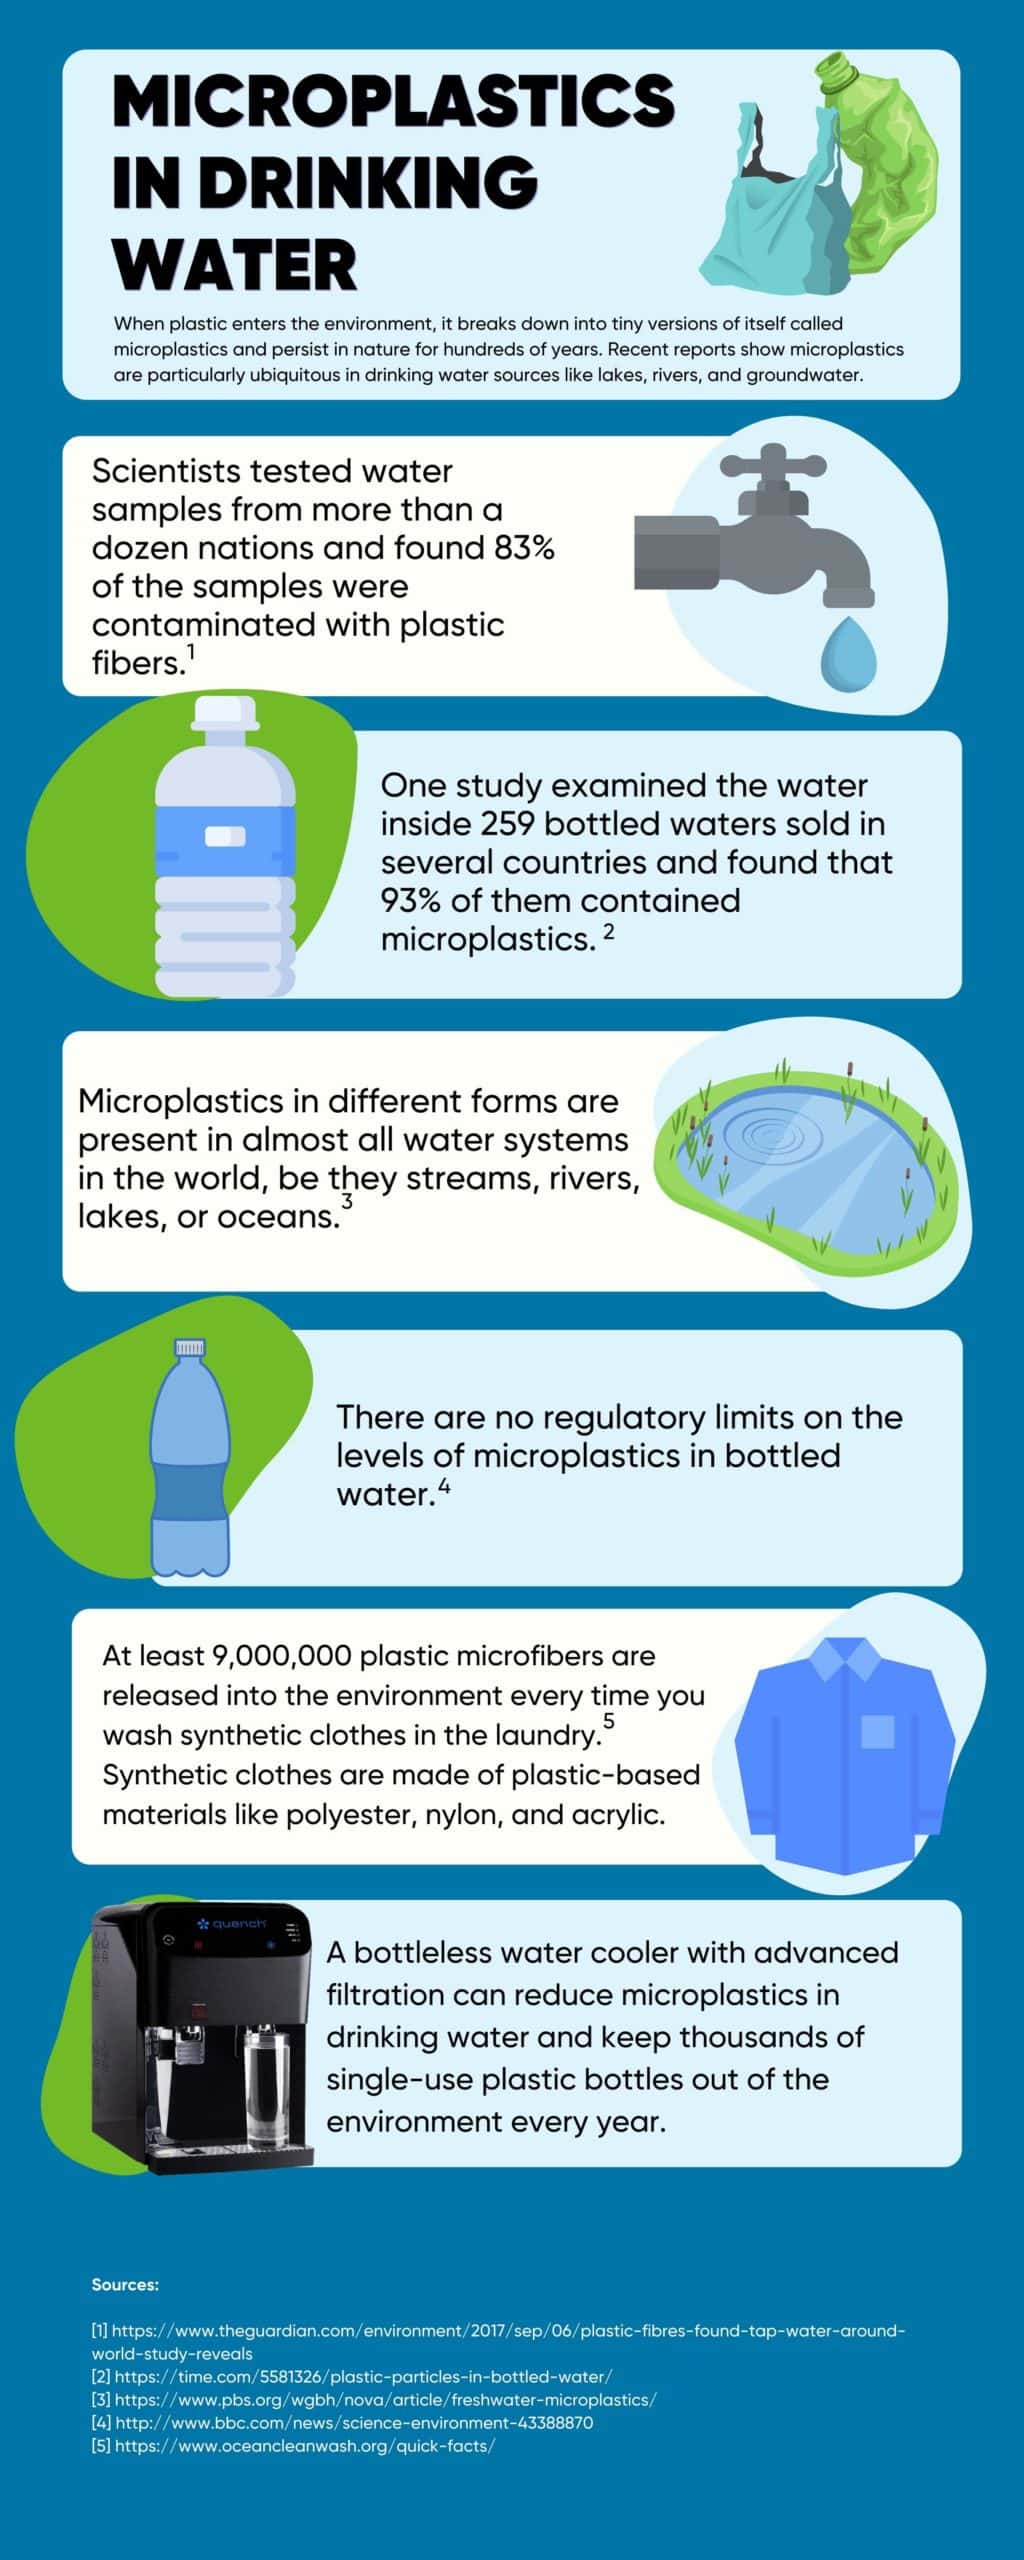
Have you ever wondered what’s really inside that bottle of water you drink every day? Microplastics—tiny plastic particles—are often hiding in bottled water, and they can affect your health in ways you might not expect.
But here’s the good news: you don’t have to feel powerless. You can take simple, effective steps to filter out these unwanted particles and protect yourself. Keep reading, and you’ll discover easy methods that fit right into your daily routine.
Your body will thank you.
Sources Of Microplastics In Bottled Water
Microplastics in bottled water come from several sources. Understanding these sources helps to reduce contamination. Bottled water is not always pure. Tiny plastic particles can enter during production, packaging, or transport. These particles are often invisible but can affect water quality and health.
Common Contaminants In Bottled Water
Besides microplastics, bottled water may contain other contaminants. These include chemicals from plastic bottles, dirt, and tiny fibers. Microplastics are small pieces of plastic less than 5 millimeters. They come from broken-down larger plastics or synthetic materials. These tiny pieces can mix with water during bottling or storage.
How Microplastics Enter Bottled Water
Microplastics enter bottled water in many ways. Plastic bottles can release particles over time. The bottling machines and pipes may shed small plastic bits. Airborne microplastics can settle inside open bottles during filling. Transport and handling can also cause plastic particles to fall into bottles. These sources make it hard to keep bottled water fully free of microplastics.
Health Risks Linked To Microplastics
Microplastics are tiny plastic particles found in many bottled water brands. These small particles can enter the human body through drinking water. Scientists are concerned about the health risks linked to microplastics. Understanding these risks helps us take better care of our health.
Microplastics can carry harmful chemicals and bacteria. They may cause inflammation and other health problems. Many people want to know how these particles affect the body over time.
Potential Impact On Human Health
Microplastics can enter the digestive system through drinking water. Once inside, they may cause irritation or damage to cells. Some studies suggest microplastics might affect the immune system. They may also cause stress in body tissues. Long-term effects are still not fully understood. Scientists worry about the build-up of microplastics in organs. This build-up could lead to chronic health issues.
Scientific Findings On Microplastic Exposure
Research shows microplastics are present in many bottled water samples. Studies report microplastics in human stool, proving ingestion occurs. Laboratory tests reveal microplastics can cross cell barriers. Animal studies link microplastic exposure to inflammation and toxicity. Scientists continue to study how microplastics affect human health. Early results suggest caution and more research are needed.
Choosing Bottled Water To Minimize Microplastics
Choosing bottled water carefully can reduce microplastic intake. Not all bottled water has the same amount of microplastics. Some brands test their water more thoroughly. Others use different packaging materials. Knowing these differences helps pick safer options.
Brands With Lower Microplastic Levels
Certain brands show fewer microplastics in tests. These companies often use advanced filtration methods. They may source water from cleaner springs or wells. Independent lab results can reveal which brands are cleaner. Choosing those can lower microplastic exposure.
Reading Labels And Packaging
Labels hold clues about water quality and source. Look for mentions of filtration or purification processes. Glass bottles usually release fewer microplastics than plastic ones. Avoid bottles with recycled plastic, as they might shed particles. Clear labels help make better choices.
Diy Filtration Methods
Filtering microplastics from bottled water at home is possible with simple tools. DIY filtration methods help reduce tiny plastic particles. These methods use everyday materials and easy steps. They work best for improving water quality before drinking. Below are three common DIY ways to filter microplastics.
Using Activated Carbon Filters
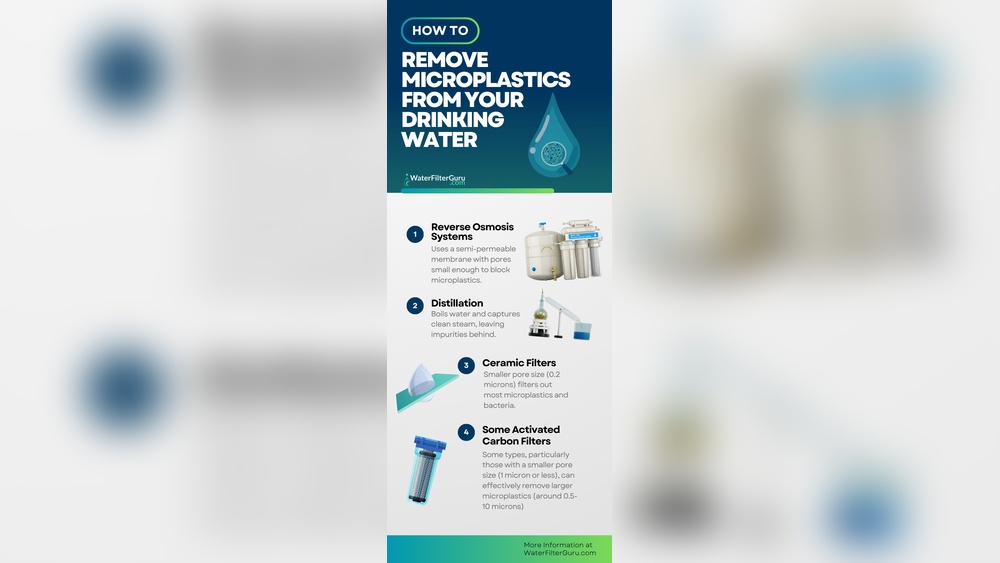
Activated carbon filters trap small particles and chemicals. They have tiny pores that catch microplastics. You can buy activated carbon filter cartridges or make your own. Fill a clean container with activated carbon granules. Pour bottled water slowly through the carbon layer. The filter removes some microplastics and improves taste. Replace carbon regularly for better results.
Employing Ceramic Filters
Ceramic filters have very small holes that block microplastics. They are made from natural clay and fired at high heat. You can find ceramic filter candles or discs online or in stores. Water passes through the ceramic layer slowly. Particles larger than the pores, like microplastics, stay trapped. Clean the ceramic surface often to keep flow steady. These filters also reduce bacteria and sediments.
Other Household Filtering Techniques
Simple household items can help reduce microplastics in water. Use a clean cloth or coffee filter to strain bigger particles first. Layer sand and fine gravel in a bottle to create a basic filter. Pour bottled water slowly through this setup. It traps some plastic bits and dirt. Boiling water after filtering can kill germs but does not remove plastics. Combining methods improves water safety.
Advanced Filtration Technologies
Advanced filtration technologies play a key role in removing microplastics from bottled water. These methods use fine filters to capture tiny plastic particles. They improve water quality and safety effectively. Understanding these technologies helps choose the right water purifier.
Ultrafiltration And Nanofiltration
Ultrafiltration uses membranes with very small pores. These pores block microplastics and other contaminants. Water passes through, leaving impurities behind. Nanofiltration works similarly but with even smaller pores. It removes particles as small as 0.001 microns. Both methods keep minerals while filtering out harmful substances. They provide cleaner and safer drinking water.
Reverse Osmosis Systems
Reverse osmosis forces water through a semi-permeable membrane. This membrane blocks microplastics and many other pollutants. It removes particles down to 0.0001 microns. The process also reduces chemicals, salts, and bacteria. Reverse osmosis delivers very pure water. It is one of the most effective ways to filter bottled water.
Testing Water For Microplastics At Home
Testing water for microplastics at home gives you control over your health. You can check bottled water for tiny plastic particles without special tools. This process helps you understand water quality and make safer choices. Simple methods exist for anyone to try. They do not need lab skills or expensive equipment.
Simple Diy Testing Kits
DIY testing kits for microplastics are easy to use. These kits often include filters and magnifying tools. First, pour the bottled water through a fine filter. The filter catches small plastic bits. Then, use the magnifier to look closely at the filter. Some kits have color indicators that show plastic presence. Follow the kit instructions step by step. Tests usually take less than an hour.
Interpreting Test Results
Reading test results is straightforward. If you see small fibers or particles on the filter, microplastics are present. Clear or colorless specks may also be microplastics. Some kits provide a guide to identify plastic shapes and colors. The amount of microplastics shows water cleanliness. High levels mean more contamination. Low or no particles mean safer water. Keep notes for future comparison. This helps track water quality over time.
Reducing Microplastic Exposure Beyond Bottled Water
Microplastics appear in many parts of daily life, not just bottled water. Reducing exposure requires a broader approach. Simple changes help lower contact with tiny plastic particles.
Focusing on water alone is not enough. Other sources like food, air, and household items also add microplastics. Understanding alternatives and lifestyle changes makes a big difference.
Alternatives To Bottled Water
Choose tap water when safe and clean. Use water filters designed to remove microplastics. Glass or stainless steel bottles reduce plastic waste. These options help cut down plastic use.
Refilling bottles reduces demand for single-use plastics. Public water fountains and refill stations offer safe water. These choices lower plastic pollution and microplastic intake.
Lifestyle Changes To Minimize Plastic Use
Use reusable bags, containers, and utensils. Avoid products with excessive plastic packaging. Choose natural fibers over synthetic clothes. These steps reduce microplastic shedding.
Recycle properly to keep plastics out of oceans and landfills. Support local efforts to reduce plastic waste. Small daily habits create a cleaner environment and lower microplastic pollution.
Frequently Asked Questions
What Are The Common Methods To Filter Microplastics?
Common methods include activated carbon filters, reverse osmosis, and nanofiltration. These effectively remove tiny plastic particles from bottled water, improving safety and taste.
How Effective Is Reverse Osmosis Against Microplastics?
Reverse osmosis removes up to 99% of microplastics by filtering particles smaller than 0. 001 microns. It’s one of the most reliable purification methods for bottled water.
Can Activated Carbon Filters Remove Microplastics?
Activated carbon filters mainly remove chlorine and odors but can reduce some microplastics. However, their efficiency is lower than reverse osmosis or nanofiltration.
Are There Diy Ways To Filter Microplastics At Home?
Yes, using portable water filters with nanofiltration or reverse osmosis membranes can help. Regular carbon filters alone are less effective against microplastics.
Conclusion
Filtering microplastics from bottled water protects your health. Small particles can harm your body over time. Using simple filters helps remove these tiny plastics. Choose filters designed to catch very small debris. Clean water tastes better and feels safer to drink.
Stay aware of what is in your water. Taking action is easy and important. Keep your water pure with the right steps. Your health deserves clean, plastic-free water daily.
Hasan Al Sarker is a Reverse Osmosis Specialist. He has worked for many years to ensure safe drinking water for all. His research paper has been published in several journals, including Issue, Medium, and Slideshare. He is recognized as a water doctor among specialists though he did not attend medical college.
Besides working as a researcher of reverse osmosis technology, he is also very fancy with the kitchen and cooking. His guides are reading thousands of people every day. As a head of content, he is responsible for all the published articles at RO System Reviews.